In Windows 10, there are a number of ways to set your IP address to a static value for network diagnostics or if you need to form a network with another device without a DHCP server, via an Ethernet crossover cable. Starting in Windows 10 version 1903 you can set a static IP address for a network connection right in the Settings app.
Advertisеment
An Internet Protocol address is a sequence of numbers (and letters in case of IPv6) for each network adapter installed in your device. It allows network devices to find and communicate with each other. Without every device in a network having its own unique IP address, it will not be able to establish a network at all.
Windows 10 supports two types of IP addresses.
A dynamic IP address is assigned by the DHCP server. Usually it is your router, but it can be a dedicated Linux PC or a computer running Windows Server.
A static IP address is usually specified manually by the user. Such configuration is traditionally used in small networks, where the DHCP server is not available and often is not required.
In Windows 10, there are a number of ways set a static IP address. You can use either the classic Control Panel (Adapter Properties), Netsh in the command prompt, or PowerShell. These methods are reviewed in detail in a previous article. Starting with build 18334, Windows 10 allows setting a static IP address in the Settings app. Let's see how it can be done.
To Set Static IP Address in Windows 10 in Settings,
- Open the Settings app.
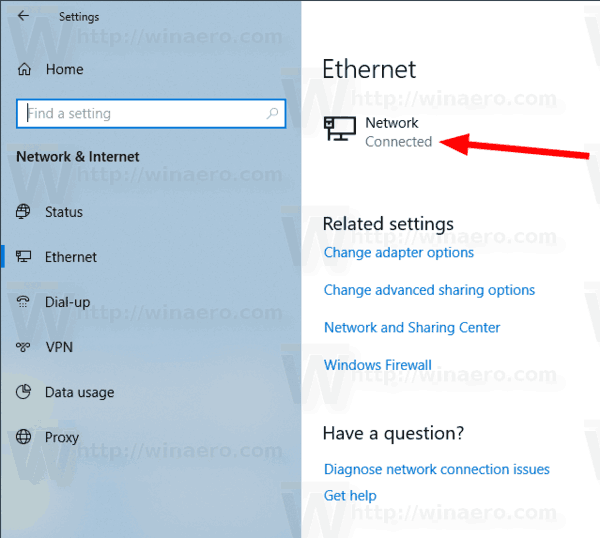
- Click on Network & Internet.
- On the left, click on Ethernet if you are using a wired connection. Click on WiFi if you are using a wireless connection.
- On the right, click the network name associated with your current connection.
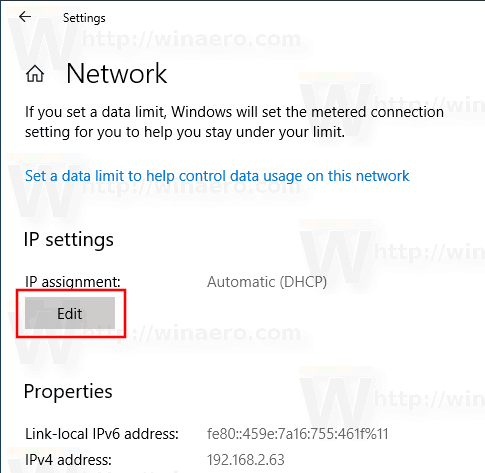
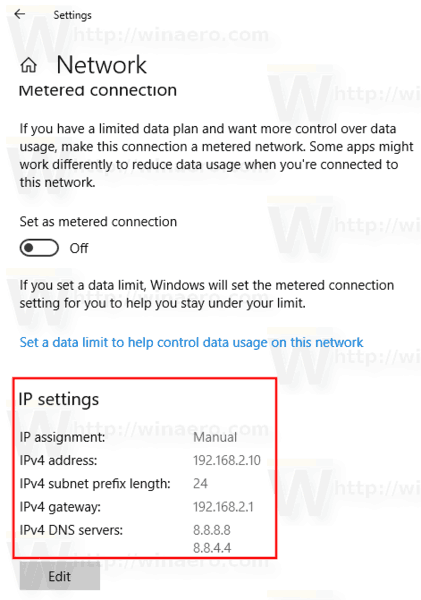
- Scroll down to the IP settings section to review your current IP address and other parameters. Click on the Edit button to change them.
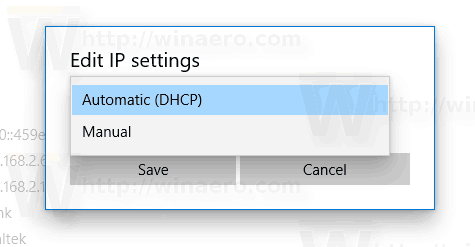
- In the next dialog, select Manual from the drop down list.
- Turn on the toggle switch option for the IP protocol version. Probably, you will start with IPv4.
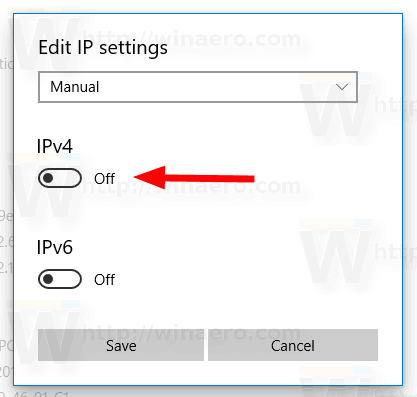
- Fill in the IP address field. Enter the desired static IP address, for example, 192.168.2.10.
- In the Subnet prefix length text box, enter the subnet mask length. Do not enter the subnet mask. So, instead of 255.255.255.0, you need to enter 24.
- Enter your default gateway address if you use it in the Gateway field.
- Enter your Preferred DNS and Alternate DNS values. I will use Google's public DNS servers, 8.8.8.8 and 8.8.4.4.
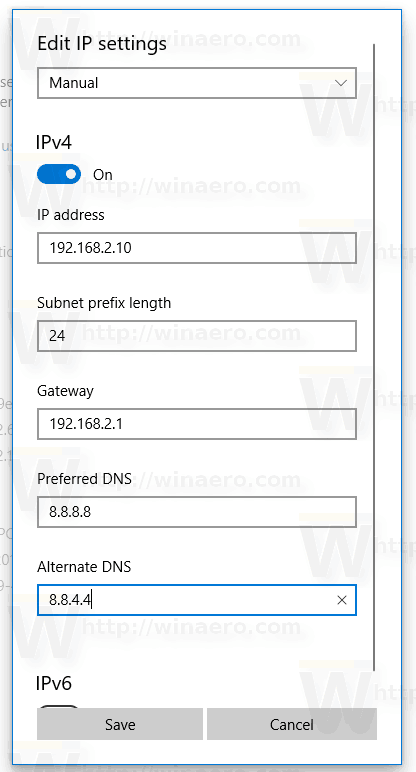
- Repeat the same for IPv6 if required.
- Click on the Save button.
You are done.
You might be interested in reading the article
How to see your IP address in Windows 10
That's it.
Support us
Winaero greatly relies on your support. You can help the site keep bringing you interesting and useful content and software by using these options:

Remember those times when you could right click on network icon in taskbar, click properties and be two clicks away from all network options?