File History allows you to create a backup of the important data stored in your Documents, Pictures, Music, Videos and Desktop folders. Today we will see how to restore your files and folders backed up by File History in Windows 10.
Advertisеment
Windows 10 comes with a built-in backup system called "File History". It allows the user to create a backup copy of files stored on your PC. It will prevent data loss in case something goes wrong. There are a number of use cases for this feature. For example, it can help you to transfer your files from an old PC to a new one. Or you can use it to backup your files to an external removable drive. The File History feature was first introduced in Windows 8, and has been improved in Windows 10. It allows browsing and restoring different versions of files.
File History requires using the NTFS file system. File History relies on the journal feature of NTFS to track file changes. If the journal contains records about changes, File History includes the updated files in the archive automatically. This operation is very fast.
File History automatically creates backup versions of your data on a schedule to a drive you select to save to.
To restore Files from File History in Windows 10, do the following.
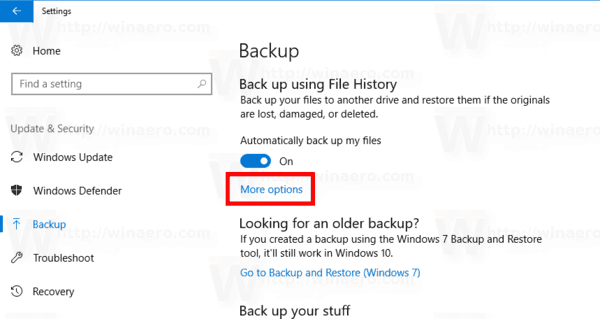
- Open the Settings app.

- Go to Update & Security -> Backup.
- Click on the link More options on the right.
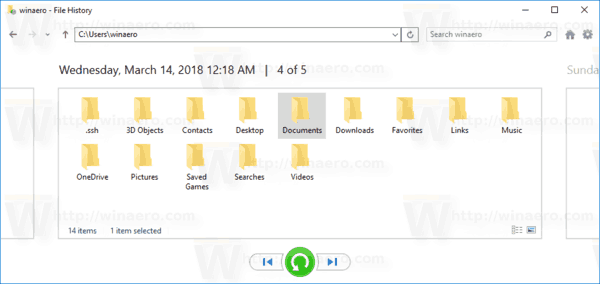
- On the next page, scroll down and click on the link Restore files from a current backup.
- In the next window, select the desired folder to restore, e.g. Documents, or double click it to see the files stored in it.
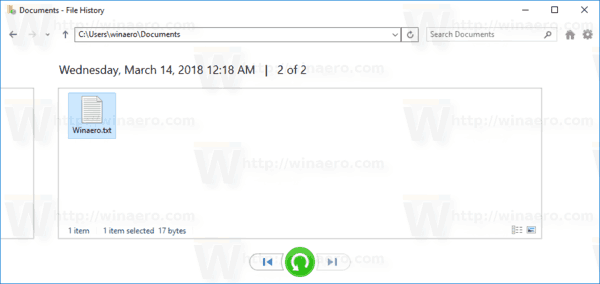
- Select a file or a folder you want to restore and click on the green button to restore it.
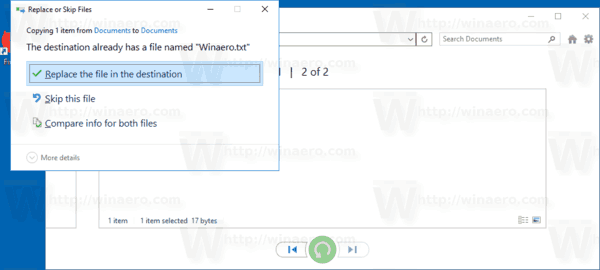
You are done. You might be prompted to overwrite the current version of your file or folder. To avoid a file version conflict, you might want to restore a previous version of your file or folder to some alternative location. Right-click the green button and choose "Restore to..." from the context menu.
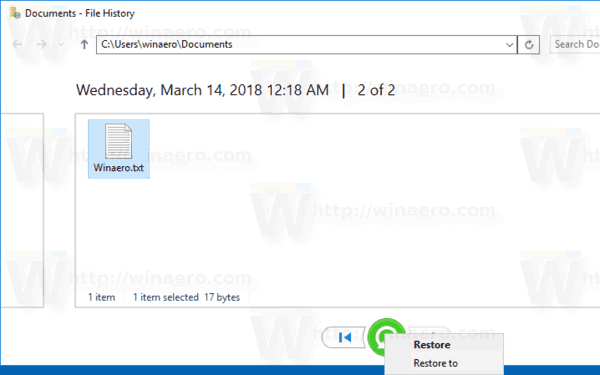
This will allow choosing an alternative folder for the file.
Tip: You can save your time and launch the File History tool directly from the Ribbon. Navigate to the folder which stores the current version of your data and click Home - History on the Ribbon. 
This will open File History in this folder.
If you are often using File History, you can add it to the Quick Access toolbar or to the right-click menu.
Related articles:
- How to Enable File History in Windows 10
- Change Drive for File History in Windows 10
- Change How Long to Keep File History in Windows 10
- Delete Older Versions of File History in Windows 10
- How to Reset File History in Windows 10
- Change How Often to Save File History in Windows 10
That's it.
Support us
Winaero greatly relies on your support. You can help the site keep bringing you interesting and useful content and software by using these options:
