This guide reviews different ways to remove the drive letter in Windows 11. By default, the operating system assigns a letter to all data partitions, drives and volumes, exposing them in File Explorer. You can change this by using a variety of methods. Once done, you can use the unassigned driver letter(s) to set for any other volume, drive, or partition.
Advertisеment
When your computer detects a new internal or external drive, Windows will automatically mount it and assign a drive letter by default. A drive letter is a single alphabetic character assigned by Windows to a physical drive or drive partition connected to the computer for reference. It is typically picked from the D to Z range, with the system drive set as C:. The A and B drive letters are historically used for floppy diskettes, so the OS avoid assigning them for general purpose partitions (but doesn't actually prevent you from that).
When needed, you can remove the drive letter assigned to a drive, partition, or volume. Say, you want to re-arrange the drive listing, or hide some partitions. After that, the corresponding drive, partition, or volume will no longer be visible in the File Explorer > This PC folder. Unassigned drive letters can be reassigned to new drives, partitions, or volumes.
Remove Drive Letter in Windows 11
The easiest way to remove a drive letter is the Settings app.
Remove Drive Letter in the Settings app
- Press Win + I to open the Settings app.
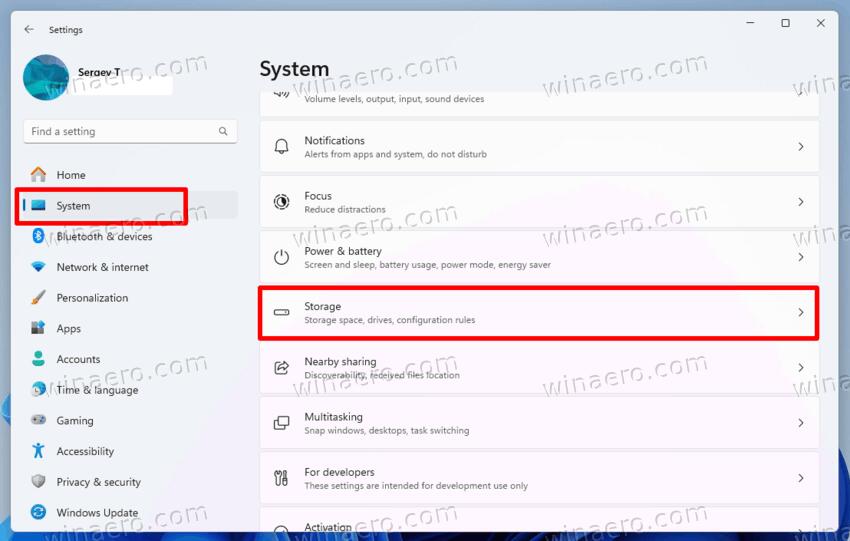
- Click System on the left, and then select Storage on the right. 💡Type ms-settings:storagesense in the Run box (Win + R) to open this page directly.
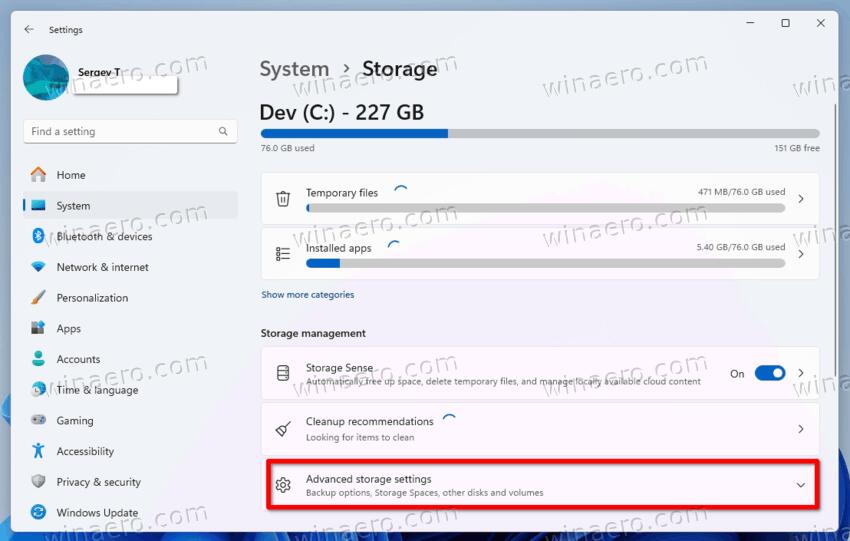
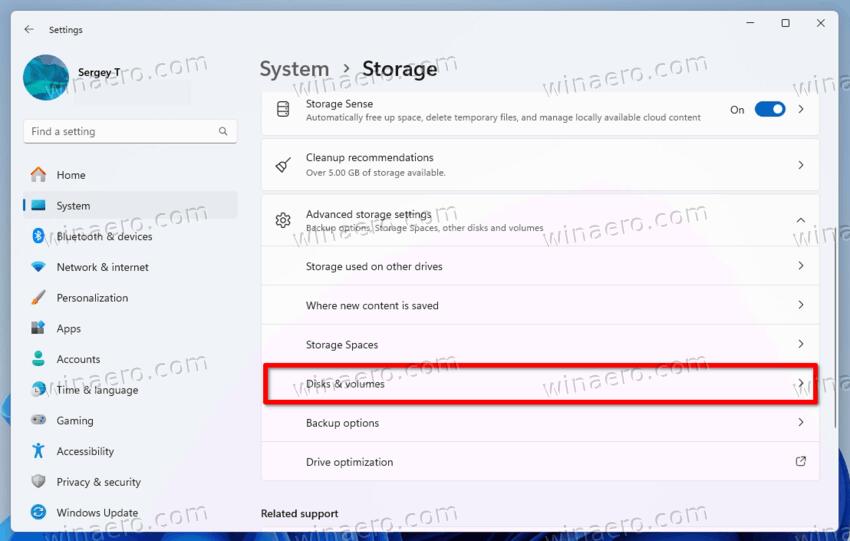
- Now click Advanced storage settings to expand it open, and then click Disks & volumes.
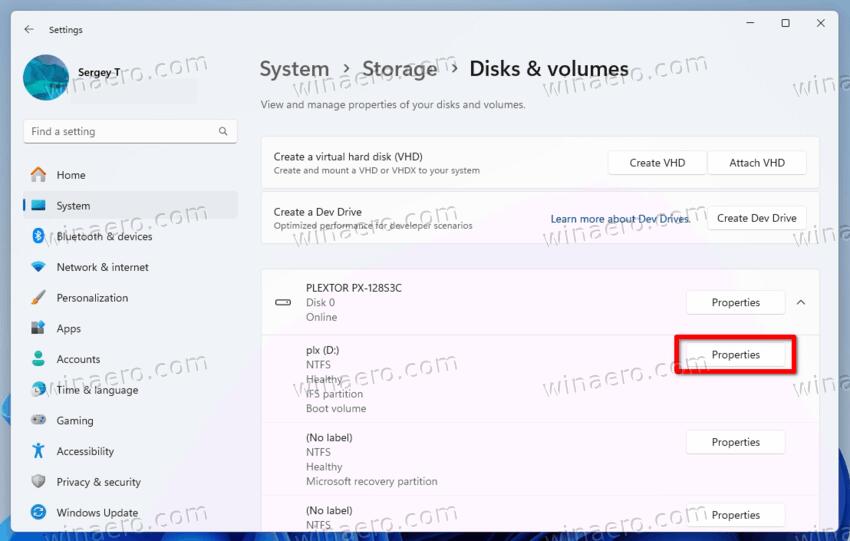
- In the list of partitions, click on the Properties button to the right of the drive the letter you want to remove for.
- On the drive properties page, click the Change drive letter button.
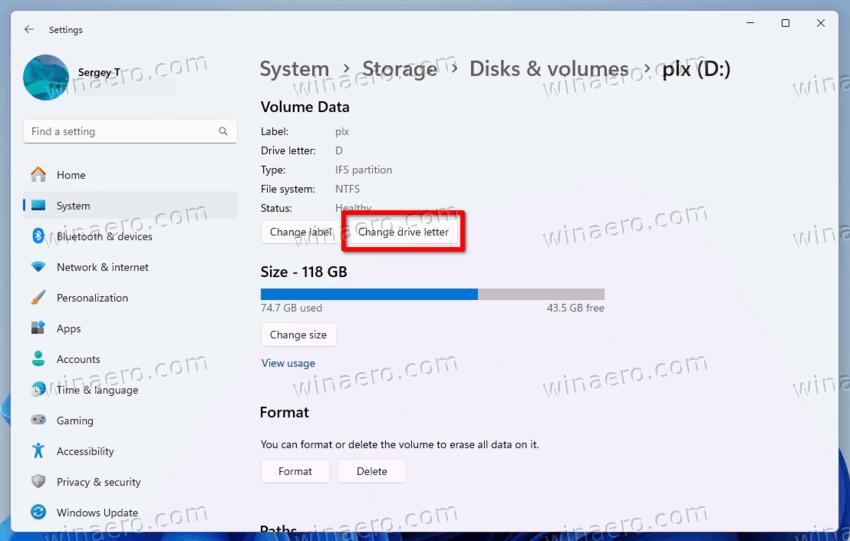
- Finally in the next dialog box, select None from the drop-down menu, and click OK.
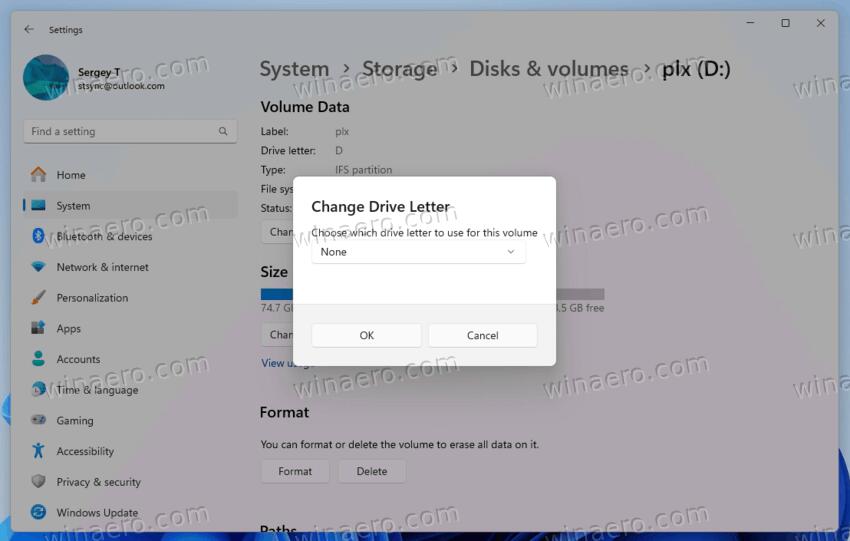
This will instantly remove the letter for the chosen drive, and you can safely close the Settings app if you have no other tasks for it.
Disk Management is another easy way to delete a letter for any drive.
Remove Drive Letter in Disk Management
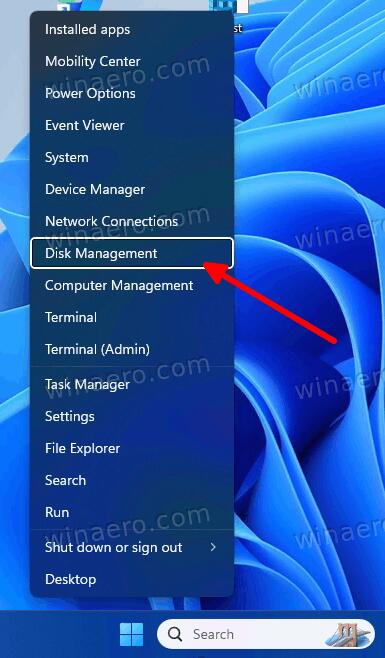
- Press Win + X and select Disk Management from the menu.
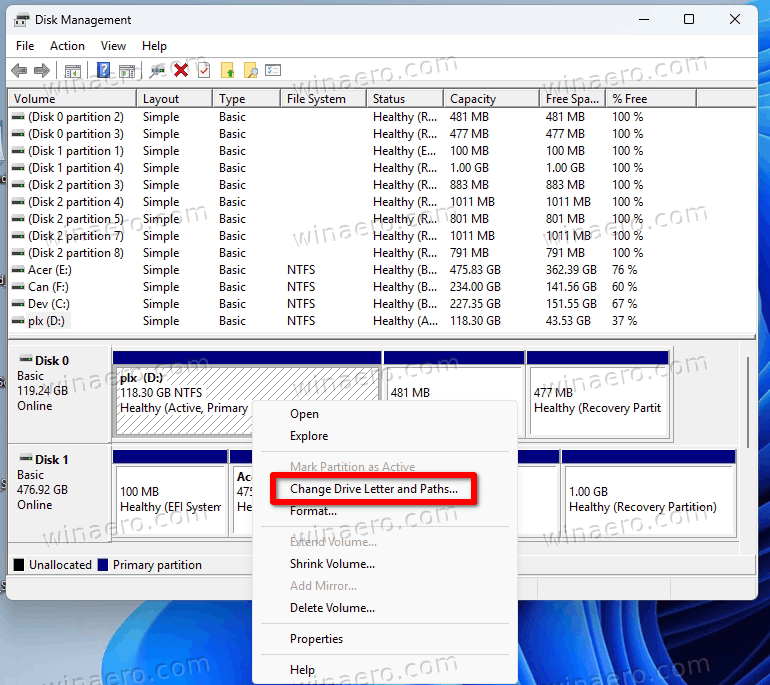
- In Disk Management, find the drive you want to hide, right-click it and select Change Drive Letter and Paths....
- In the next dialog, select the letter in the list, and click on the Remove button.
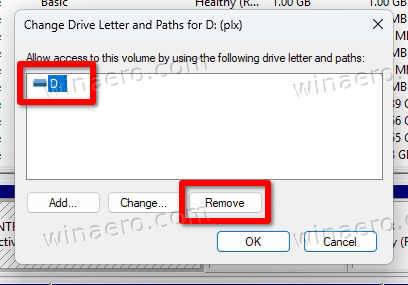

- Confirm the letter removal by clicking on Yes, and the drive will instantly disappear from File Explorer.
An alternative method is the console DiskPart tool. It allows you to remove the drive letter from the command prompt. This will hide the drive in File Explorer.
Using DiskPart
- Press Win + R and type diskpart, then press Enter.
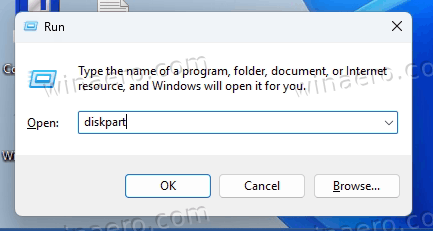
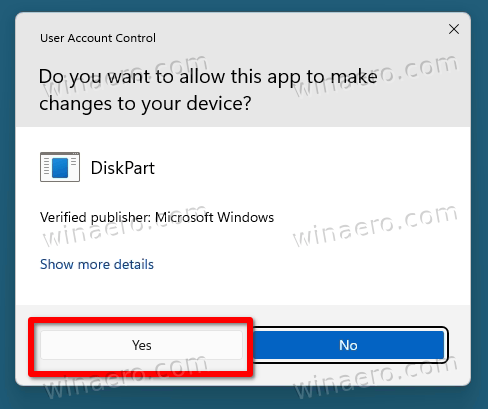
- Confirm the User Account Control prompt to launch the diskpart console.
- Enter the
list volumecommand to see the available drives.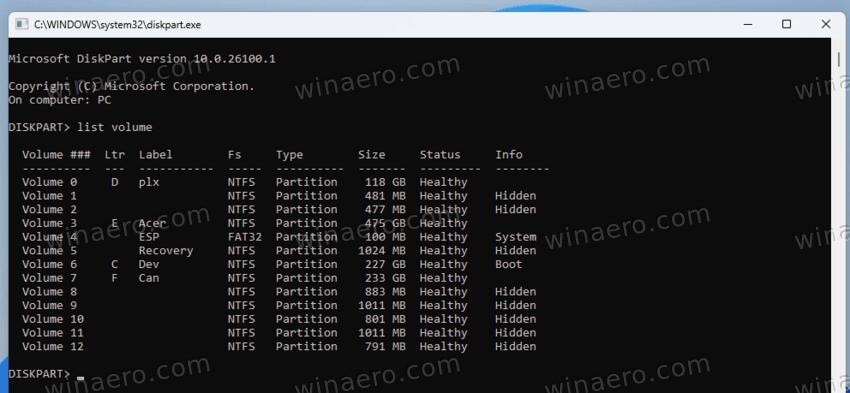
- Write down or remember of the volume number, e.g. 5 for the drive letter you want to remove.
- Type the command below in the diskpart console, and press Enter:
select volume <your volume number>.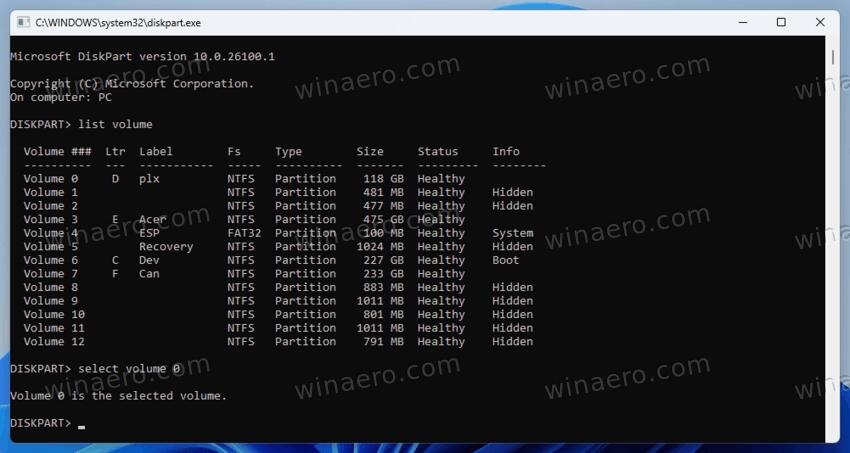
- Finally, you can remove the drive letter with the following command:
remove letter=<letter>. Substitute the <letter> portion with the actual drive letter assigned to the drive, i.e.remove letter=D.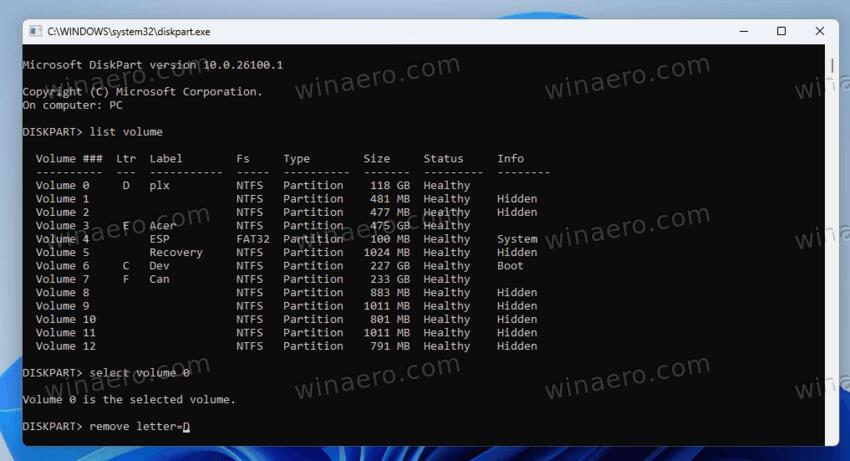
- Now close the DiskPart window, or type exit to leave it via a command.
That's how you remove the drive letter with diskpart.
💡 The opposite command is assign letter=<letter>. You can use it later to assign the same or a different letter to your partition.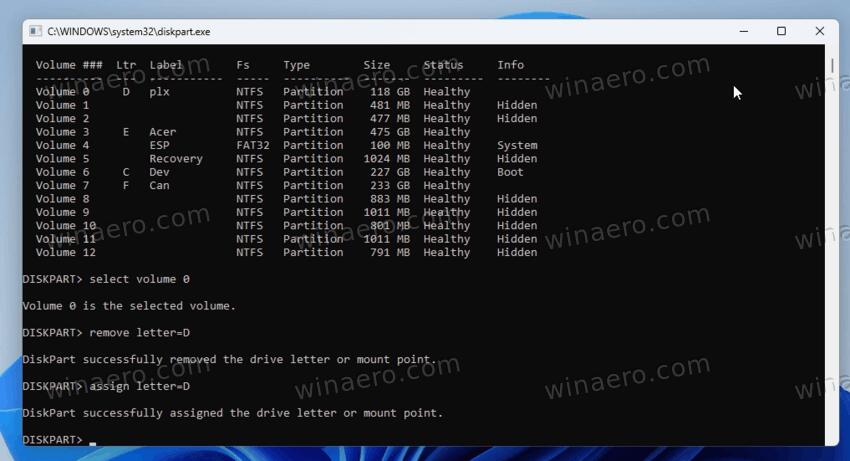
Now, let's review an additional method that involves PowerShell. Note that you'll need a PowerShell console open as Administrator (elevated).
Remove Drive Letter with PowerShell
- Open the Terminal app as Administrator by right-clicking the Start menu button and selecting Terminal(Admin).
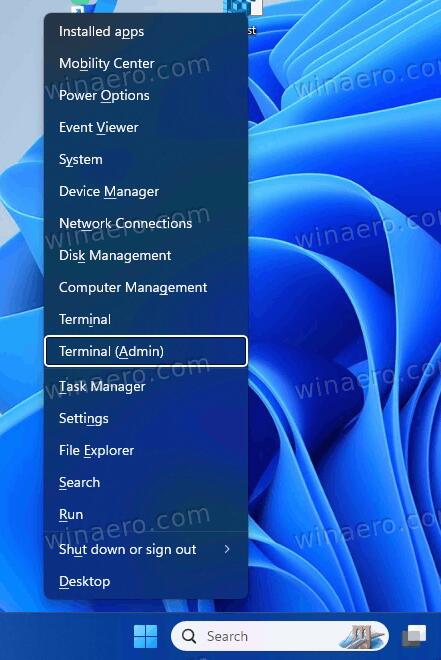
- In Terminal, make sure you are on a PowerShell tab, and type the following command.
Get-Volume -Drive <DriveLetter> | Get-Partition | Remove-PartitionAccessPath-accesspath "<DriveLetter>`:\".- Here, replace the <DriveLetter> with the actual letter you want to remove. E.g.
Get-Volume -Drive D | Get-Partition | Remove-PartitionAccessPath-accesspath "D`:\".
- Here, replace the <DriveLetter> with the actual letter you want to remove. E.g.
- The drive letter is now removed, and the drive is no longer exposed in File Explorer.
You have successfully deleted the letter with PowerShell. But there are more console methods. The built-in mountvol command is one of them, so let's review it.
Remove Drive Letter using "mountvol" command
- Press Win + X, select Terminal (Admin) from the menu that open, and select either Windows PowerShell or Command Prompt as you Terminal tab.
- Now type the following command, and press Enter.
mountvol <drive letter>: /d- Replace the <drive letter> portion in the command with the actual drive letter like "D", the one you want to remove. For example: mountvol D: /d.

- Replace the <drive letter> portion in the command with the actual drive letter like "D", the one you want to remove. For example: mountvol D: /d.
- You can now close the Terminal app.
▶ The mountvol utiliity allows creating, deleting, or listing a volume mount point. Additionally, volumes can be linked without the need for a drive letter, i.e. to a folder. For reference, check out this documentation.
Remove drive letters for earlier connected devices
Here we will delete the associated letters and registry entries for volume mount points of drives no longer connected to the system. In simpler terms, it removes any assigned driver letters from drives that are not currently connected or powered on. You have two options for that.
Option 1. The automount scrub command
- From the Start button's right-click menu, select Terminal (Admin), and select either Windows PowerShell or Command Prompt.
- Copy and paste
automount scrubinto Windows Terminal (Admin), and press Enter.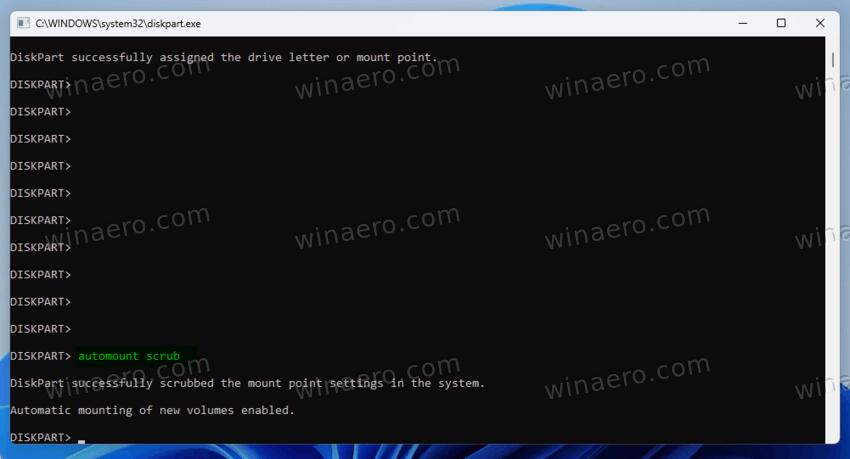
- The letters for disconnected devices are now released. It is now safe to close Terminal.
Option 2. The mountvol /r command
- Open Terminal (Admin) from the Win + X menu, and select either Windows PowerShell or Command Prompt profile (tab).
- Type or copy-paste
mountvol /rinto the Terminal tab, and press Enter.
- You can now close the Terminal window if you have no other tasks for it.
Voila, you have successfully deleted the earlier assigned letters for all disconnected devices.
Finally, once you delete the letters for all desired partitions, you may want to prevent Windows from assigning the letters for specific drives. It is also possible. Follow the steps in the next chapter.
Prevent Windows from Assigning Drive Letter to Partition
We already know that Windows automatically designates the letter C for the system partition and the letter D for the user partition, and so on. You have the option to modify the letter of a custom partition or delete it entirely using the Disk Management snap-in. But any other user can easily assign a letter to the partition using the same Disk Management tool.
If you want, you can prevent Windows from assigning a letter for a specific partition. For that, you need to change partition attributes by following the steps below.
To prevent Windows from assigning a drive letter for a partition, do the following.
- Right-click the Start button, and select Run from the menu (or press Win + R).
- In the Run dialog, type diskpart, hit Enter, and confirm the User Account Control prompt (if appears).
- In the diskpart console, type
list diskto see the list of disks installed in your computer. Note the disk number that contains the target partition.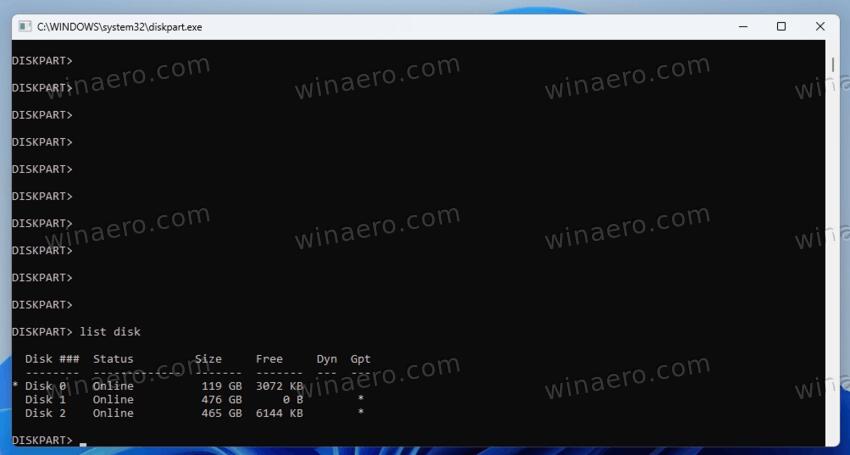
- Now type
sel dis <number>to select the needed physical drive, e.g.sel dis 1. 💡If your PC has only one drive, you can omit steps 3-4.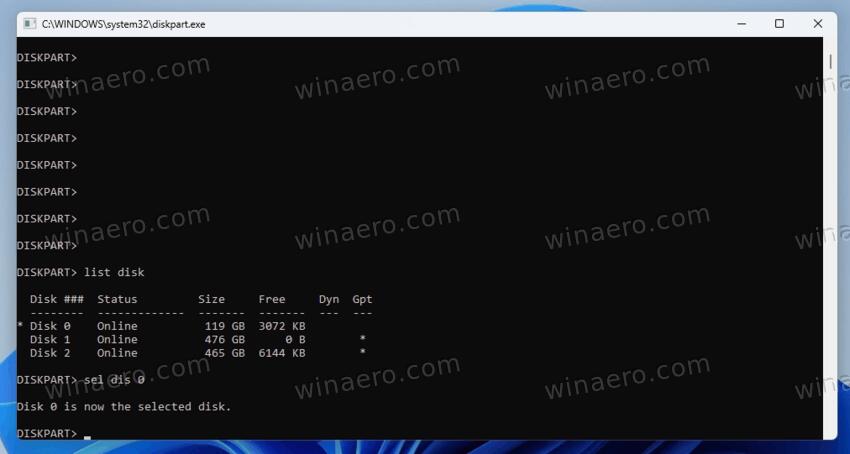
- Next, type
list volum, and hit Enter. Note the volume number that corresponds to the partition you want prevent from having a letter. - Now type
sel vol <number>, where <number> is the number you noted at the previous step. Example:sel vol 3.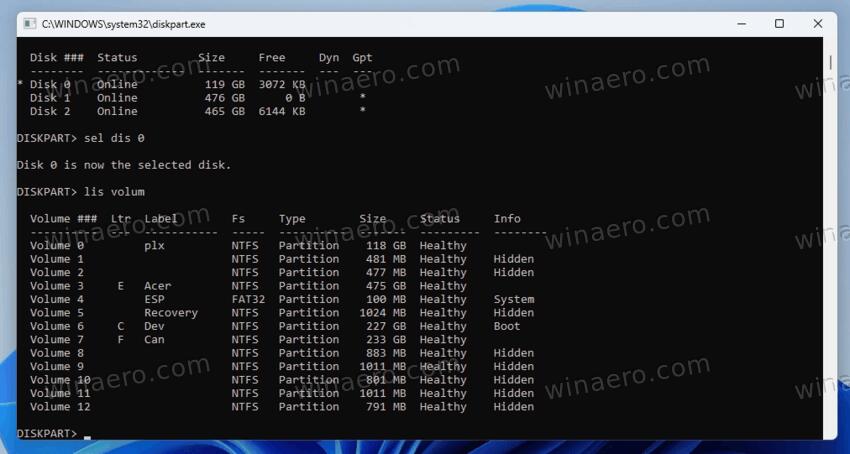
- If it has a letter, you can now remove it with the
remove letter Fcommand, where F is the drive letter (use the actual one instead of F).
- If it has a letter, you can now remove it with the
- Finally, the next two commands will do the trick. Type
set id=de94bba4-06d1-4d40-a16a-bfd50179d6acand press Enter. This command assigns the status of a service recovery partition to the volume. - The final command is
gpt attributes=0x8000000000000001. It sets two flags, "required partition" and "never assign the letter". This is the only way to prevent Windows to add the letter.
That's it! From now on, your specified drive will never have a letter.
Prevent letter assignment on MBR
You may have already noticed the "gpt" command. It applies to the modern gpt partition layouts. If your device comes with Windows 10 or Windows 11 preinstalled, it is hard to imagine that it doesn't have the GPT layout. But if by a chance you have installed Windows on an older drive with the legacy MBR partition layout, you need to use a different command instead of the last two.
💡 Here is how you can find if you have GPT or MBR partition layout.
So, for an MBR drive, use the command set id=27 override. The set of commands in this case will be as follows
select disk <disk number>list partsel part <partition number>set id=de94bba4-06d1-4d40-a16a-bfd50179d6acgpt attributes=0x8000000000000001set id=27 override
Undoing the changes
To make the partition "regular" again, you need to substitute value in the last command(s).
For GPT partitions, it will be
set id=ebd0a0a2-b9e5-4433-87c0-68b6b72699c7gpt attributes=0X0000000000000000
And for MBR, the last command is
set id=07 override
That's it!
Support us
Winaero greatly relies on your support. You can help the site keep bringing you interesting and useful content and software by using these options:

