How to Re-arrange or Delete Win + X Menu Commands in Windows 10
In Windows 8, Microsoft introduced a feature for mouse users which can be accessed with a right click in the bottom left corner of the screen - the Win+X menu. In Windows 8.1 and Windows 10, you can simply right click on the Start button to show it. This menu has shortcuts to useful administrative tools and system functions. While it is not a customizable part of Windows 10, you can re-arrange the menu items and delete ones you never use.
Advertisеment
However, it is not a customizable part of the operating system. The user cannot add the desired apps and commands he wants to the Win+X menu.
- Right click the Start button. Instead of the context menu of the taskbar, Windows 10 shows Win + X menu.
- Or, press Win + X shortcut keys on the keyboard.
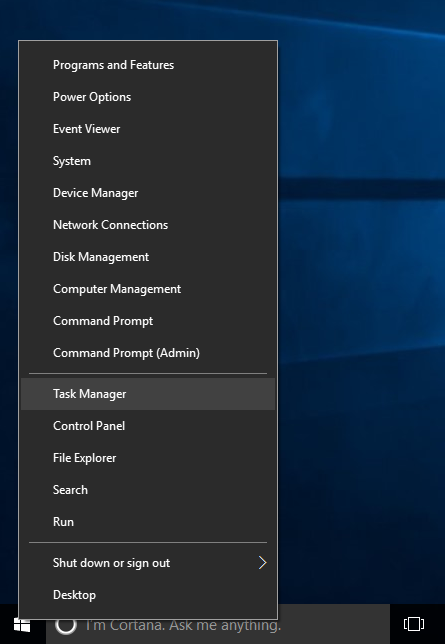
Win+X Menu Contents
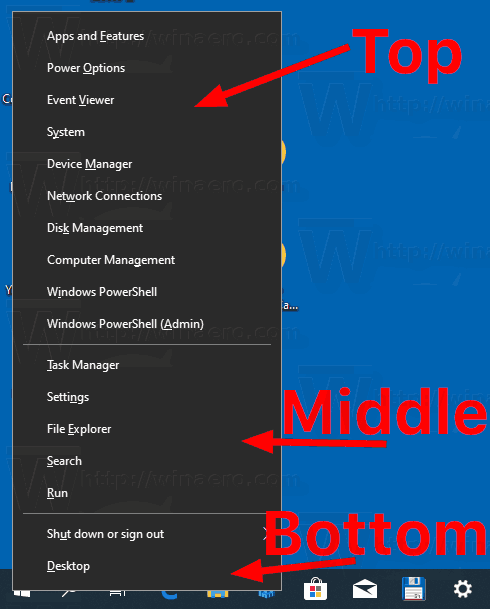
The Win+X menu entries actually are all shortcut files (.LNK). They are stored in the %LocalAppdata%\Microsoft\Windows\WinX folder, organized by three subfolders, Group 1, Group 2, and Group 3. Each of the subfolders represent a section of Win + X menu.
- Group1 - the bottom section,
- Group2 - middle,
- Group3 - top.
Customizing the Win+X menu is not an easy task because Microsoft intentionally made it harder to customize it to prevent third party apps from abusing it and putting their own shortcuts there. The shortcuts are all special - they are passed though a Windows API hashing function and the hash is then stored inside those shortcuts. Its presence tells the Win+X menu that the shortcut is 'approved' and only then it will show up in the menu, otherwise it will be ignored.
However, you can move or re-arrange the Win+X menu entries without using third-party tools. Here is how it can be done. I am using the Settings entry as the procedure example.
To Re-arrange Win + X Menu Commands in Windows 10,
- Open File Explorer.
- Go to the folder
%LocalAppdata%\Microsoft\Windows\WinX. Paste this path to the address bar of File Explorer and hit the Enter key.
- Open the
Group 2folder and cut (Ctrl + X) the Control Panel item.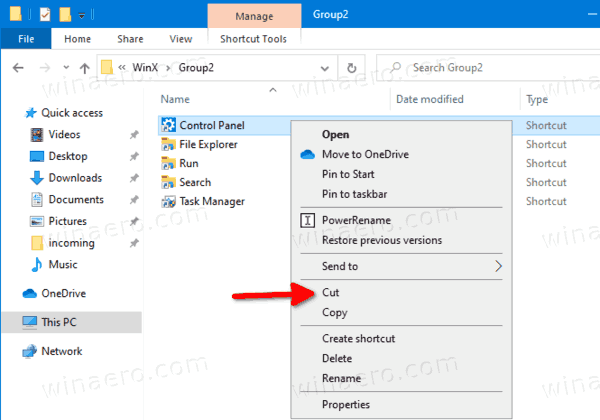
- Paste it into the
Group 1folder.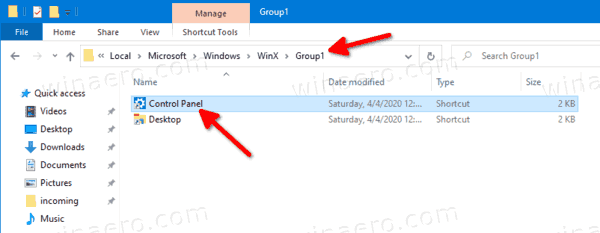
- Voila, the Settings item is now at the bottom, along with the Desktop entry!
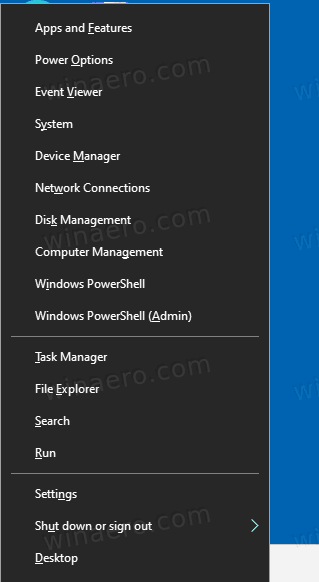
Tip: If see duplicate entries, just restart Explorer or sign out and sign in back.
Note: Keep in mind that Microsoft can implement more changes in Windows 10, so this trick can stop working at any moment. If it does not work for you, please leave a comment, and specify your Windows 10 version and its build number.
Now, let's see how to remove an entry from the Win + X menu.
To Delete a Win+X Menu Command in Windows 10,
- Open File Explorer.
- Go to the folder
%LocalAppdata%\Microsoft\Windows\WinX. Paste this path to the address bar of File Explorer and hit the Enter key.
- Open the folder Group1 (bottom), Group2 (middle), or Group3 (top) to find the required shortcut.
- Cut (Ctrl + X) the item you want to remove. For example, Group3\System.
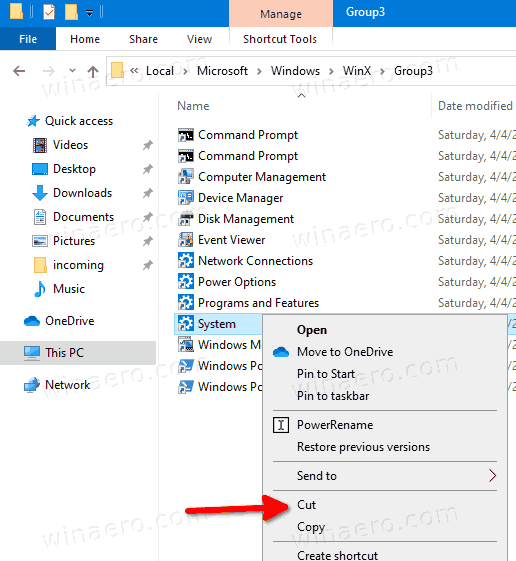
- Paste to the root folder,
%LocalAppdata%\Microsoft\Windows\WinX.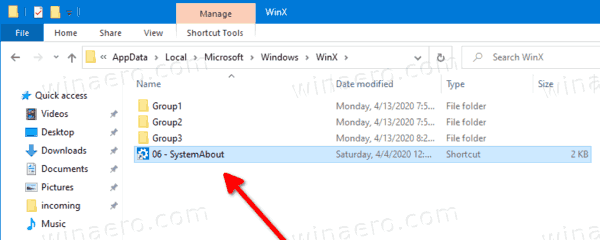
- The entry has gone from the Win+X menu.
Before:
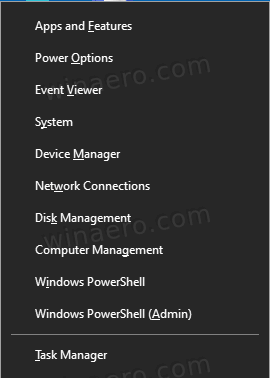
After:
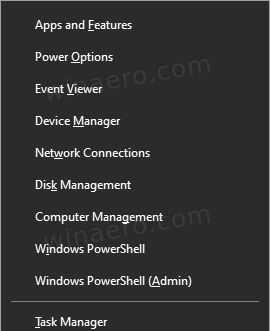
Warning! Do not *delete* any of the shortcuts using the 'Delete' command. Otherwise, you won't be able to quickly restore them if you change your mind later.
Restore deleted items
To restore any deleted item, just move it from the %LocalAppdata%\Microsoft\Windows\WinX folder back to its original location under the Group 1 .. Group 3 subfolder.
Further customization
You can also rename Win+X Menu shortcuts in Windows 10 without using third-party tools.
Finally, to customize the Win+X user menu, you can use the Win + X Menu Editor app. Win+X Menu Editor is a free tool with an easy-to-use GUI that does not patch any system files to disable the hash check. Using it, you can add or remove shortcuts to the Win+X menu, change their names and order.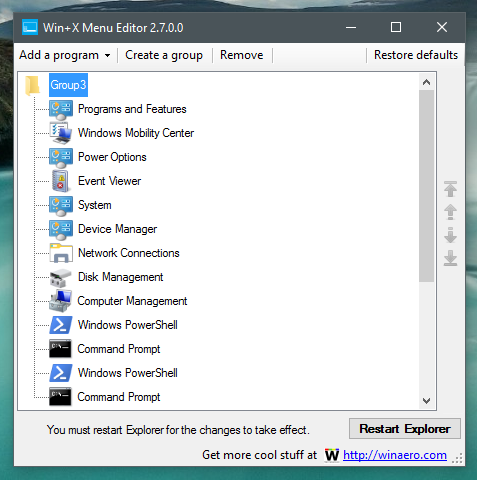
You can download Win+X Menu Editor from here.
That's it.
Support us
Winaero greatly relies on your support. You can help the site keep bringing you interesting and useful content and software by using these options:
