Libraries is a special folder in Windows, introduced in Windows 7. It allows you to create libraries - special folders which can aggregate files from several different folders and show it under a single, unified view. A library is an indexed location, meaning Windows Search will be completed faster in a library compared to a regular non-indexed folder. In Windows 7, when you opened Explorer using the mouse, it opened the Libraries folder. In this article, we will see how to add or remove a library from the navigation pane in File Explorer in Windows.
Advertisеment
By default, Windows 10 comes with the following libraries:
- Documents
- Music
- Pictures
- Videos
- Camera Roll
- Saved Pictures
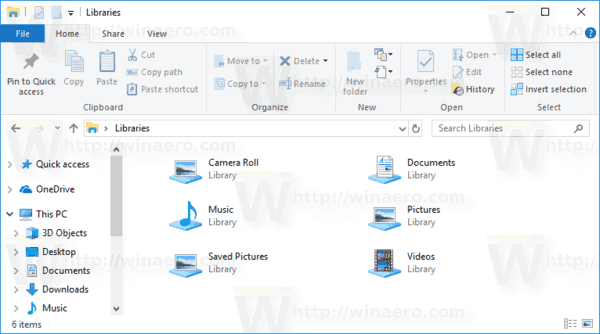
Note: If the Libraries folder is not visible in your File Explorer, see the article:
Enable Libraries in File Explorer navigation pane in Windows 10
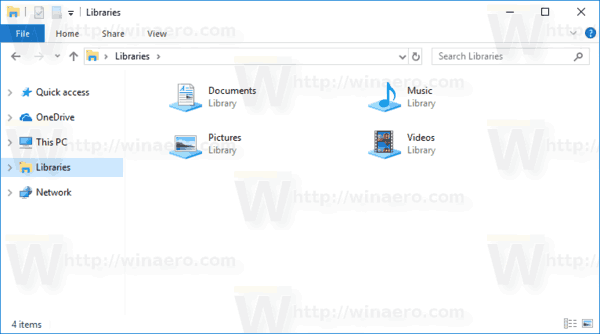
The following libraries are pinned to the navigation pane by default:
- Documents
- Music
- Pictures
- Videos

You can hide a library from the navigation pane or add a new library there. For example, if you've created a custom library, you might want to make it visible on the left in File Explorer.
There are three methods to add a library to the navigation pane. Let's review them.
Using the Context Menu
- Open This PC in File Explorer.
- Click on Libraries on the left to open the folder.
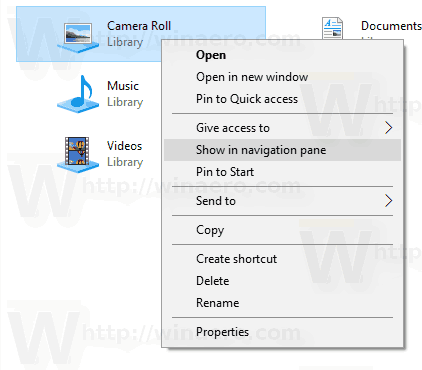
- Right-click the Library you want to add to the navigation pane and click on Show in navigation pane.
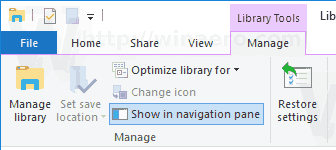
Using the Ribbon
- Select the desired library in the Libraries folder.
- In the Ribbon, go to the Manage tab will appear under Library tools.
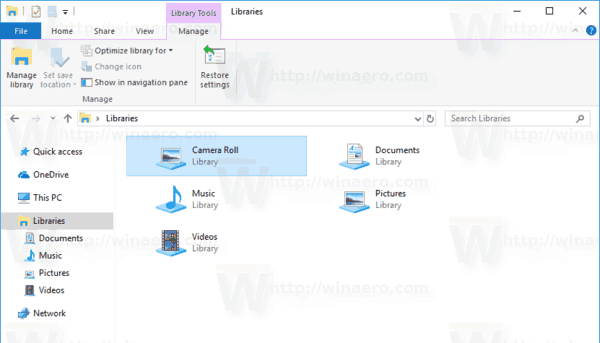
- Click on the Show in navigation pane button.
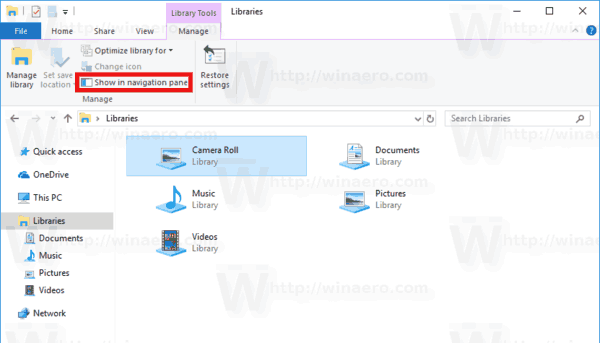
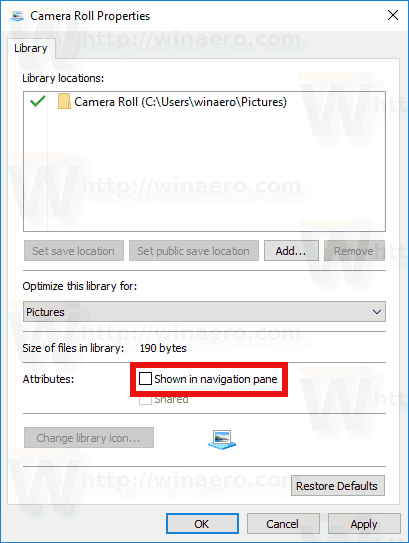
Using the Library Properties Dialog
- Right-click a library and select "Properties" in the context menu. Tip: You can open Properties of a library, file or folder faster if you double-click it while holding the ALT key. See How to open file or folder properties quickly in Windows File Explorer.
- In Properties, Check the Shown in navigation pane box.
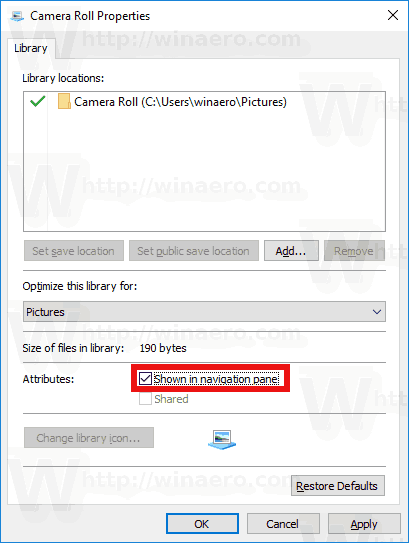
Regardless of the method you are using, the library will appear in the navigation pane.

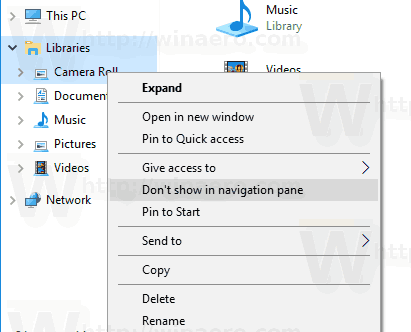
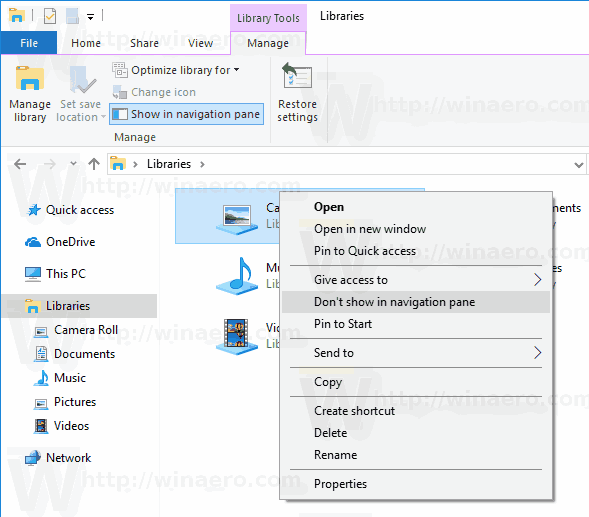
To remove a library from the navigation pane in Windows 10, you can use one of the following methods.
- Right-click the desired library in the navigation pane and select Don't show in navigation pane in the context menu.
- Right-click the library in the Libraries folder and select Don't show in navigation pane in the context menu.
- Uncheck the box Shown in navigation pane box in the library properties dialog.
- Click on the Show in navigation pane button in the Ribbon.
You are done.
Articles of interest:
- Change Icons of Default Libraries in Windows 10
- How to Add Libraries to Quick Access in Windows 10
- How To Add Libraries Desktop Icon in Windows 10
- How to move Libraries above This PC in Windows 10
- Make Explorer open Libraries instead of Quick Access in Windows 10
- Set Default Save Location for Library in Windows 10
- How to re-order folders inside a library in Windows 10
You can add or remove the following library context menus:
- Remove Include in Library Context Menu in Windows 10
- Add Change Icon to Library Context Menu in Windows 10
- Add Optimize Library For to Context Menu in Windows 10
- Add Set Save Location to Context Menu of Library in Windows 10
That's it.
Support us
Winaero greatly relies on your support. You can help the site keep bringing you interesting and useful content and software by using these options:

Just tried this, the setting “Don’t show in Navigation pane” is nowhere to be found. Thanks anyways, though.
Marry me. That may sound like some stupid spammer. But I mean it. After the incredibly simple solution you just provided after I spent two hours tearing my hair out for such a frustratingly ridiculous setting in Windows 10 — which I HATE — well I am in love with you. I repeat. Marry me.