If you always wanted to keep Edge running when you close last tab, follow the steps in this guide. Microsoft has added a special option to the browser, so it remains always open. When you close the last tab, it will open a new one instead of exiting.
Advertisеment
The default Edge behavior is not different from most browsers based on Chrome/Chromium. For years, the Chrome browser closes when you close the last tab in the row. It quits silently, without prompting the user. To change its behavior, users have to apply workarounds like this one.
Sadly, Microsoft Edge goes here after its parent. Despite being heavily customized and packed with exclusive and pretty useful features, it also exits without a confirmation when you close the last tab.
Finally, Microsoft decided to do something with this and give the user some choice. Currently, the option is only available in the Canary version of Edge 121.0.2275.0, but it may eventually land in the stable release.
To make Edge remain open when you close the last tab, do the following (assumes that you have updated Edge to version 121.0.2275.0 or later).
Keep Edge Open After You Close Last Tab
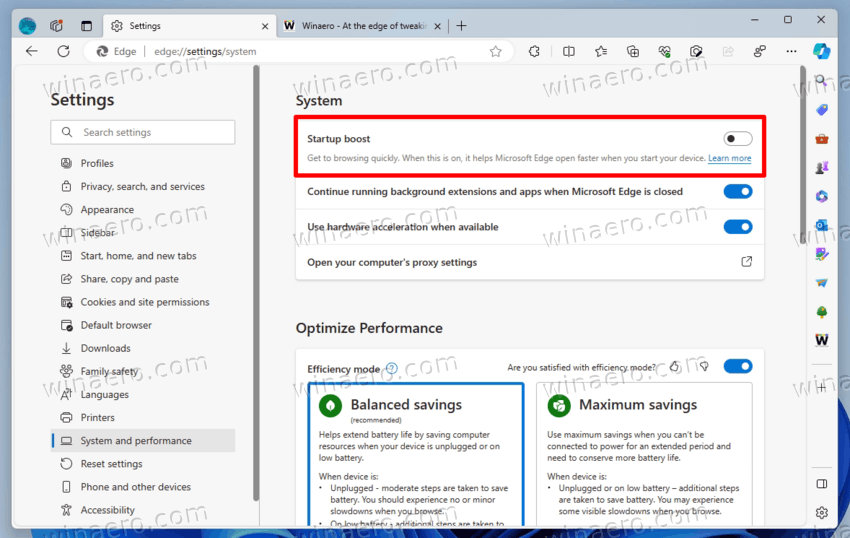
- Open Edge settings from the menu (Alt + F), and navigate to System and performance.
- On the right, disable the Startup Boost option, and close the browser.

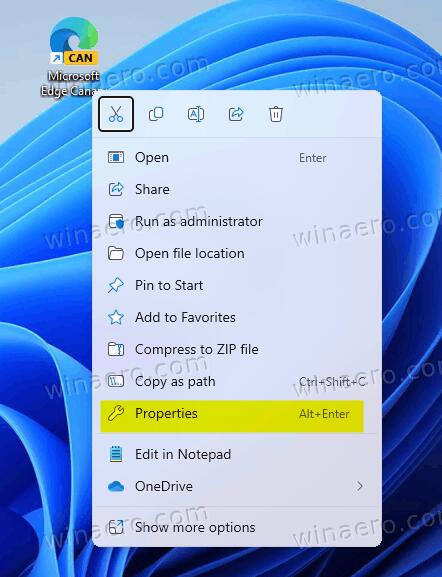
- Right-click the Edge desktop shortcut, and select Properties from the menu.

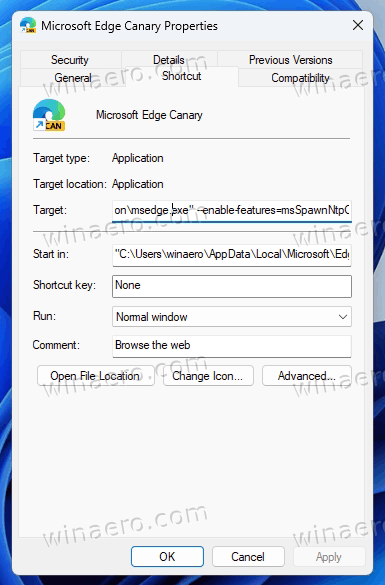
- On the Shortcut tab, click in the Target box, and add the following text after
msedge.exeseparated by a space:--enable-features=msSpawnNtpOnLastTabClose.
- Click Apply and OK, and start Edge using the modified shortcut.
- Now, try to close all the open tabs. When you close the last one, Edge will open a new one automatically instead of exiting.
You are done! The following video shows the change in action.
Here's a couple things to note. You must disable the Startup Boost because otherwise Edge will always run in the background. It will create new windows from those background processes, ignoring the command line argument you have specified with the shortcut. Disabling the option solves the issue.
Finally, if you need to specify more than one --enable-features option, just pass them separated by a coma. You can learn more on how to apply multiple such features in the corresponding guide here.
Support us
Winaero greatly relies on your support. You can help the site keep bringing you interesting and useful content and software by using these options:
