You can rename a network adapter in Windows 11 if you want to organize or customize the available network connections to match your taste and needs. Windows 11 comes with a number of options in the updated Settings app to make this process fast and easy.
Advertisеment
You may remember that Windows 10 requires the user to use the classic Control Panel to rename a network connection. Microsoft made a step forward in Windows 11 and now allows renaming a network adapter right in the Settings app.
There is now a section called "Advanced Network Settings" that lists all the available network adapters, allows seeing their status and even disabling them with a single click.
This post will show you how to rename network adapters on Windows 11. In addition to the new method with Settings, we will also recall how to use the classic Network Connections folder for that, since this method remains available in Windows 11 as well.
Rename a Network Adapter in Windows 11
- Open the Settings app using the Win + I shortcut keys or from the Start menu.
- Click on Network & internet.
- On the right, select Advanced network settings.
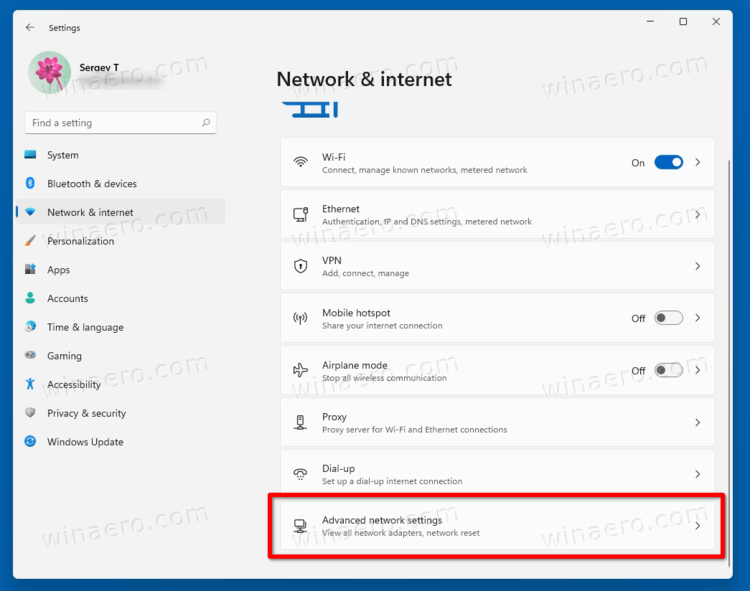
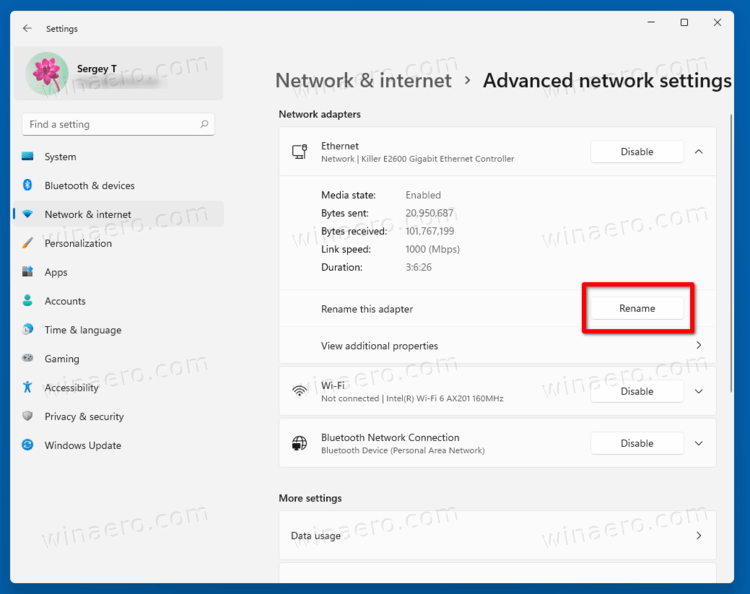
- Click on the network adapter you want to rename.
- Finally, click on the Rename button.
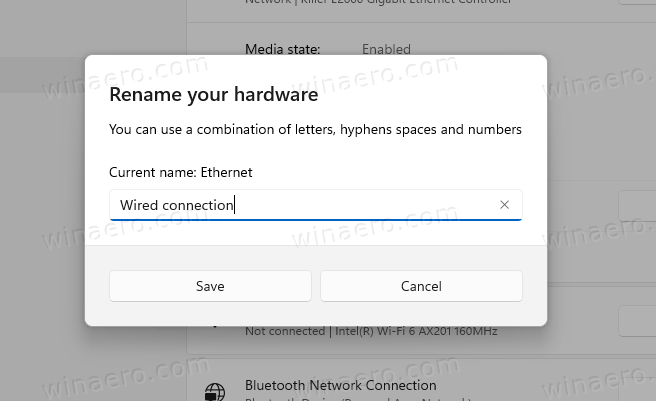
- Enter the desired name and click on Save to apply the change.
Done! That was easy.
Additionally, you still can use the classic Network Connections folder to rename your network connections. Perform the following steps.
Rename a network connection in classic Control Panel
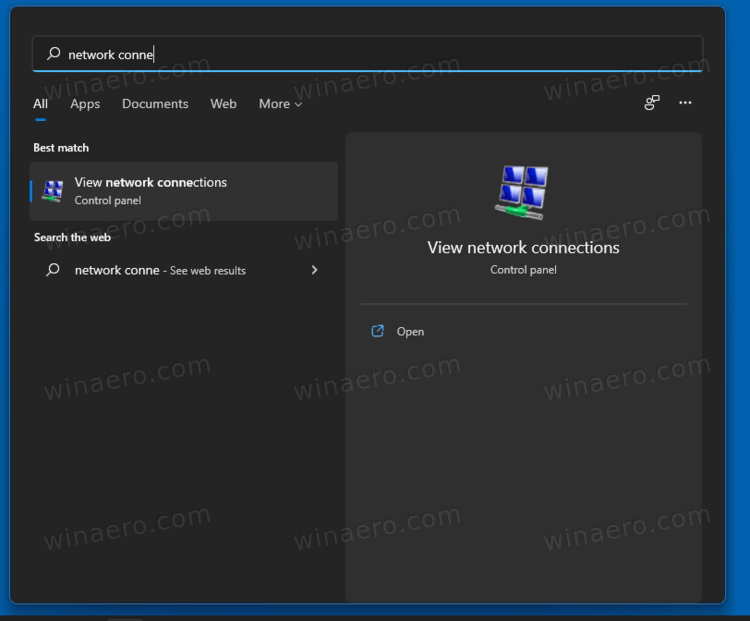
- In Windows Search (Win + S), type network connections in the search box.
- Click on View network connections.
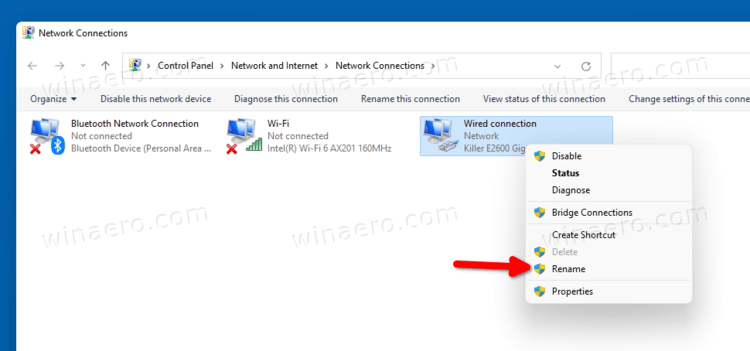
- Once the Network Connections folder opens, right-click the adapter you want to change the name for.
- Select Rename from the context menu.
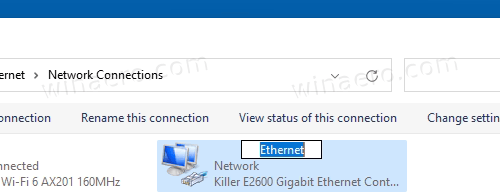
- Enter a new name and hit the Enter key to apply the change.
- Confirm the UAC prompt if it appears on the screen.
That's all about the network adapter renaming on Windows 11.
Support us
Winaero greatly relies on your support. You can help the site keep bringing you interesting and useful content and software by using these options:

Hello Sergey,
Winaero Tweaker zip file from the website is corrupted (can’t open in a standard archiver, WinRAR, or 7-zip), but the one from Telegram does not.
Ehm
Investigating.
Please use the one from Telegram or from https://winaerotweaker.com