This article will help you learn how to entirely remove a printer driver in Windows 11. Modern computers with Windows 11 and 10 onboard are stable and reliable devices that get the job done for more than a billion people around the globe. That is not what you can tell about printers.
Advertisеment
Somehow these devices remain a constant source of headaches for many users. In a desperate attempt to fix a broken printer, the user may want to remove a printer driver.
Others do not want to keep around drivers for the printers they no longer use. That mainly applies to users who own computers with smaller drives.
Whatever is your reasoning, here is how to delete the driver for a printer.
Fully remove a printer driver in Windows 11
To remove a printer driver in Windows 11, do the following.
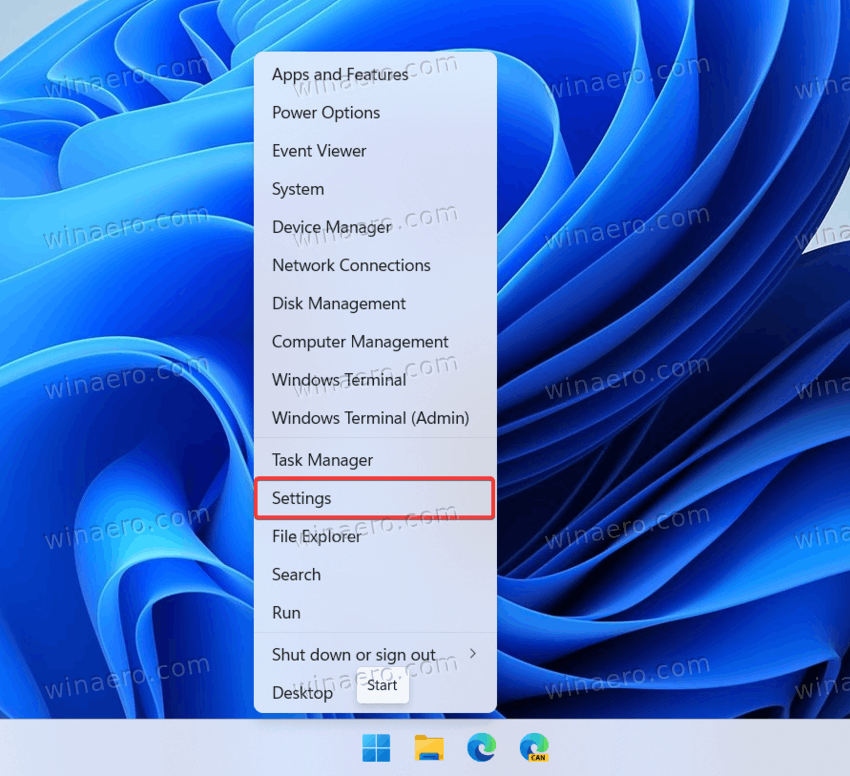
- Begin with pressing Win + I to launch the Settings app. You can also right-click the Start button and select Settings.
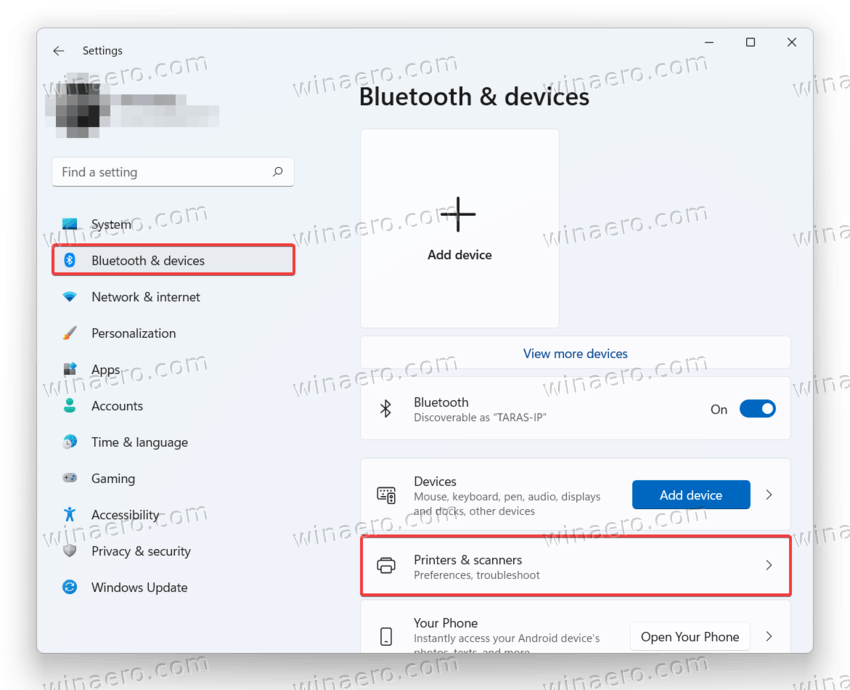
- Go to the Bluetooth & devices section.
- Click Printers & scanners.
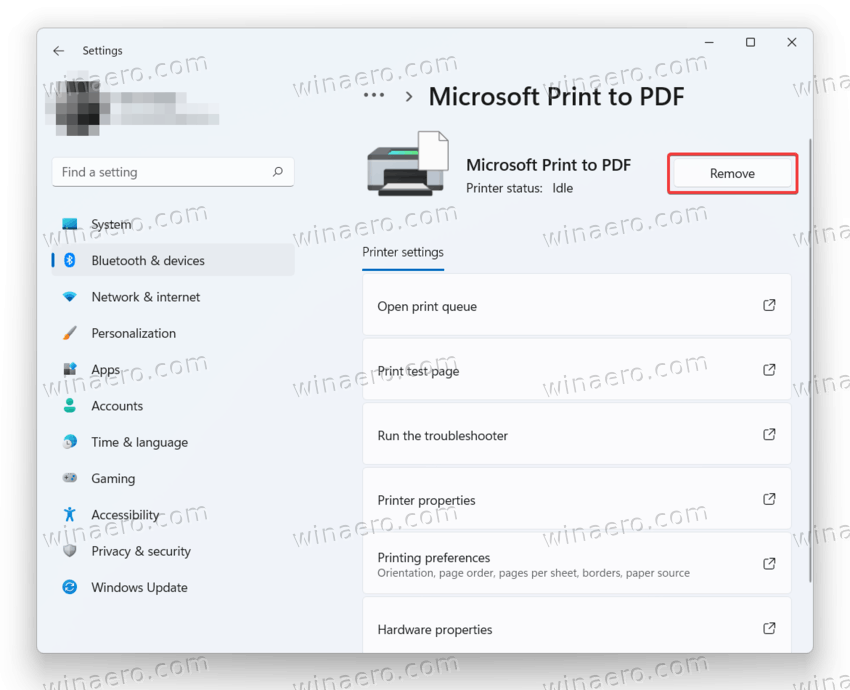
- Select the printer whose driver you want to delete in Windows 11.
- Click the Remove button and select Yes. After that, Windows will uninstall the printer and all the associated drivers.
You are done.
Note: You may need to reinstall the removed driver next time you connect the deleted printer.
Using the classic Control Panel
The classic Control Panel is another way to remove a printer driver in Windows 11. Here is how:
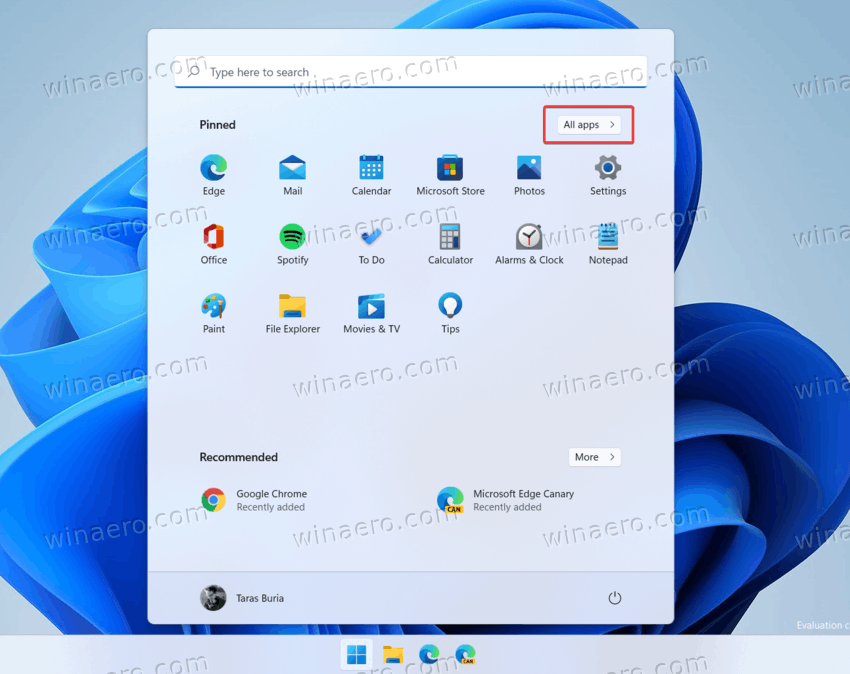
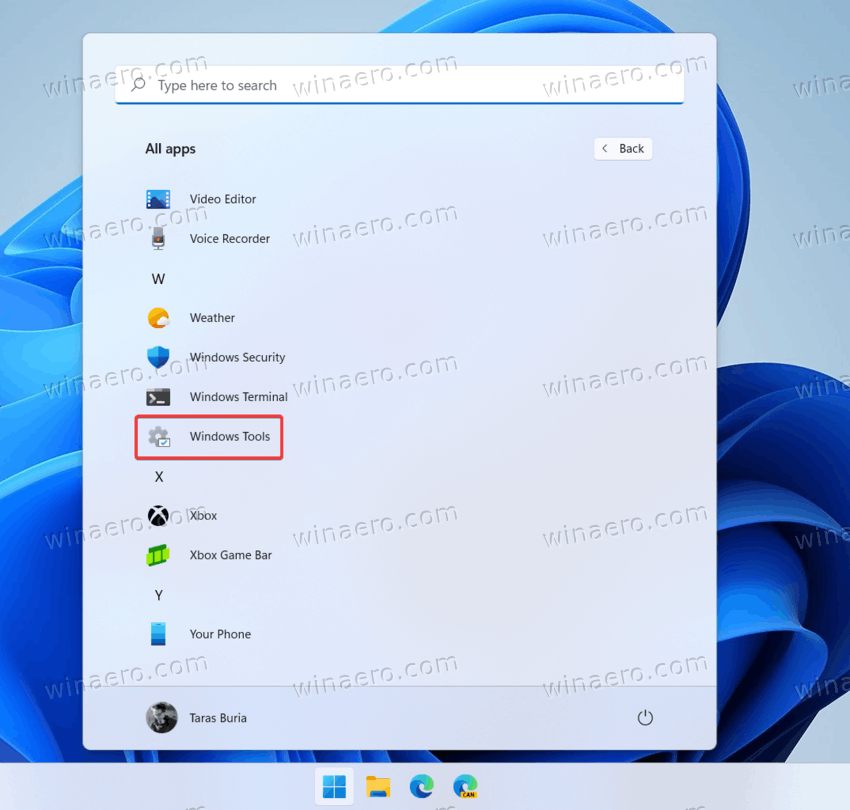
- Open the Start menu and select All apps.
- Scroll down the list of apps and open Windows Tools.
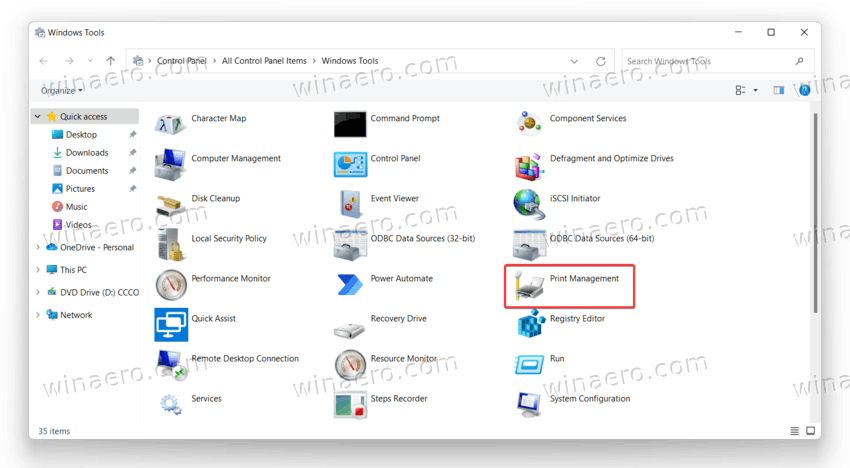
- Open Print Management in the Windows Tools window.
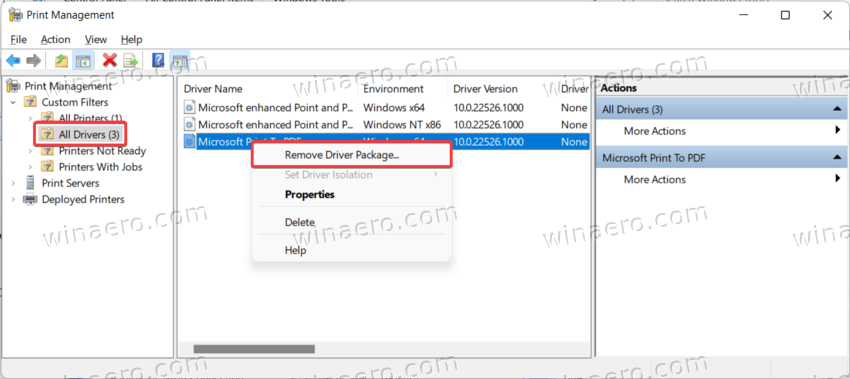
- Expand the Custom Filters option and click All Drivers.
- Right-click the driver you want to uninstall at the center of the window.
- Click Remove Driver Package and confirm the action.
Done!
Tip: You can directly open the Print Management snap-in using the Win + R shortcut keys and the printmanagement.msc command in the Run dialog. You can find more such commands here.
And that is how you delete a printer driver in Windows 11. It is also worth noting that you better restart your computer before reinstalling the driver you have just removed.
Support us
Winaero greatly relies on your support. You can help the site keep bringing you interesting and useful content and software by using these options:

But STILL in the registry.
Grrrr
I just keep getting the same error message that it can’t be deleted because it’s in use. The printer is turned off and there are no apps using the printer that are open. I tried ending the spooler app but in about 15 seconds it automatically restarts. I’m trying a reboot.