Here are two ways to enable Night Light in Windows 11 (a blue light filter). Microsoft introduced the Night Light feature in Windows back at the end of 2016. While it was possible to enable a blue light filter in Windows beforehand, Night Light integrates into the system and allows making a screen warmer on a system level without third-party apps. With Windows 11, Microsoft changed many things in its operating system, but the Night Light feature remained untouched. What is different is how you get to the needed settings. This article will show you how to turn on and configure Night Light.
Advertisеment
Enable Night Light in Windows 11
Before you proceed to turn on Night Light in Windows 11, notice that some monitors have this feature built-in. Make sure they do not clash; otherwise, you may get a seriously distorted picture.
Enable Night Light in Windows 11 Settings
- Press Win + I to open Windows Settings in Windows 11.
- Go to System > Display.
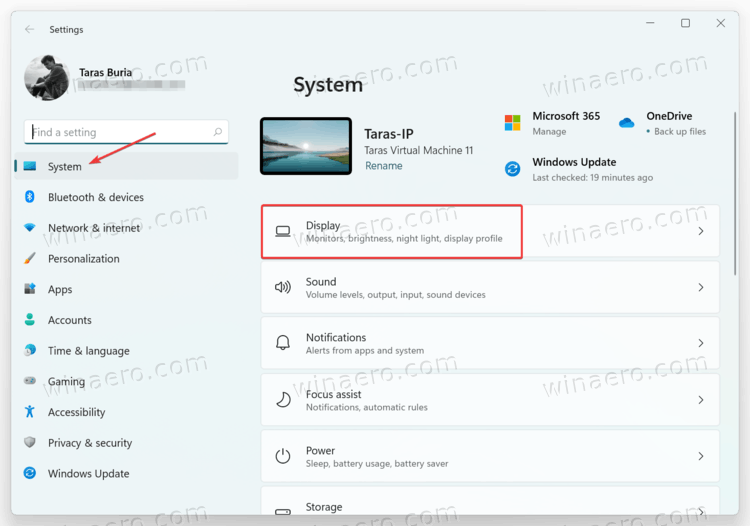
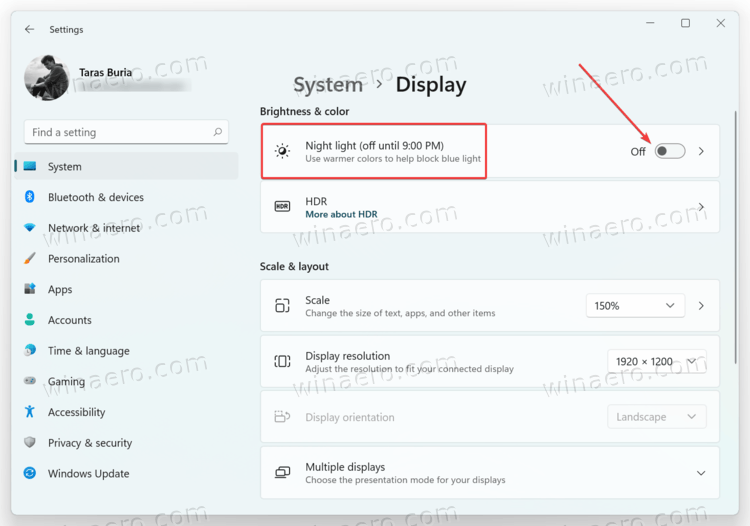
- Click Night Light on the right. Tip: You can enable Night Light in Windows 11 right here by clicking a toggle next to the Night Light option.
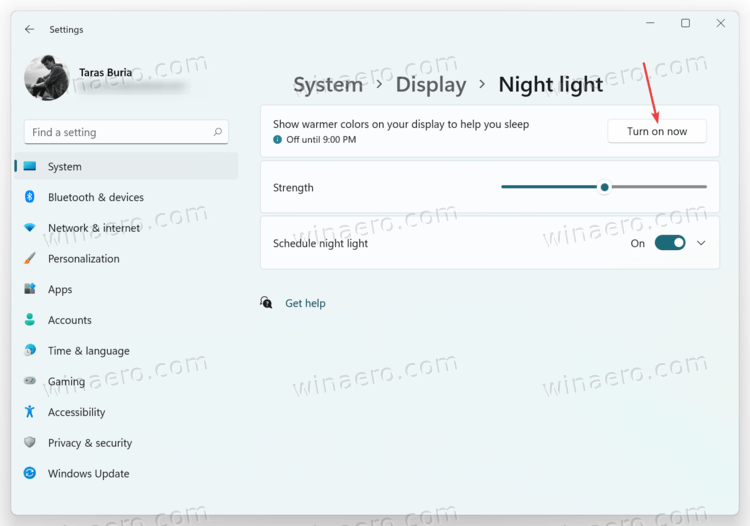
- Click Turn on Now. That action immediately enables Night Light in Windows 11.
Alternatively, you can use the new Quick Settings feature of Windows 11 to quickly activate the Night Light blue color filter.
Using Quick Settings
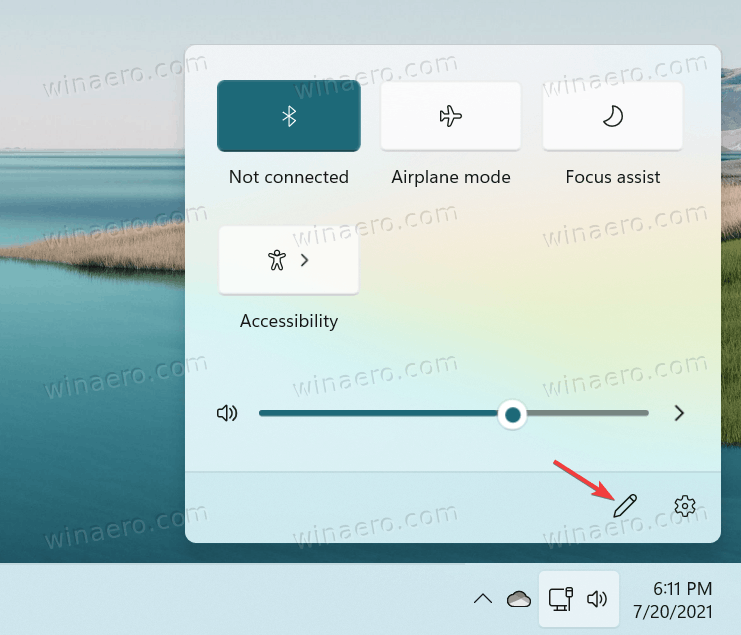
The Night Light button also appears in the list of quick settings in the control center.
- Press Win + A (that combination is a part of new keyboard shortcuts in Windows 11) to open the Quick Settings pane in Windows 11.
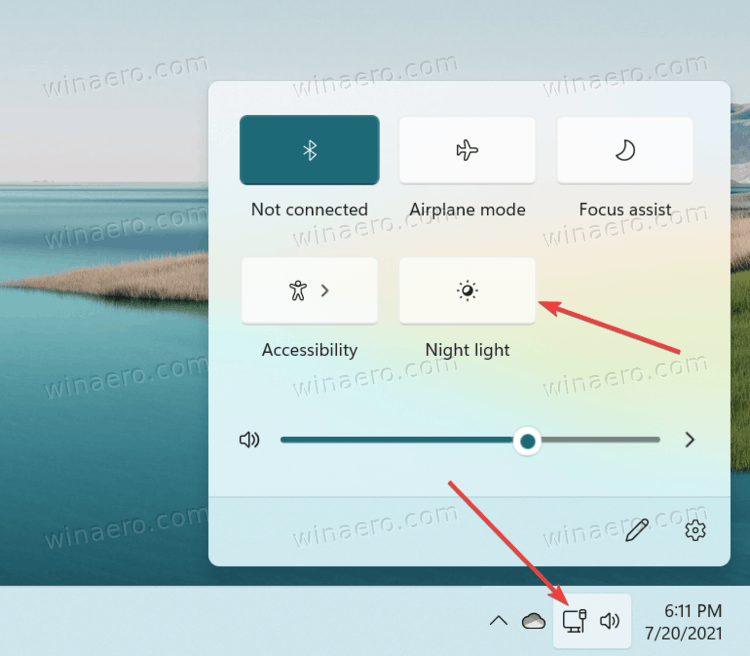
- Optionally, you can click the volume or network icon in the notification area.
- Press Night Light. You can also right-click the Night Light button and select Go to Settings to open Night Light settings faster.
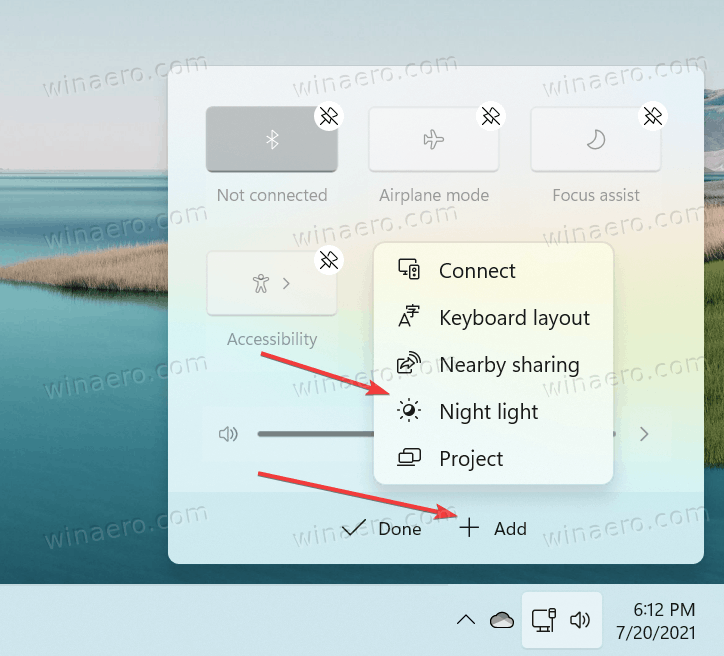
Tip: If you cannot spot the Night Light button in the Control Center, click the Edit button with a pencil icon in the bottom-right corner of the control center.
Then, click Add and select Night Light. This way, you can easily add or remove Quick Settings buttons.
Schedule Night Light for sunset and sunrise
Windows 11 allows scheduling Night Light. You can set specific hours when to turn on and off Night Light to avoid opening Windows Settings every day just to enable the blue light filter. Also, there is a "Sunset to Sunrise" option that dynamically adjusts the schedule according to your current location.
To schedule Night Light for sunset and sunrise, do the following.
- Open Windows Settings by pressing Win + I or using any other method.
- Go to System > Display.
- Click Night Light.
- Select Schedule Night Light.
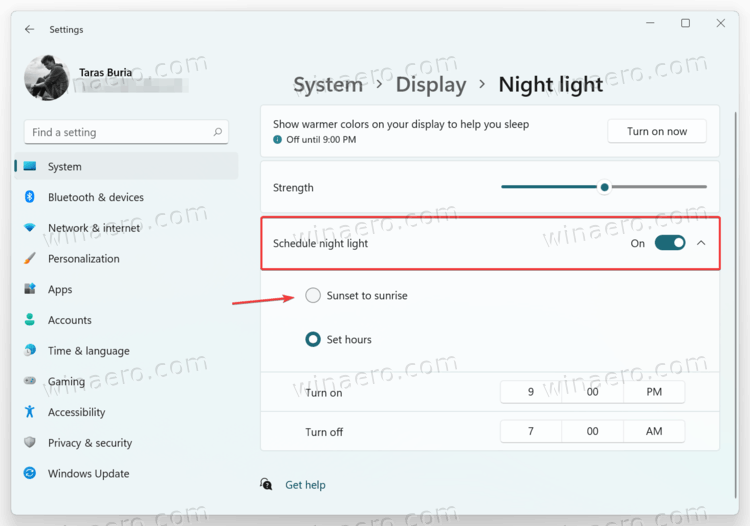
- Select Sunset to Sunrise. As an option, you can create your own schedule by clicking Set Hours.
Change Night Light Strength
If you do not like the default Night Light intensity in Windows 11 and want to make it less or more warm, you can configure this in its preferences.
To change Night Light strength, do the following.
- Go to Windows Settings > System > Display.
- Click Night Light.
- Drag the Strength slider to change its position.
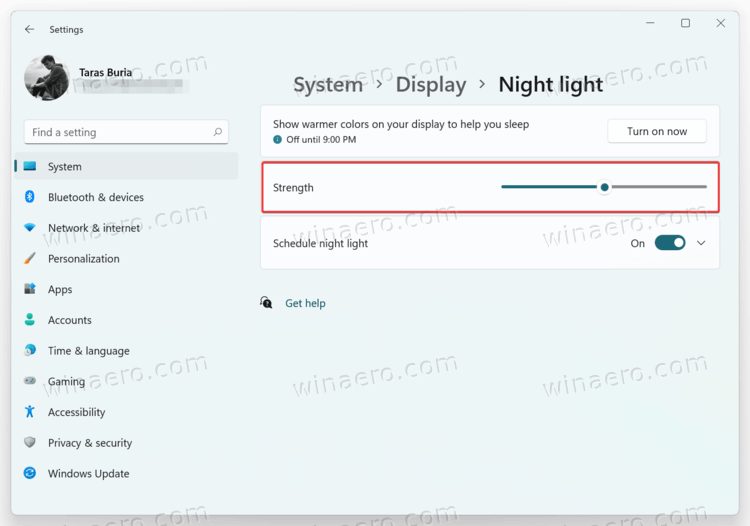
- Windows will preview changes in real-time even if Night Light is currently off.
That is it. Now you know how to enable and customize Night Light in Windows 11.
Support us
Winaero greatly relies on your support. You can help the site keep bringing you interesting and useful content and software by using these options:
