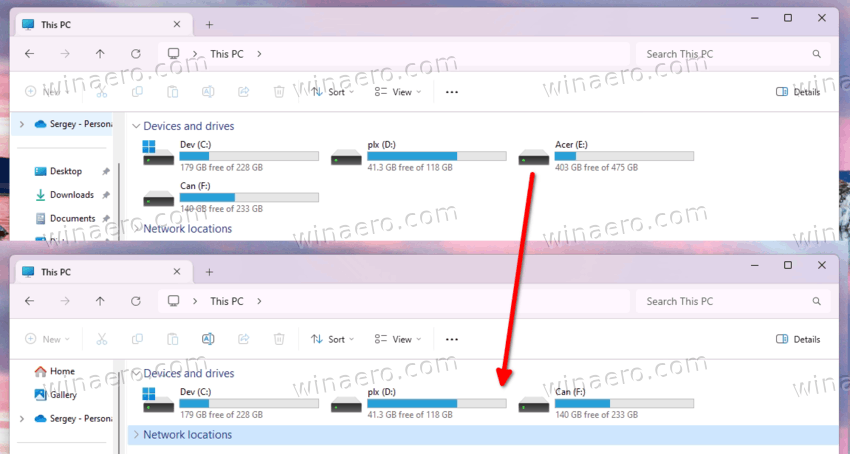
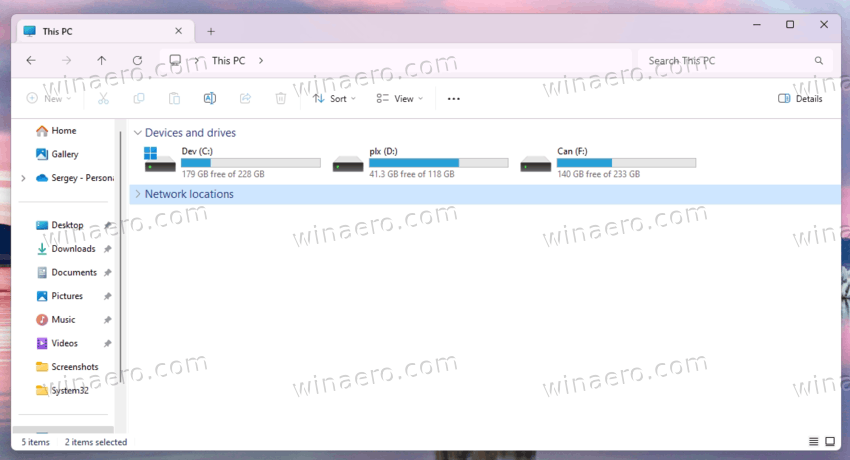
In Windows, you can hide specific drives in the This PC folder of File Explorer. This can be done with several methods, including a Registry tweak. Today, we'll see how it can be done.
Advertisеment
We will start with a special Registry tweak. With it, the specific drives will disappear from the This PC folder. But they will remain accessible for all users of your PC.
While a hidden drive won't appear in File Explorer, the user can type the full path to the folder or file on that drive in File Explorer's address bar to open it. The same applies to the Run dialog. Also, all installed apps will have access to the drive's contents. All built-in tools like Disk Management or Disk Defrag will be able to work with the drive.
Sign in as Administrator before proceeding. You will need to apply a special Registry tweak.
Hide a Drive in File Explorer
To hide a specific drive letter in File Explorer, do the following.
- Open the Registry Editor app.
- Go to the following Registry key:
HKEY_LOCAL_MACHINE\SOFTWARE\Microsoft\Windows\CurrentVersion\Policies\Explorer. Paste this path into regedit's address bar. - In the left pane, right-click the Explorer subkey, and select New > DWORD (32-bit) Value from the menu.
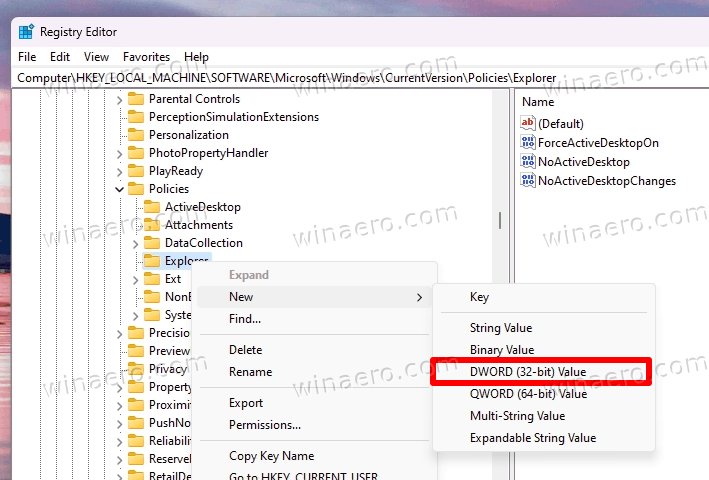
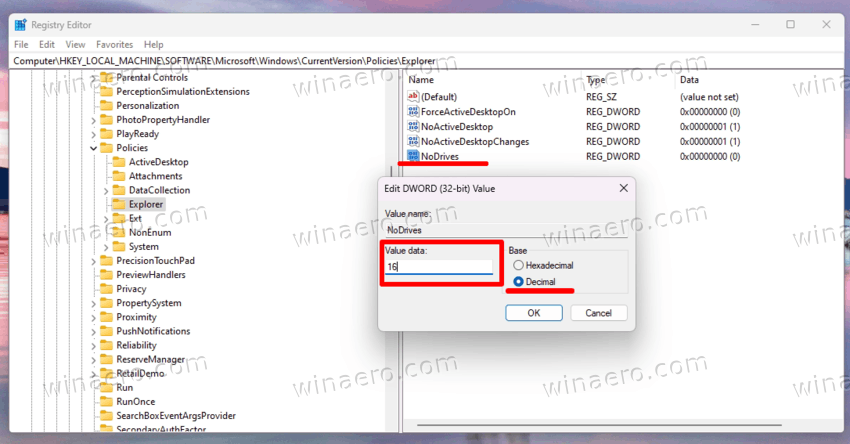
- Name the new value NoDrives and double-click it to open.
- To hide a single drive, set the NoDrives value data in decimals by using the formula: Each successive letter of the alphabet has a number multiplied by 2. The starting point is 1, so A=1, B=2, C=4, etc. In my case, I will set NoDrives to 16 to hide the E: drive.
- Restart the computer, and the drive will disappear from everywhere in File Explorer.
You are done!
Hide multiple drives at once
To hide multiple drives in a row, add up the values for the appropriate drive letters. Enter the calculated value in decimals. For example, to hide drives C and E, use the value data of 20 (4+16=20).
For you convenience, here is a reference table with values that match the drive letters.
| Drive Letter | Decimal Value Data |
|---|---|
| Show all drives | 0 |
| A | 1 |
| B | 2 |
| C | 4 |
| D | 8 |
| E | 16 |
| F | 32 |
| G | 64 |
| H | 128 |
| I | 256 |
| J | 512 |
| K | 1024 |
| L | 2048 |
| M | 4096 |
| N | 8192 |
| O | 16384 |
| P | 32768 |
| Q | 65536 |
| R | 131072 |
| S | 262144 |
| T | 524288 |
| U | 1048576 |
| V | 2097152 |
| W | 4194304 |
| X | 8388608 |
| Y | 16777216 |
| Z | 33554432 |
| Hide all drives | 67108863 |
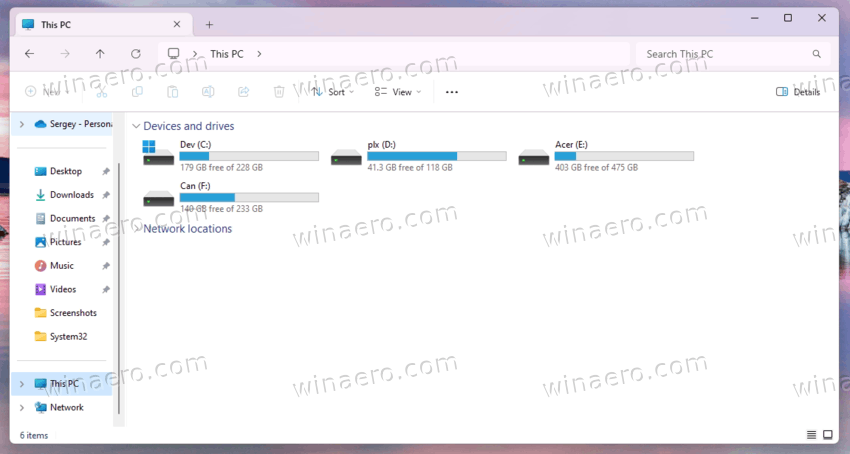
The Registry tweak simply hides the drive. In my case, the drive E: was visible prior to applying the change.
But after applying the tweak, it is hidden. It is not exposed in This PC, or anywhere in File Explorer.
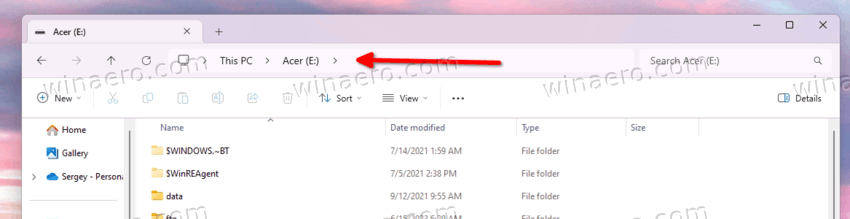
However, if you type the letter of the drive you have hid with the tweak into the File Explorer's address bar or into the Run dialog, it will open.
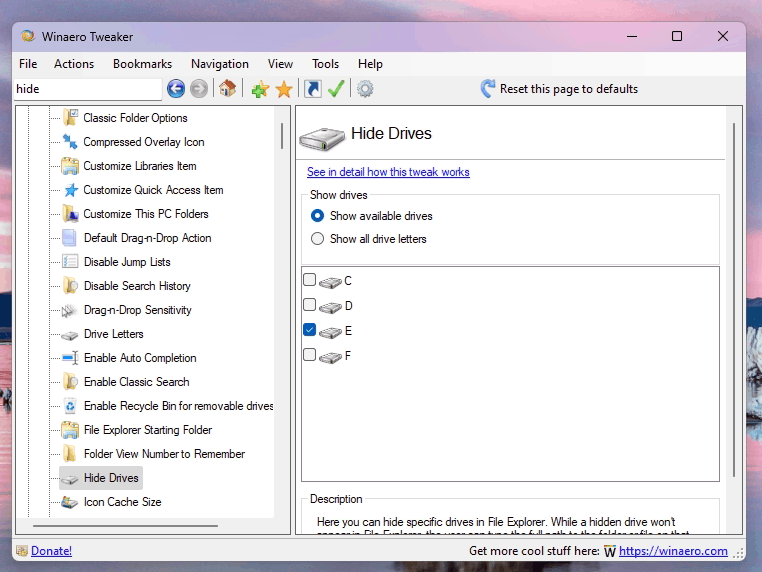
Using Winaero Tweaker
To save plenty of your time, you can use Winaero Tweaker. The app can hide any of your drives just with one click. Select drives you want to hide under File Explorer\Hide drives.
You can download Winaero Tweaker here: Download Winaero Tweaker
So, the reviewed method simply hides the drive, but allows accessing it by its path from any app. If it is not what you are trying to achieve, you can hide a drive by removing its letter in Disk Management.
Hide a Drive with Disk Management
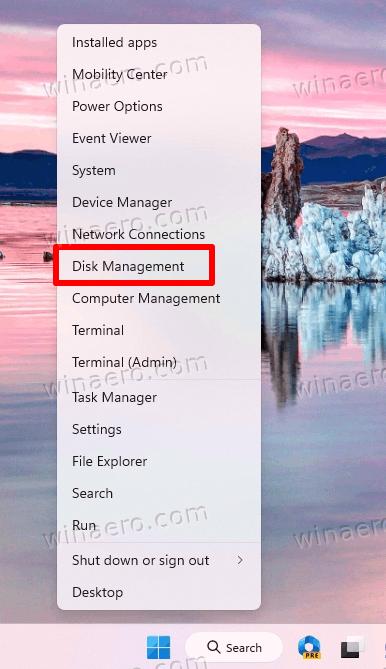
- Press Win + X and select Disk Management from the menu.
- In Disk Management, find the drive you want to hide, right-click it and select Change Drive Letter and Paths....
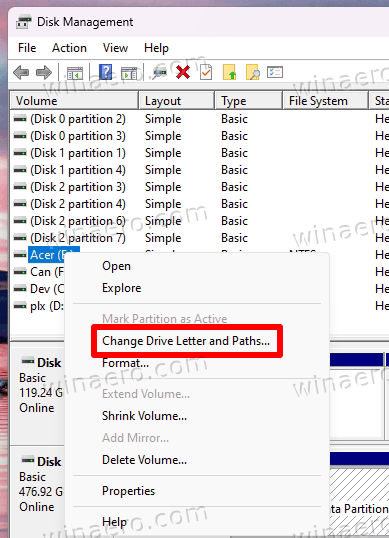
- In the next dialog, select the letter in the list, and click on the Remove button.
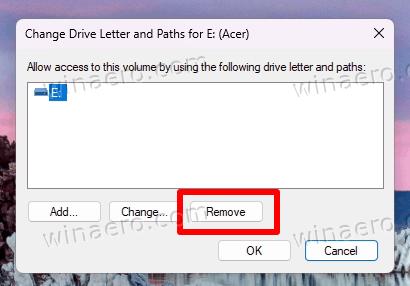
- Confirm the letter removal by clicking on Yes, and the drive will instantly disappear from File Explorer.
This way, most apps and inexperienced users won't be able to access your hidden partition. The same technique Microsoft is using for system and recovery partitions of Windows 11/10. The latter do not exposed anywhere unless you assign them letters manually.
Finally, there's an alternative method that applies to the DVD and CD drives. If you by a change have such a device in your computer or laptop, but never use it, you may want to hide it.
Hide a DVD or CD drive from This PC
These days, DVD or CD media find rare use among users. Most modern devices do not include drives for reading and writing them. So, in many cases the drive will just show it letter in the This PC folder, and occupy the space in your computer.
While you may have reason to keep the drive connected, its disk letter can be easily hidden from the This PC folder.
For relatively new DVD readers, you can try the "Disk Management" or the Registry tweak reviewed in two previous chapters of this tutorial. But in case if the CD drive is missing in Disk Management, you can go with two alternative methods.
Hide CD or DVD drive with Device Manager
To hide the legacy DVD or CD drive letter, do the following.
- Press Win + X and select Device Manager from the menu.
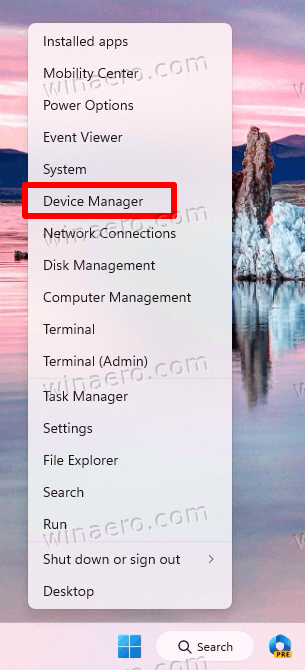
- Expand the DVD/CD-ROM Devices branch in the device list.
- Right-click your drive, and select Disable device.
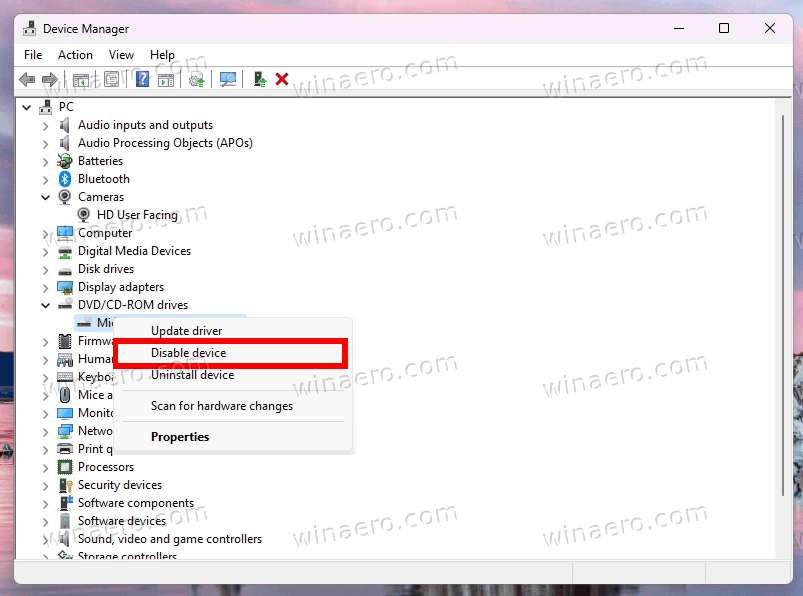
This will hide it from everywhere in the OS. The installed software will no longer detect it, and its drive letter will disappear from the This PC folder.
Alternatively, you can use a Registry tweak.
Using a Registry tweak
- Open the Registry Editor (Win + R >
regedit). - Navigate to the
HKEY_LOCAL_MACHINE\SYSTEM\CurrentControlSet\Services\cdromkey. - In the right pane, double-click the Start value and change its data to 4.
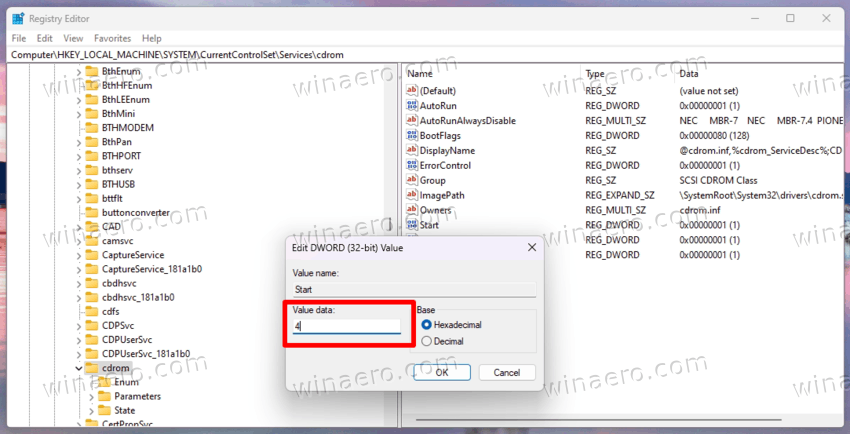
- Now, restart the computer.
This will stop the cdrom driver from loading, so it will not be detected by the operating system. This will hide your CD/DVD in File Explorer.
ℹ️ To undo the change, navigate to the same Registry key, and change the value data for Start to 1. After restarting the OS the cdrom driver will be active.
That's it.
Support us
Winaero greatly relies on your support. You can help the site keep bringing you interesting and useful content and software by using these options:

Скрыть диск в Windows 10 можно проще. Правой кнопкой мыши щелкаем по “этот компьютер”-открываем управление компьютером-переходим на вкладку “управление дисками”- выбираем интересующий нам диск- опять кликаем по нему-“изменить букву диска или путь к диску”- удаляем букву диска. И все…)))) Диск исчезает из проводника.Если нужно чтобы он снова отображался выполняем те же действия- только теперь добавляем букву диска. И диск снова отображается в проводнике.)))))