When Windows 10 is running low on free space on your disk storage, there are a number of ways to free up your drive space. Traditionally, the built-in Disk Cleanup tool (cleanmgr.exe) has been useful to remove temporary files, logs and Windows Update packages. With recent builds of Windows 10, Microsoft introduced a revamped Storage Sense feature which allows you to remove these files and more.
Advertisеment
The redundant files
When you do an in-place upgrade from a previous version of Windows, Windows 10 saves a lot of files from the earlier installed OS during the upgrade and fills your disk drive with files that you might never need again if your upgrade was successful. The reason setup saves these files is so that if something goes wrong during setup, it can safely rollback to the earlier version of Windows. However, if your upgrade was successful and you've got everything working perfectly, then there's no need to keep these files. For that purpose, Disk Cleanup (cleanmgr.exe) is a useful way to delete the redundant files.
If you are interested in learning more about the cleanmgr app's features and options, then refer to the following articles:
- Start Disk Cleanup With All Items Checked
- Clear Temp Directory on Startup with Disk Cleanup
- Add Cleanup Drive Context Menu in Windows 10
- Disk Cleanup Cleanmgr Command Line Arguments in Windows 10
- Create a Preset for Cleanmgr (Disk Cleanup)
Storage Sense
Storage Sense is a nice, modern addition to Disk Cleanup. It allows you to maintain certain folders and clean them up automatically. The Storage Sense feature can be found in Settings, under System -> Storage. We have reviewed how it can be used in our previous articles:
- Automatically Delete Windows.old folder in Windows 10
- How to Clear Downloads Folder Automatically in Windows 10
- How to Clear Temporary Files Automatically in Windows 10
Starting with Windows 10 Build 17063, Storage Sense has got some of the features which were exclusive to Disk Cleanup. It is possible to use it to remove Windows upgrade log files, system-created Windows Error Reporting Files, Windows Defender Antivirus, Thumbnails, Temporary Internet Files, Device driver packages, DirectX Shader Cache, Downloaded Program Files and Delivery Optimization Files. Here is how it can be done.
Free Up Drive Space in Windows 10
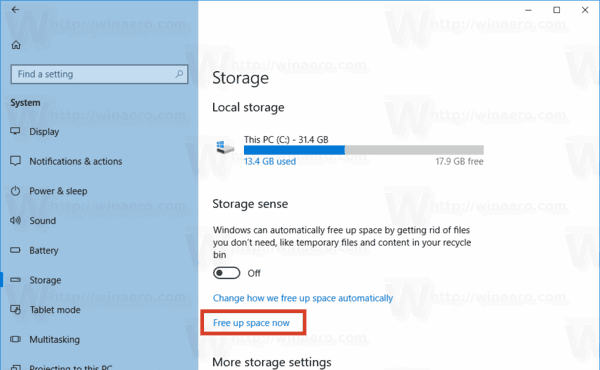
- Open Settings.
- Go to System - Storage.
- Click on the link Free up space now on the right under Storage Sense.
- On the next page, check the items you would like to remove and click on the Remove files button.
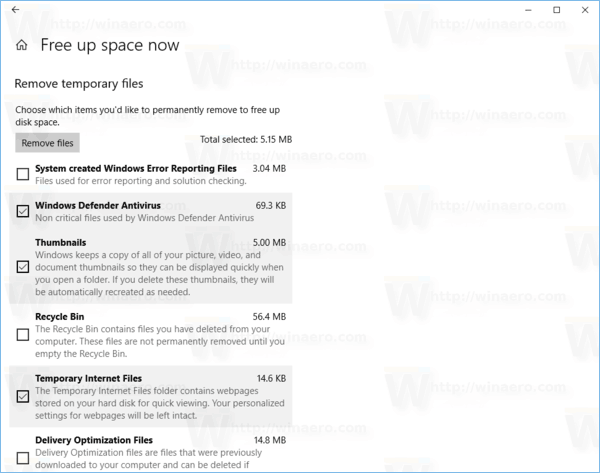
That's it! This will remove all the files you checked in the list.
It is obvious that the new feature replicates the functionality of the Disk Cleanup tool. As it has happened to many classic tools such as Windows Photo Viewer, Paint, and the Control Panel, Disk Cleanup might be removed one day from Windows 10. This move can be disappointing for old-school Windows users but as long as feature parity is properly maintained and all the functionality of the old Disk Cleanup tool carried over to Storage Sense, it's actually a good change.
There are many modern devices with a touch screen, stylus and pen. For owners of such devices, the updated Storage Sense feature is definitely more usable. It is perfectly adapted to finger input, looks better on HiDPI screens and can become the single tool to use instead of having to deal with two different apps to do the same thing on your PC.
Support us
Winaero greatly relies on your support. You can help the site keep bringing you interesting and useful content and software by using these options:

Is there a way to open the Free up space now directly instead of going through storage sense?