How to Encrypt a VHD or VHDX File with BitLocker in Windows 10
Windows 10 allows you to create a VHD file and encrypt it with BitLocker, so your data inside that VHD file will be safely protected. You will be prompted to unlock it with a password. It will encrypt the new files automatically when you copy them to the VHD. Here's how to configure this useful feature.
Advertisеment
BitLocker was first introduced in Windows Vista and still exists in Windows 10. It was implemented exclusively for Windows and has no official support in alternative operating systems. BitLocker can utilize your PC's Trusted Platform Module (TPM) to store its encryption key secrets. In modern versions of Windows such as Windows 8.1 and Windows 10, BitLocker supports hardware-accelerated encryption if certain requirements are met (the drive has to support it, Secure Boot must be on and many other requirements). Without hardware encryption, BitLocker switches to software-based encryption so there is a dip in your drive's performance.
Note: In Windows 10, BitLocker Drive Encryption is only available in the Pro, Enterprise, and Education editions.
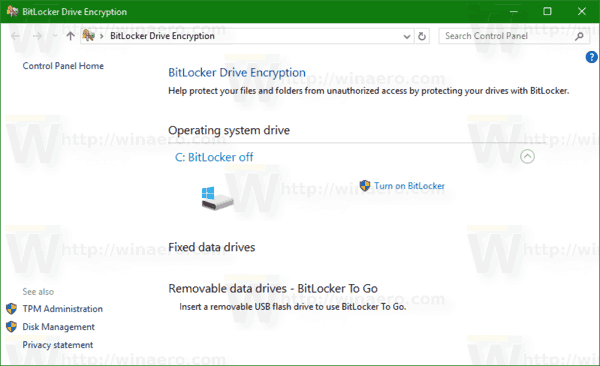
VHD File Encryption with BitLocker
Besides physical drive partitions, you can use BitLocker to encrypt a mounted VHD file. After that, you can use it as a portable encrypted file container. It will be possible to open it on any Windows 10 PC after providing the drive password.
If you encrypt a VHD with BitLocker, all files you copy on its partition will be automatically encrypted. However, keep in mind that when you copy a file outside of the drive, it will decrypted and appear unencrypted on the destination partition.
Let's see how to encrypt a VHD file in Windows 10. You need to sign in as Administrator before proceeding.
To Encrypt a VHD or VHDX File with BitLocker in Windows 10,
- Create a new VHD file if you don't have one.
- Mount it to the system.
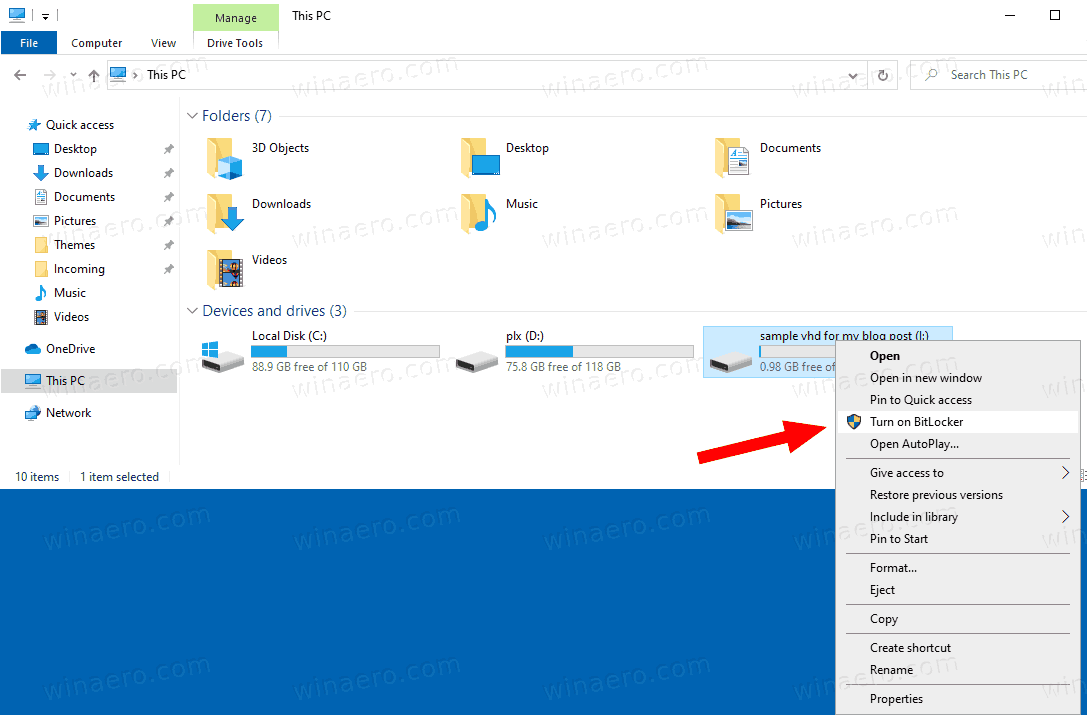
- Open This PC in File Explorer.
- Right-click on the mounted VHD file partition.
- Select Turn on BitLocker from the context menu.
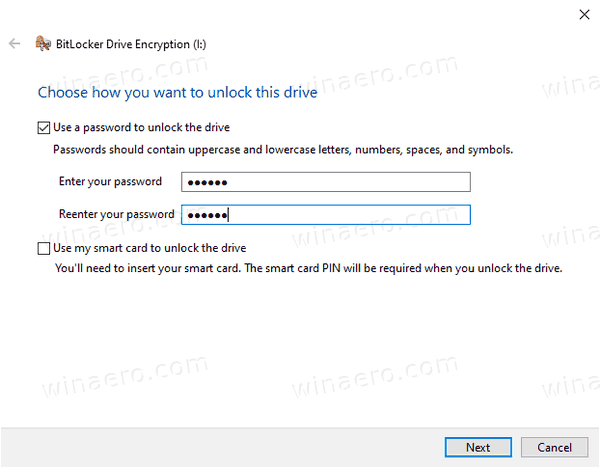
- In the next dialog, select Use a password to unlock the drive, and specify the desired password.
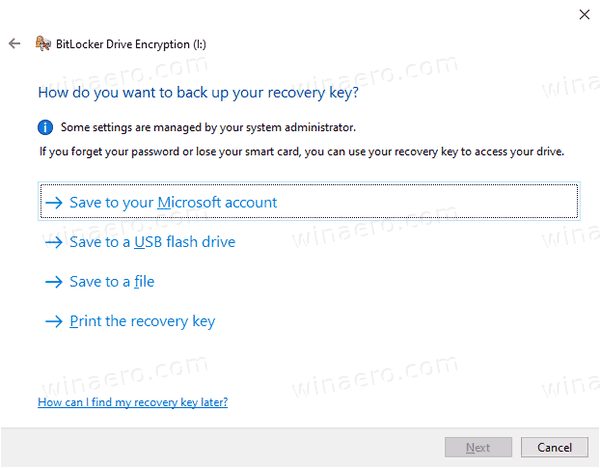
- On the next page, choose how to store a BitLocker recovery key, e.g. store it on a USB drive.
- On the next page, select Encrypt entire drive.

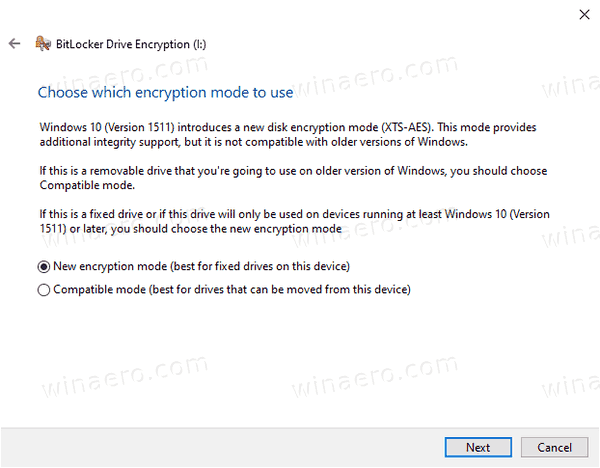
- On the next page, select New encryption mode or Compatible mode. The second one uses AES-CBC 128-bit encryption and can be used in Windows 7 and Windows 8. New encryption uses XTS-AES 128-bit and requires Windows 10.
- On the last page, click on Start encrypting.
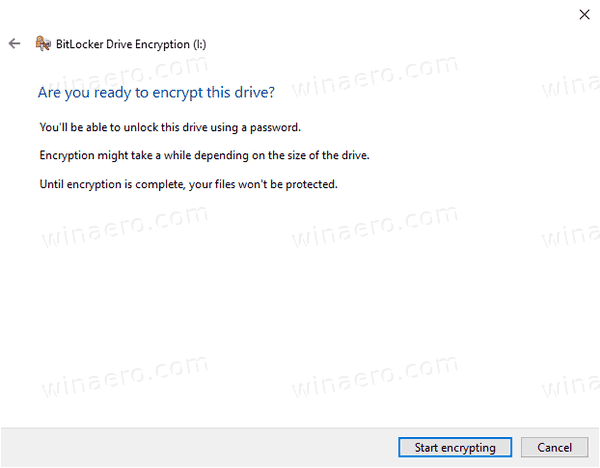
You are done!
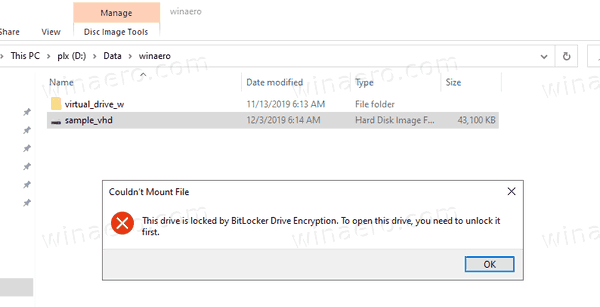
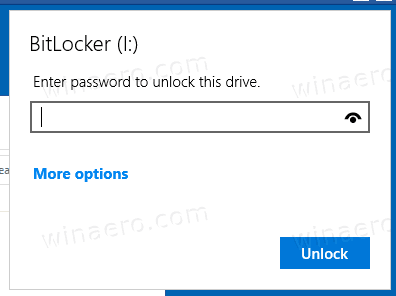
Next time you mount the VHD file, you'll be prompted to enter your password. This works even with the VHD auto-mount routine!

That's it.
Support us
Winaero greatly relies on your support. You can help the site keep bringing you interesting and useful content and software by using these options:
