It is a well known fact that various software can wake your Windows 10 PC from sleep. For example, if an update is scheduled to be installed, or a special task in the Task Scheduler app is defined with the option "Wake the computer to run this task", then the computer will be turned on automatically. This is possible thanks to wake timers.
Advertisеment
Earlier, we had learned how to find active wake timers in Windows 10. For reference, see the following article: Find Wake Timers in Windows 10. Today, we'll see how to disable them and prevent wake timers from waking your Windows 10 device.
To disable wake timers in Windows 10, you need to open advanced settings of your current power plan. Press Win + R shortcut keys together on your keyboard and enter the following in the Run box:
control.exe powercfg.cpl,,3
Press the Enter key to open them. See the article How to open advanced settings of a power plan directly in Windows 10.

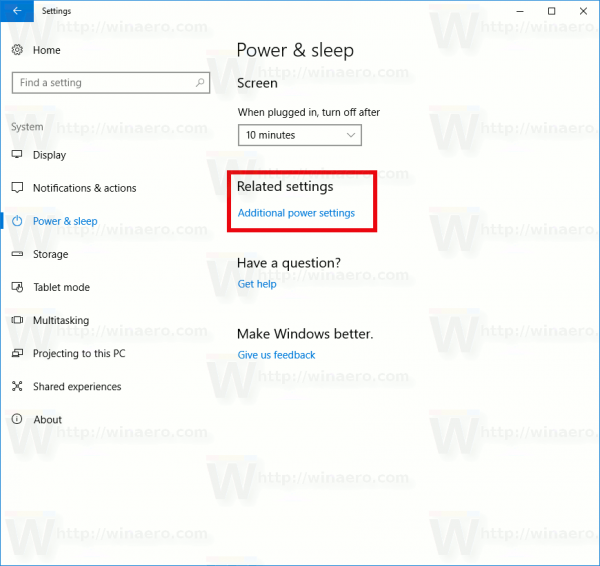
Tip: You can open advanced power plan options from Settings. Go to Settings - System - Power and sleep. On the right, click "Additional power settings" under Related settings.

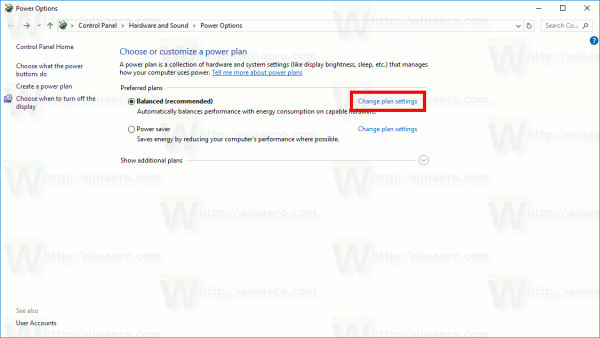
This will open the classic Control Panel applet. There, you have to click "Change plan settings" as shown in the next screenshot.

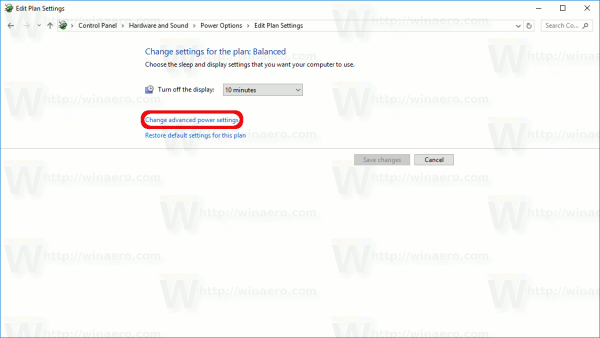
On the next page, you need to click on "Change advanced power settings".
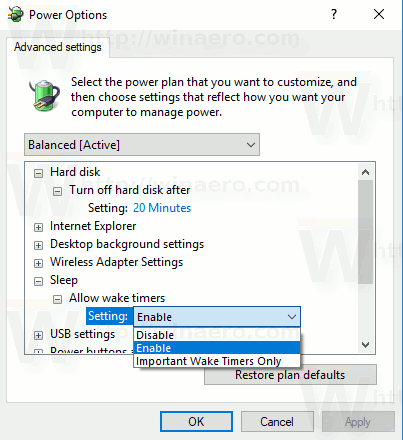
The same dialog will be opened.
Under Sleep, configure the option "Allow wake timers". It can be configured individually when on battery and when Plugged in. The default value is Enabled.

You can set the option to Disabled to disable all wake timers.
The value "Important wake timers" represents a group of wake timers in Windows 10 that includes timers responsible for reboots after installed updates and drivers. You can keep them to allow system maintenance tasks.
Pick the desired option and you are done.
Support us
Winaero greatly relies on your support. You can help the site keep bringing you interesting and useful content and software by using these options:

Sergey, is there a way to make changes via registry?