In today's guide, we will review how to disable the Recall feature in Windows 11. It has become available starting in version 24H2 as part of Microsoft's AI initiative. The Redmond firm is actively adding artificial intelligence assistance to the operating system and inbox apps. Recall is one of them, which tracks everything you do, shows a timeline, and allows you to return to your past work with one click.
Advertisеment
Recall captures screenshots at regular intervals and stores them exclusively on the local device. The integrated Copilot AI agent processes these images to recognize and index on-screen content, including text from applications, messages, and web pages.
This enables users to retrieve previously viewed information through keyword searches or natural language voice commands. Microsoft states that all data remains on the device and does not transmit to cloud services.
ℹ️ Finally, Recall requires hardware that satisfies stringent performance and security criteria. Your device must be a Copilot+PC equipped with an integrated neural processing unit (NPU) that delivers a minimum performance of 40 TOPs. It must have at least 16 GB of RAM and a storage drive of 256 GB or more, with no less than 50 GB of free space reserved for Recall. Additionally, you must enable either Device Encryption or BitLocker, and configure Windows Hello with at least one biometric authentication method.
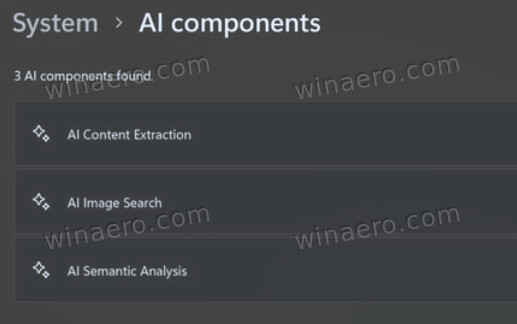
The system installs dedicated AI components such as AI Content Extraction, AI Image Search, and AI Semantic Analysis. Users retain full control over data capture and retention through built-in settings and administrative policies.
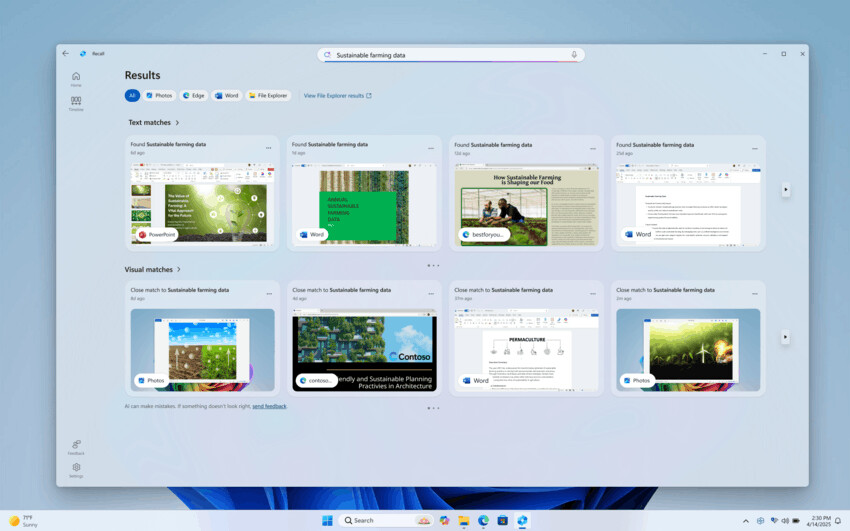
Users can open the Recall app via the taskbar icon or the Win + J shortcut. The Recall app displays a timeline of screenshots that the user can scroll through or search in it using search terms in the native language.
How to Enable Recall on Windows 11
As of the moment of this writing, Recall is disabled in by default in Windows 11 25H2. Moreover, it is a Feature-on-Demand, and is not installed. So, as the first step, you can check its status with PowerShell.
Step 1. Check if you have Recall installed
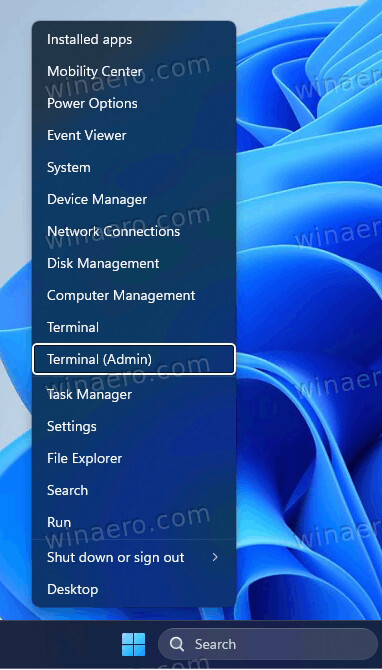
- Right-click the Start menu button in the taskbar.
- Select Terminal (Admin) from the opened menu.
- Type
Get-WindowsOptionalFeature -Online -FeatureName Recalland press Enter to run the command.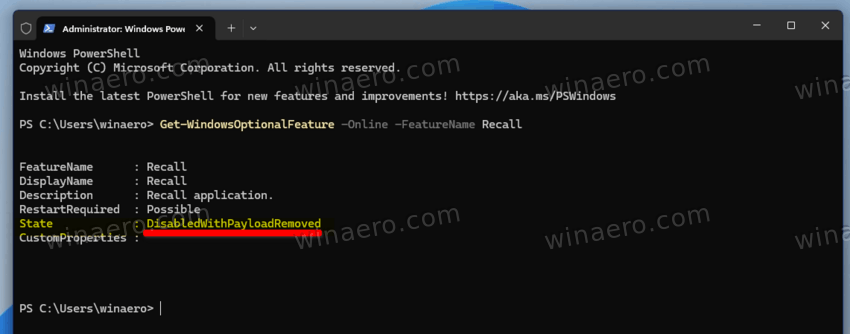
- Check out the output. The State line will tell if you have Recall enabled. In the picture above, it is not installed.
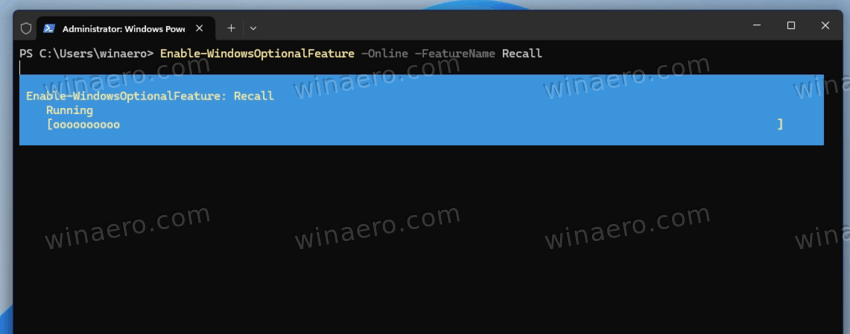
Using PowerShell, it is easy to add the feature to your current setup. Here's one simple command for that.
Step 2. Install and Enable Recall
- Open Terminal as Administrator (Win + X > select Terminal(Admin)).
- Type the following command:
Enable-WindowsOptionalFeature -Online -FeatureName Recall. - Press Enter and wait for the command to finish.
- Once prompted to restart the computer, press Y to confirm the operation. Your device may restart several times.
- The Recall feature is now installed. You will find its traces in Settings > AI Components.
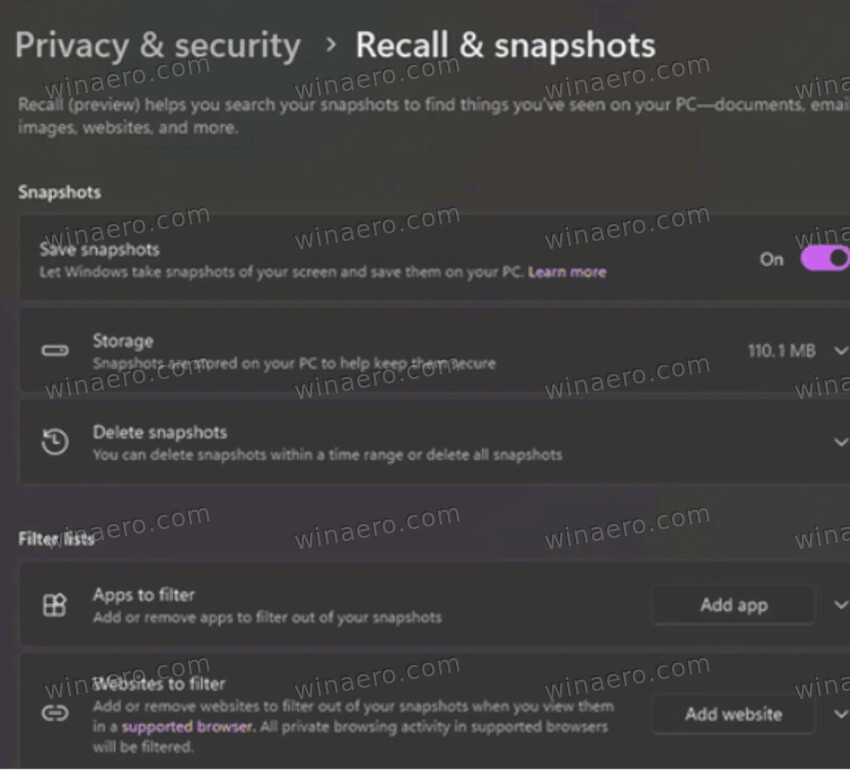
- Finally, to enable Recall, navigate to Settings > Privacy & Security > Recall & Snapshots. Turn on the Save snapshots option.
That's it! From now on, you can enabled Recall. Pressing Win + J will bring you its main interface.
You may be to a kind of a person that falls in love to Recall. Or could have it enabled for curiosity, and now you want to disable it. Here are the steps for you.
Disable Recall in Windows 11
- Press Win + I to open the Settings app (or you can use any other method you like).
- Click on the Privacy & Security in the left pane.
- Now, find Recall & Snapshots on the right and click it.
- Finally, toggle off the Save snapshots switch.
You have successfully disabled the Recall tracking.
However, it is not the only option. Microsoft has packed the OS with a number of Group Policy options. Setting them will effectively prevent users from enabling the feature.
Traditionally, you can apply the policy using a Registry tweak, or with gpedit, the built-in Local Group Policy editor app. However, the latter is missing in Home edition of Windows 11. So the Registry tweak is more universal solution, but we will review both.
Disable Recall in Group Policy
Follow these steps to manage the Recall feature through the Local Group Policy Editor.
- Open the Local Group Policy Editor by running
gpedit.msc. - In the console tree, expand Computer Configuration.
- Navigate to Administrative Templates > Windows Components > Windows AI.
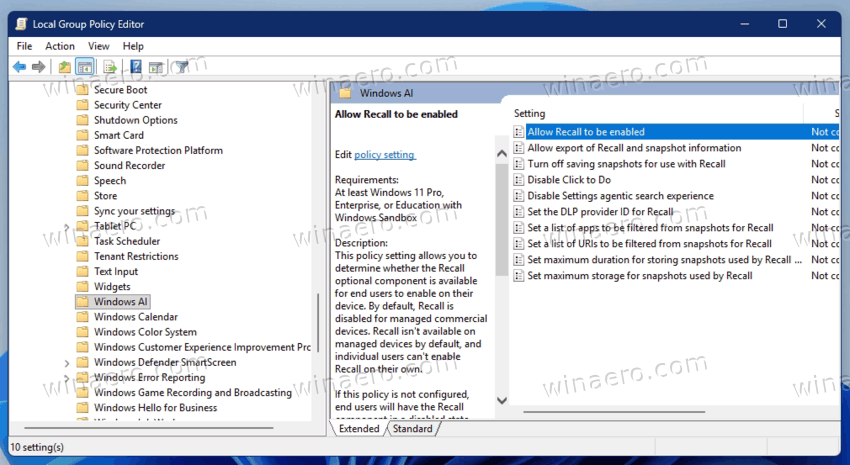
- Locate the policy setting named “Allow Recall to be enabled.”
- Double-click this policy to open its properties.
- Select the Disabled option to turn off the Recall feature.
- Click Apply, then click OK to save the configuration.
After completing these steps, the system disables Recall. Here are the details.
How it works
When this policy is set to Disabled, the system deactivates the Recall component and removes all associated files from the device. Any snapshots previously stored locally will be permanently deleted upon applying the policy. The policy takes effect following the next Group Policy refresh or after a system restart.
Alternatively, you can activate the policy with a Registry tweak. Here are the detailed steps.
AllowRecallEnablement Group Policy Tweak via Registry
Here's how to disable Recall Feature via Registry by setting the AllowRecallEnablement value. Do the following.
Method 1: Using Windows Terminal (Command Prompt or PowerShell)
- Open Windows Terminal with administrator privileges.
- Type or copy-paste the given command:
reg add HKLM\SOFTWARE\Policies\Microsoft\Windows\WindowsAI /v AllowRecallEnablement /t REG_DWORD /d 0 /f.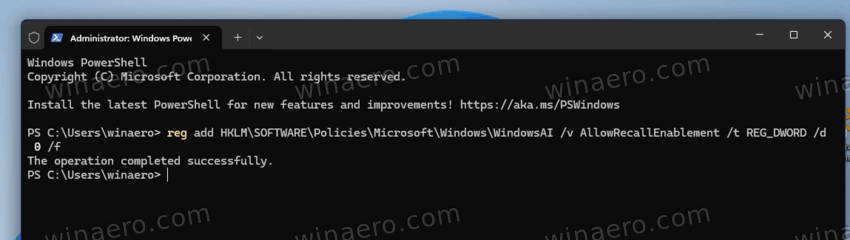
- Press Enter to execute the command.
- The system will confirm successful change of the registry value.
That's it. This is the fastest method to apply the Registry modification.
Method 2: Manual Editing with Registry Editor (regedit)
- Press Win + R, type
regedit, and press Enter. - When prompted by User Account Control, click Yes to grant administrator access.
- Navigate to the following path:
HKEY_LOCAL_MACHINE\SOFTWARE\Policies\Microsoft\Windows\WindowsAI - If the WindowsAI key does not exist, right-click the Windows key, select New > Key, and name it
WindowsAI. - Right-click in the right pane, select New > DWORD (32-bit) Value, and name it
AllowRecallEnablement.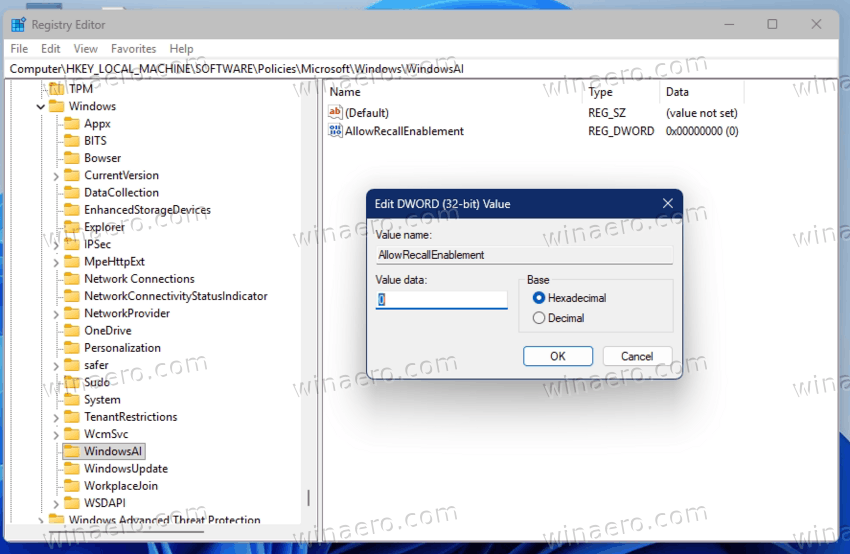
- Leave its data
0.
That's it.
Method 3: Using a .REG File
- Open a text editor, say Notepad.
- Copy and paste the following content into the file:
Windows Registry Editor Version 5.00

[HKEY_LOCAL_MACHINE\SOFTWARE\Policies\Microsoft\Windows\WindowsAI]
"AllowRecallEnablement"=dword:00000000
- Save the file with a
.regextension, for exampleDisableRecall.reg.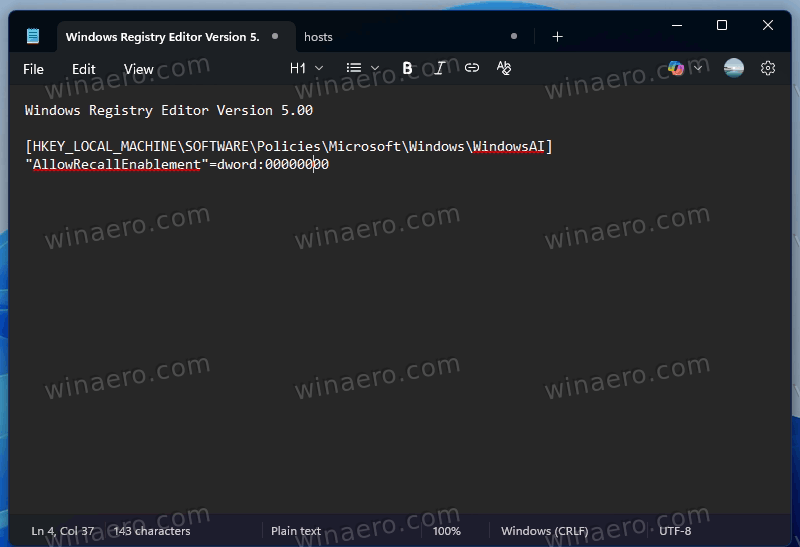
- Double-click the saved
.regfile and confirm the prompt to apply the changes to the registry.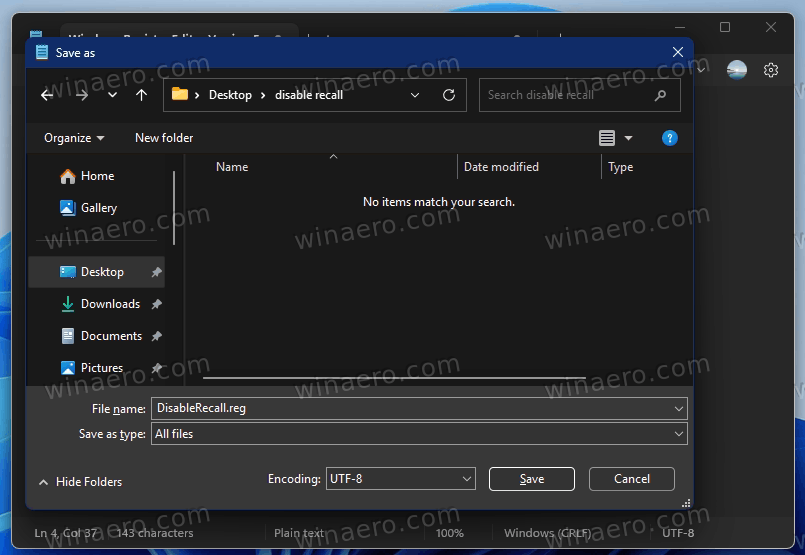
Revert Recall Feature Policy Changes
To undo the change introduced by the Registry modification, do the following.
Method 1: Using Windows Terminal (Command Prompt or PowerShell)
- Open the Terminal app with administrator privileges.
- Enter the following command to delete the registry value:
reg delete HKLM\SOFTWARE\Policies\Microsoft\Windows\WindowsAI /v AllowRecallEnablement /f.
- Press Enter to execute the command.
- The system will confirm successful deletion of the registry value.
Method 2: Using Registry Editor (regedit)
- Press Win + R, type
regedit, and press Enter. - When prompted by User Account Control, click Yes to grant administrator access.
- Navigate to:
HKEY_LOCAL_MACHINE\SOFTWARE\Policies\Microsoft\Windows\WindowsAI. - In the right pane, locate the AllowRecallEnablement entry.
- Right-click the entry and select Delete.
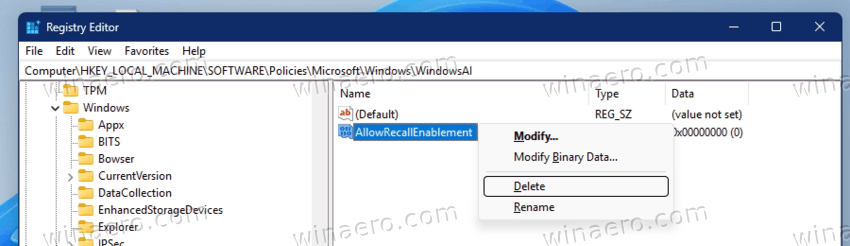
- Confirm the deletion if prompted.
Method 3: Using a .REG File to Remove the Value
- Open a text editor such as Notepad.
- Copy and paste the following content:
Windows Registry Editor Version 5.00

[HKEY_LOCAL_MACHINE\SOFTWARE\Policies\Microsoft\Windows\WindowsAI]
"AllowRecallEnablement"=-
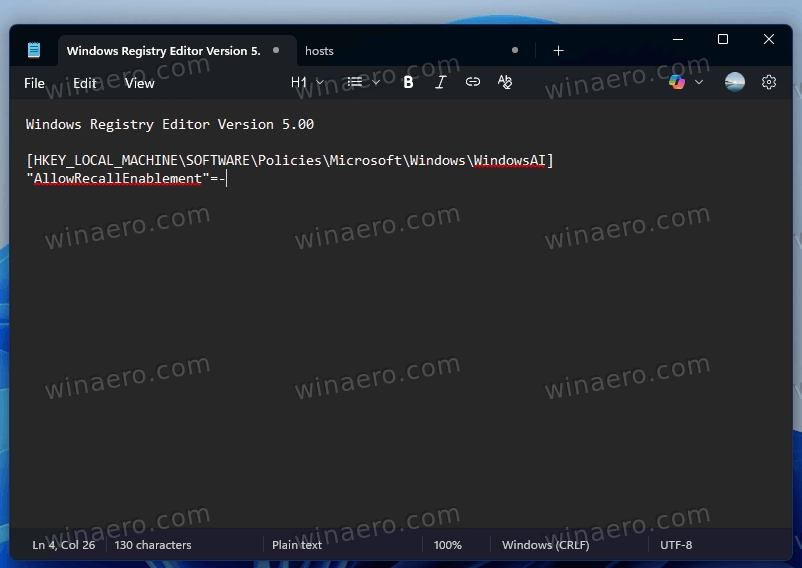
- Save the file with a
.regextension, for exampleRemoveRecallPolicy.reg.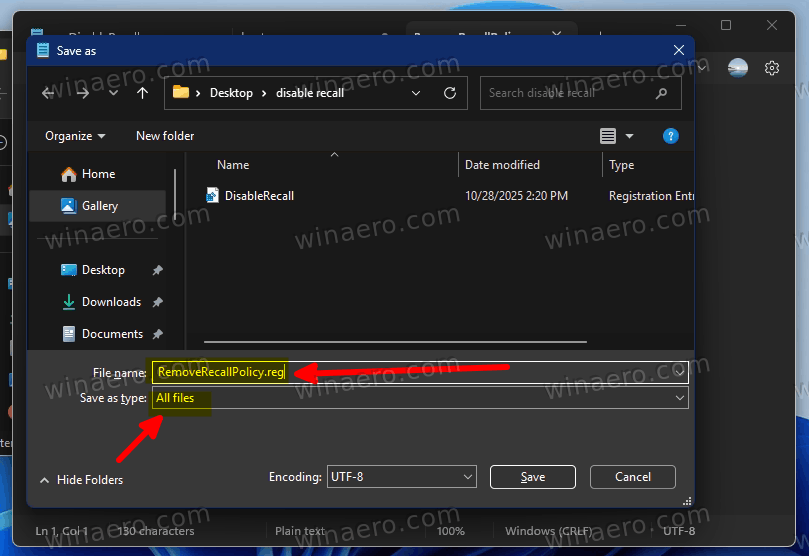
- Double-click the file and confirm the prompt to apply the change.
Ready-made Registry Files
For your convenience, and to save your time, I have created the two ready-to-use REG files. We have reviewed their contents in previous chapters. Having them under your fingertips will allow changing the policy on demand. To get the files, do the following.
- Click ⬇️ this link ⬇️ to download the ZIP archive containing two REG files.
- Extract the downloaded file to any folder of your choice. Your Desktop in Windows 11 will do.
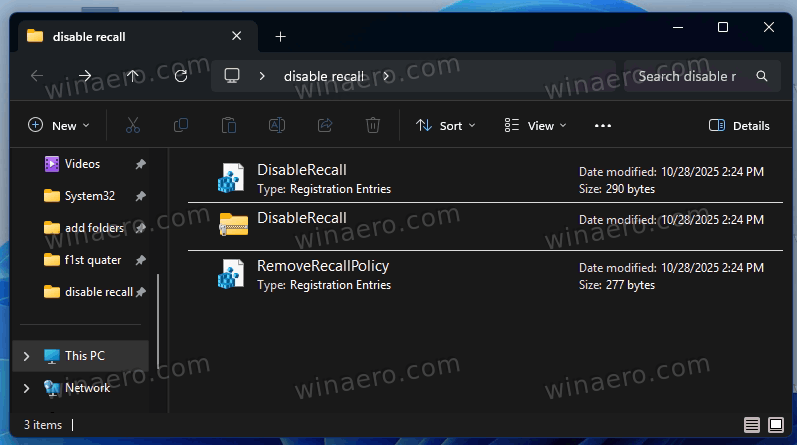
- To disable Recall, double-click the
DisableRecall.regfile and confirm the prompt to apply the change. - Alternatively, to re-enable Recall (revert the policy), open the
RemoveRecallPolicy.regfile. - Now, confirm the User Account Prompt by clicking Yes.
- Finally, click Yes in the Registry Editor. Now you have successfully applied the REG file.
It is also worth mentioning that you can uninstall Recall from Windows 11. This can be done with either PowerShell or DISM. Let's learn more about these methods.
How to Uninstall Recall
Run the following commands to remove Recall from Windows 11. Note that both commands require administrator privileges.
Method 1: Uninstall Recall Using Dism
- Press Win + X and select Windows Terminal (Admin). If prompted by User Account Control, click Yes to continue.
- Terminal will open with elevated privileges. By default, it launches a PowerShell tab.
- To use the DISM command, switch to a Command Prompt tab by pressing Ctrl + Shift + 2.
- Now, type the following command and press Enter:
DISM /Online /Disable-Feature /FeatureName:"Recall".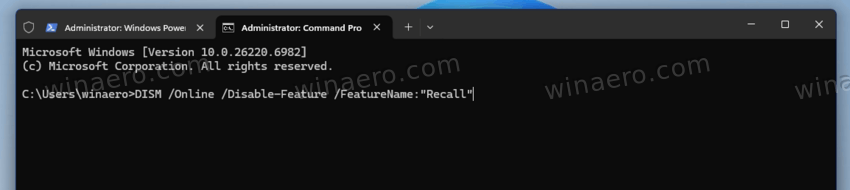
- Wait for the operation to complete. The system may prompt for a restart, so agree.
That's it.
Microsoft likely considers DISM a legacy component. Its modern alternative are appropriate PowerShell cmdlets. You can use them as follows.
Method 2: Remove the Recall component from PowerShell
- Open Terminal with elevated privileges.
- By default, it launches a PowerShell tab. If not, switch to the PowerShell with the Ctrl + Shift + 1 hotkey.
- Now, type or copy-paste the following PowerShell command, and hit Enter to execute it:
Disable-WindowsOptionalFeature -Online -FeatureName Recall -Remove.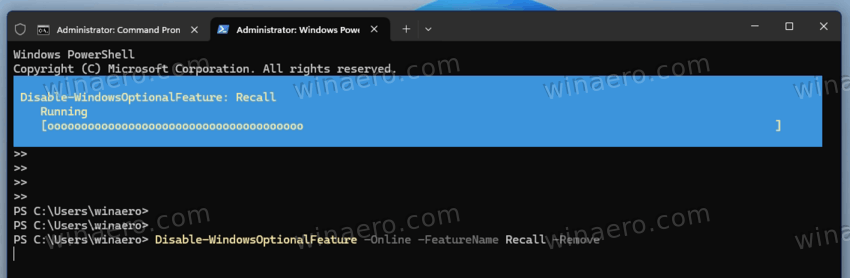
- Allow the command to finish processing. This step removes the Recall feature files from the system.
- Restart the computer when the command complete successfully to finalize the removal.
Notes
These commands permanently uninstall the Recall feature. Reinstallation requires enabling the feature again through Windows Features or system updates, if available.
That's it!
Support us
Winaero greatly relies on your support. You can help the site keep bringing you interesting and useful content and software by using these options:
