As you may already know, Windows 10 includes the ability to automatically delete files in your Recycle bin, delete temporary files, and files in the Downloads folder to free up disk space. Starting with Windows 10 version 1809, the ability to remove the contents of the Downloads folder is added to the Storage Sense feature along with the classic Disk Cleanup tool (cleanmgr.exe).
Advertisеment
The appropriate option became available in Windows 10 build 17763 and above. The option can be found under Storage Sense in Settings.
Storage Sense
Storage Sense is a nice, modern addition to Disk Cleanup. It allows you to maintain certain folders by preventing them from getting too large and clean them up automatically. The Storage Sense feature can be found in Settings, under System -> Storage. We have reviewed how it can be used in our previous articles:
- Automatically Delete Windows.old folder in Windows 10
- How to Clear Downloads Folder Automatically in Windows 10
- How to Clear Temporary Files Automatically in Windows 10
Storage Sense can be used to remove Windows upgrade log files, system-created Windows Error Reporting Files, Windows Defender Antivirus temporary files, Thumbnails, Temporary Internet Files, Device driver packages, DirectX Shader Cache, Downloaded Program Files and Delivery Optimization Files.
To clear the Downloads folder with Storage Sense in Windows 10, do the following.
- Open Settings.
- Go to System - Storage.
- Click on the link Free up space now on the right under Storage Sense.
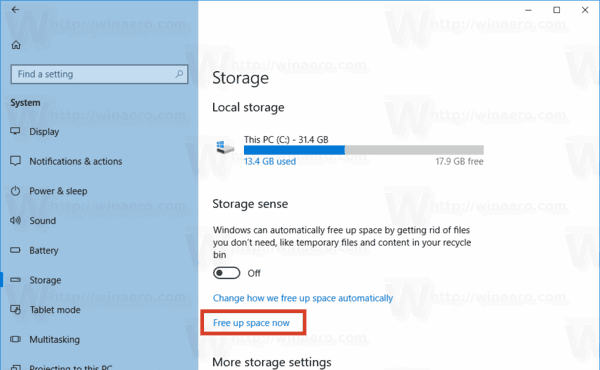
- On the next page, turn on the option Downloads.
- Click on the button Remove files.
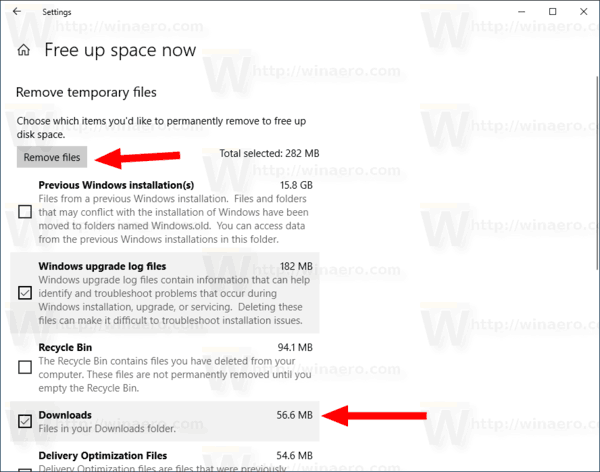
You are done.
Also, the Disk Cleanup tool (cleanmgr) has got the same option. Note that it is deprecated and Microsoft now recommends to use Storage Sense instead.
Using cleanmgr.exe
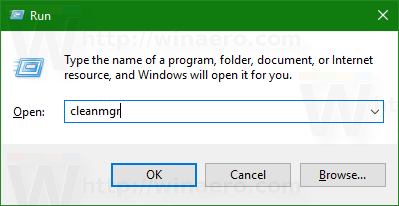
- Press Win + R shortcut keys together on the keyboard to open the Run dialog.
Tip: See the ultimate list of all Windows keyboard shortcuts with Win keys. - Type the following in the Run box:
cleanmgr
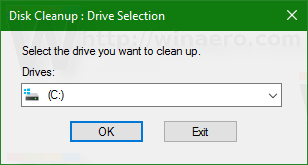
- Select your system drive:
- Turn on the Downloads option and click on the OK button.
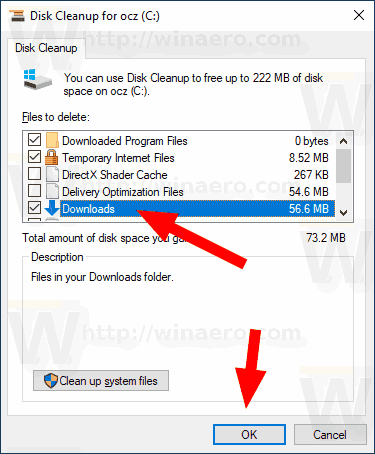
That's it.
Tip: You might be interested in learning more about the cleanmgr app's features and options. Refer to the following articles:
- Start Disk Cleanup With All Items Checked
- Clear Temp Directory on Startup with Disk Cleanup
- Add Cleanup Drive Context Menu in Windows 10
- Disk Cleanup Cleanmgr Command Line Arguments in Windows 10
- Create a Preset for Cleanmgr (Disk Cleanup)
Support us
Winaero greatly relies on your support. You can help the site keep bringing you interesting and useful content and software by using these options:

I don’t see any way this could backfire or this being the source problem of recent 1809 failed rollout which resulted in lost files for many users.