How to Change Turn Off Display After Time in Windows 10
In Windows 10, you can specify for how long your computer remains inactive before the connected monitor is automatically turned off. If you have not changed the default power management settings, the display will be turned off after 10 minutes. Here is how to change these settings.
Advertisеment
Before you continue, you might want to read about unlocking the hidden display off timeout for the Lock screen in Windows 10. This will allow you to reduce the period when your display turns off after locking.
There are a number of methods you can use to set the time your computer remains inactive before the connected display will be automatically turned off. This option applies to all displays connected to your PC. You can use either Settings, the classic Control Panel, or the console 'powercfg' tool.
To Change Turn Off Display After Time in Windows 10,
- Open the Settings app.
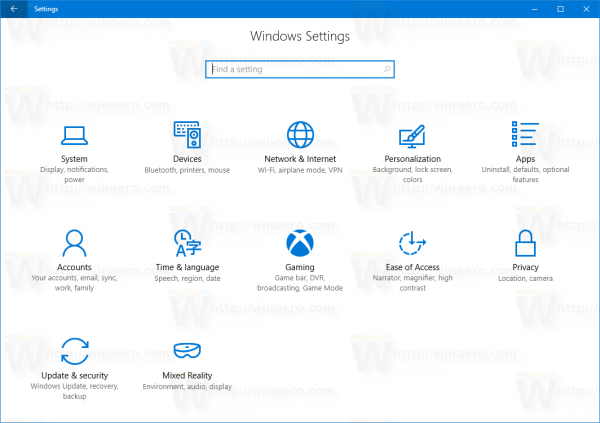
- Go to System > Power & sleep.
- On the right, specify the number of minutes after which the display turns off.
- On laptops, you can set this parameter individually for battery power, and when plugged in.
You are done.
Change Turn Off Display After Time using Control Panel
- Open the classic Control Panel.
- Go to Control Panel\Hardware and Sound\Power Options.
- Click on the link "Change plan settings".
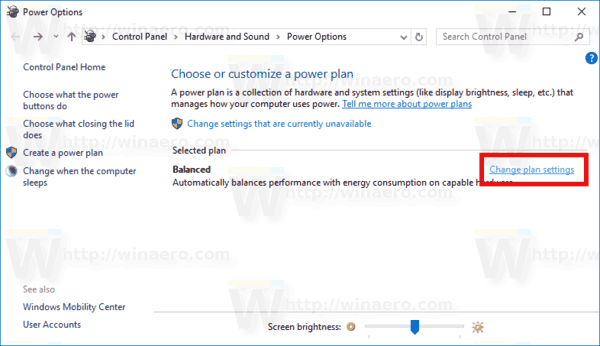
- Click on the link "Change settings that are currently unavailable".
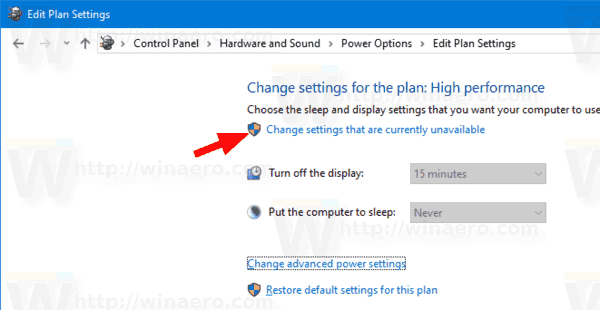
- Next to Turn off the display, select the number of minutes after which the display turns off,and click on Save changes.
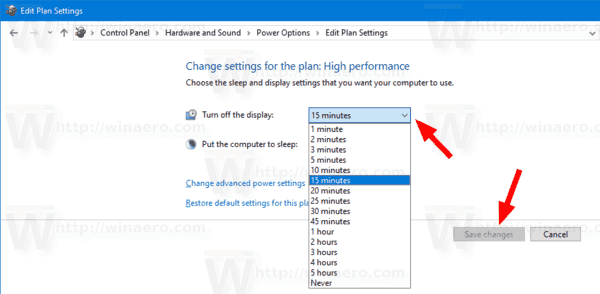
You are done.
Change Turn Off Display After Time with Advanced Power Plan Settings
- Open advanced power options.
- In the drop-down list, select the power plan you want to change the option for.
- Expand Display and Turn off display after.
- Specify the number of minutes after which the display turns off.
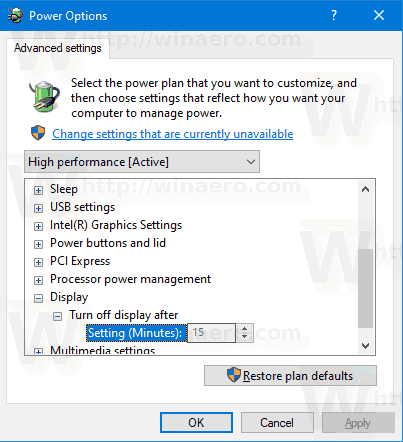
- On a laptop, you can set this number separately for battery power, and when plugged in.
You are done.
Change Turn Off Display After Time In Command Prompt
You can use powercfg, a built-in console tool that allows managing power options from the command prompt. Powercfg.exe exists in Windows since Windows XP. Using the options provided by that app it is possible to manage various power settings of the operating system.
To change the Turn Off Display After time in the command prompt, do the following.
- Open a new command prompt
- Type the following command:
powercfg /SETDCVALUEINDEX SCHEME_CURRENT 7516b95f-f776-4464-8c53-06167f40cc99 3c0bc021-c8a8-4e07-a973-6b14cbcb2b7e <seconds>. This will set the number of seconds after which the display turns off when on battery.
- The following command does the same when plugged in:
powercfg /SETACVALUEINDEX SCHEME_CURRENT 7516b95f-f776-4464-8c53-06167f40cc99 3c0bc021-c8a8-4e07-a973-6b14cbcb2b7e <seconds>. - Substitute <seconds> in the commands above with the desired value.
Related articles:
- How to lock Windows 10 and turn off the display with one click
- Unlock the hidden display off timeout for the Lock screen in Windows 10
- Add Turn Off Display Context Menu in Windows 10
- Change Display Resolution in Windows 10
- Change Display Refresh Rate in Windows 10
Support us
Winaero greatly relies on your support. You can help the site keep bringing you interesting and useful content and software by using these options:
