In Windows 10, there are a number of ways to set your IP address to a static value for network diagnostics or if you need to form a network with another device without a DHCP server, via an Ethernet crossover cable. Let's see how to set a static IP address on Windows 10. Let's see how to set a static IP address on Windows 10.
Advertisеment
An Internet Protocol address is a sequence of numbers (and letters in case of IPv6) for each network adapter installed in your device. It allows network devices to find and communicate with each other. Without every device in a network having its own unique IP address, it will not be able to establish a network at all.
Windows 10 supports two types of IP addresses.
A dynamic IP address is assigned by the DHCP server. Usually it is your router, but it can be a dedicated Linux PC or a computer running Windows Server.
A static IP address is usually specified manually by the user. Such configuration is traditionally used in small networks, where the DHCP server is not available and often is not required.
In Windows 10, there are a number of ways set a static IP address.
Update: Starting in Windows 10 version 1903, you can use Settings to set a static IP address for your Windows 10 device.
Set a static IP address in Windows 10
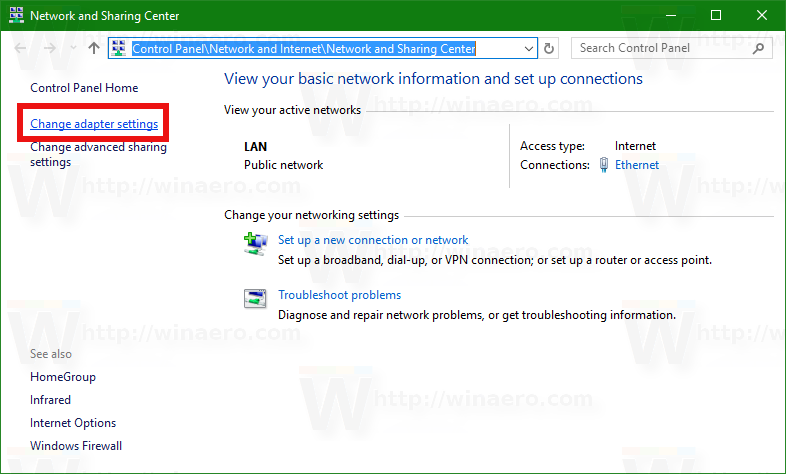
- Open Control Panel and go to Control Panel\Network and Internet\Network and Sharing Center.
- On the left, click Change adapter settings.

- The network connections folder will open.
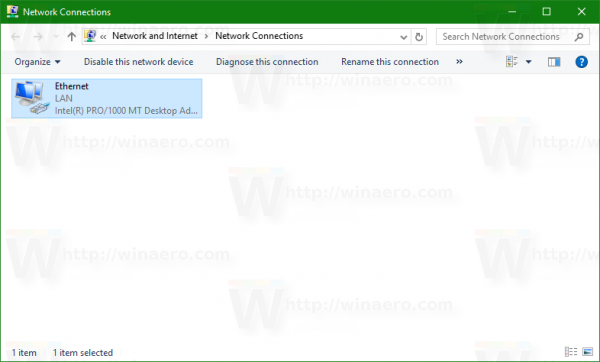 Double click the desired network connection to open its properties.
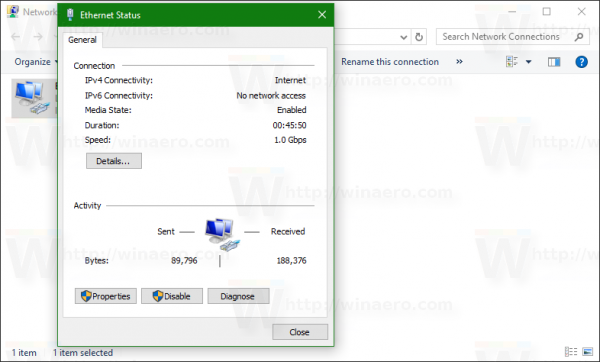
- Click on the Properties button.
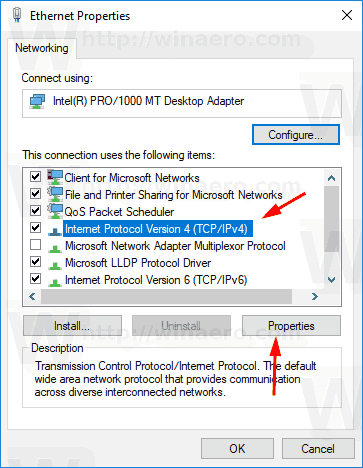
- Select Internet Protocol Version 4 (TCP/IPv4) in the list and click on the Properties button.
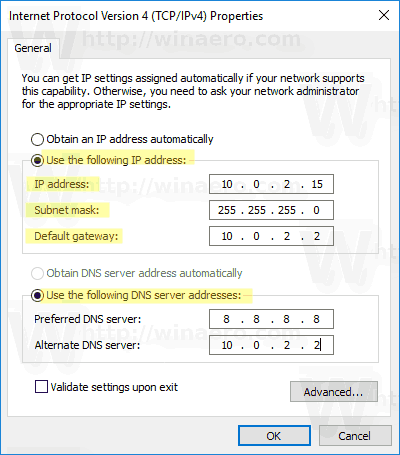
- In Propreties, set the option Use the following IP address and type the desired IP address, for example 10.0.2.15.
- Specify values for Subnet mask, Gateway and DNS servers for your network configuration and click OK.
Close all open dialog boxes and you're done.
Note: A subnet mask is a way of telling your computer or router what network addresses it considers local and which are remote. The subnet mask determines what portion of the IP address represents your network and what portion can be used for your hosts. Don't worry, Windows will automatically fill in the correct values for subnet mask.
A default gateway is simply the remote IP address of the forwarding host (computer or router or access point) from which information will arrive at your IP address. If you omit the default gateway, Windows will show the network as an unidentified network.
To understand what a DNS server is, see this article:
How to Change DNS Server in Windows 10
Set a static IP address with Command Prompt
- Open a new command prompt instance.
- Type the following command to see your current network configuration:
ipconfig /all
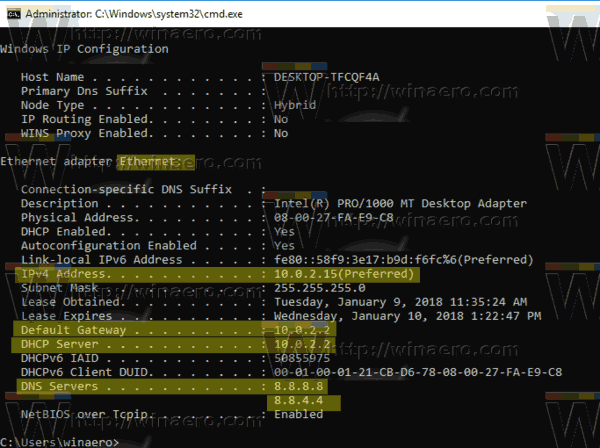
Note the connection name in the output. In my case, it is "Ethernet". - To set a new IP address, execute the following command:
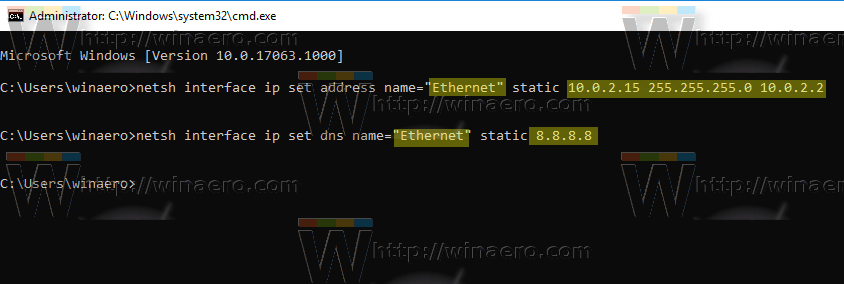
netsh interface ip set address name="connection name" static your_ip_address subnet_mask default_gateway
Substitute the appropriate string portions with the correct values for your case.
For example,netsh interface ip set address name="Ethernet" static 10.0.2.15 255.255.255.0 10.0.2.2
- Set the DNS server for your connection as follows:
netsh interface ip set dns name="connection name" static dns_server_ip_address
Set a static IP address with PowerShell
- Open a new PowerShell console as Administrator.
- Execute the cmdlet Get-NetIPConfiguration to see the current network configuration.
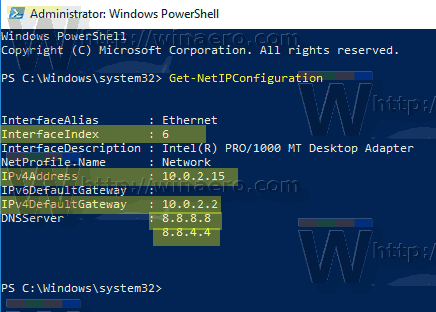
- Note the InterfaceIndex value for your network connection.
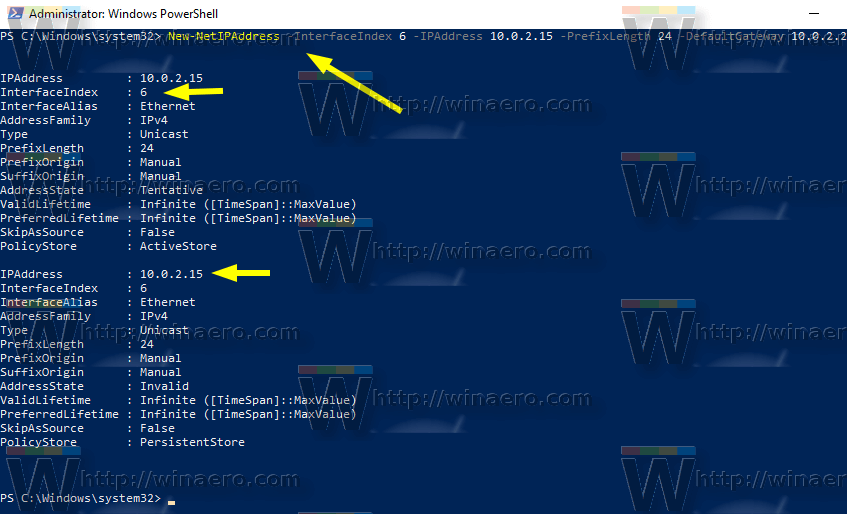
- So set a new static IP address, execute the following command:
New-NetIPAddress -InterfaceIndex your_InterfaceIndex_value -IPAddress your_IP_address -PrefixLength 24 -DefaultGateway you_gateway_address
For example:
New-NetIPAddress -InterfaceIndex 6 -IPAddress 10.0.2.15 -PrefixLength 24 -DefaultGateway 10.0.2.2
- Set the DNS server using the following command:
Set-DnsClientServerAddress -InterfaceIndex your_InterfaceIndex_value -ServerAddresses dns_server_ip_address

Note: The PrefixLength parameter specifies the subnet mask for the IP address. In this example, the PrefixLength of 24 equals a subnet mask of 255.255.255.0.
To change the existing static IP value with PowerShell, use the cmdlet Set-NetIPAddress.
For example,
Set-NetIPAddress -InterfaceIndex 12 -IPAddress 192.168.0.1 -PrefixLength 24
To remove the static IP with PowerShell, use the cmdlet Remove-NetIPAddress. For example,
Remove-NetIPAddress -IPAddress 192.168.0.1
That's it.
You might be interested in reading the article
How to see your IP address in Windows 10
Support us
Winaero greatly relies on your support. You can help the site keep bringing you interesting and useful content and software by using these options:

It can be also setup based on MAC address.
wmic nicconfig where macaddress=”D0:17:C2:D0:30:DC” call EnableStatic (“10.10.10.12”), (“255.255.255.248″)
wmic nicconfig where macaddress=”D0:17:C2:D0:30:DC” call SetDNSServerSearchOrder (“84.200.70.40″,”84.200.69.80″)
wmic nicconfig where macaddress=”D0:17:C2:D0:30:DC” call SetGateways (“10.10.10.10”)
Used the above commands. Windows NIC’S get actually busted by this untill you put them back to DHCP mode and /release /renew the NIC.
Test your comments before posting. Remove or add when an update changes the outcome of these commands…. useless.
LoL David, seriously? In order to use a static IP, you have to setup your router first, like disable DHCP or predefine IP per PC. I use it in my setup (website) after Windows install, so it works just fine.