In this article, we will see how to to restore default font settings for your user account in Windows 10. This will allow you to quickly restore visibility of hidden fonts.
Advertisеment
Windows 10 comes with TrueType fonts and OpenType fonts installed out-of-the-box. They either have TTF or OTF file extensions. They support scaling and look sharp on modern displays. OpenType is the more modern format, which can support any writing script, has advanced typographic "layout" features which prescribe positioning and replacement of rendered glyphs.
Starting with build 17083, Windows 10 features a special section in the Settings app. The new section, called simply "Fonts", can be found under Personalization.
You may be familiar with the classic Fonts Control Panel applet, which you could use to see the fonts that are currently installed, or to install or uninstall fonts. Instead of the classic applet, recent releases of Windows 10 offer the Fonts page in Settings, which is able to show off newer font capabilities, such as color fonts or variable fonts. A refresh of the Fonts UI to show off the newer capabilities was long overdue.
In Settings, a dedicated page for Fonts settings provides a short preview of each font family. The previews use a variety of interesting strings that are selected to match the primary languages that each font family is designed for, together with your own language settings. And if a font has multi-color capabilities built into it, then the preview will demonstrate this.
If you have customized your font options, here is how to restore them easily.
To restore default font settings in Windows 10, do the following.
- Open the classic Control Panel app.
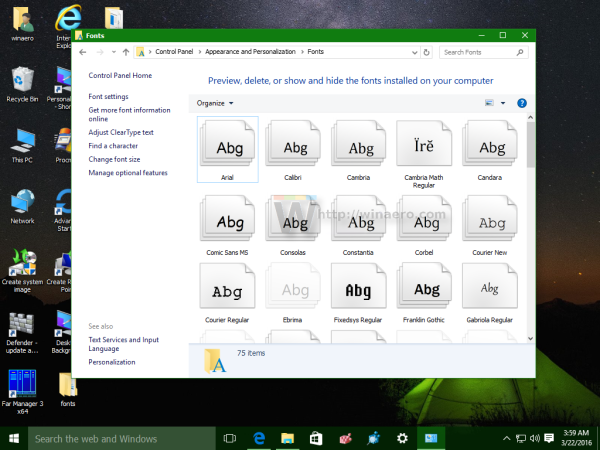
- Go to Control Panel\Appearance and Personalization\Fonts. The following folder will appear:

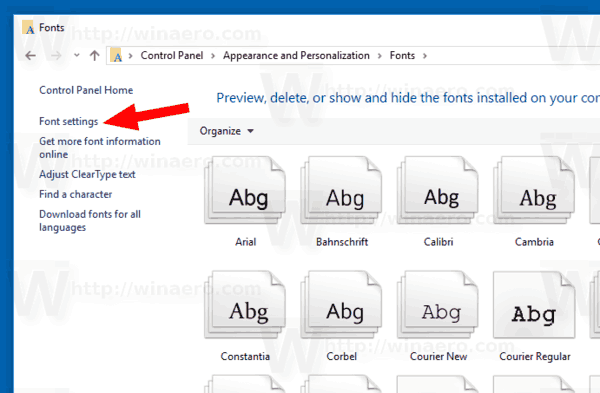
- On the left, click on the link Font settings.

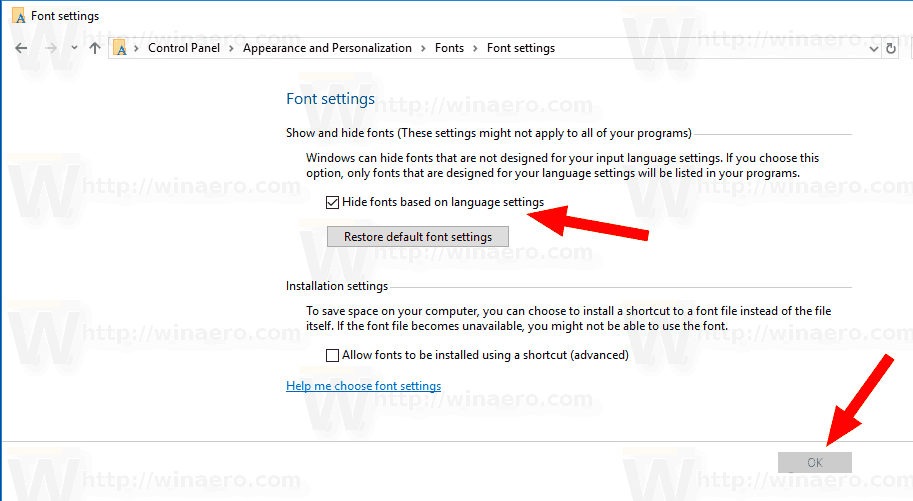
- On the next page, click on the button 'Restore default font settings'.

- This will make all hidden fonts in the font dialog of Windows 10.
The same action can be done with a Registry tweak.
Using a Registry tweak
To restore defaults for fonts in Windows 10, apply the following Registry tweak:
Windows Registry Editor Version 5.00
[HKEY_CURRENT_USER\Software\Microsoft\Windows NT\CurrentVersion\Font Management]
"Auto Activation Mode"=dword:00000001
"InstallAsLink"=dword:00000000
"Inactive Fonts"=-
"Active Languages"=-[-HKEY_CURRENT_USER\Software\Microsoft\Windows NT\CurrentVersion\Font Management\Auto Activation Languages]
Save the contents of the Registry tweak to a REG file, then double-click on it to apply.
Alternatively, you can download the following ready-to-use REG file.
That's it.
Articles of interest:
- How to Install Fonts in Windows 10
- How To Rebuild Font Cache in Windows 10
- Change ClearType Font Settings in Windows 10
- How To Install Fonts From Microsoft Store In Windows 10
- How to a Hide a Font in Windows 10
- Hide a Font Based on Language Settings in Windows 10
Support us
Winaero greatly relies on your support. You can help the site keep bringing you interesting and useful content and software by using these options:

Why do you people have to change stuff on this PC? I liked the way it was set , now i have a three inch view, I Do Not like your changes, Understand? T L B.
I do not like the way you people change Settings on my Desk top. Just leave them alone, Now i my need to take my P C. to the repair shop to get them brought back to standard’s. T L B.
ɪ have tried your suɡɡested route to restore my font settinɡs – but it will not work. ɪ have everythinɡ infected with random phonetic style fonts – as you will see hereǃǃǃǃ