XPS is an XML-based file format designed to print onscreen content while preserving fidelity. It is also the Windows print spooler format and can also be used to share and exchange electronic fixed layout documents like PDF. Windows 10 ships with XPS Document Writer which is the virtual printer installed out-of-the-box so you can create XPS documents. If you find no use for this XPS printer and are not going to use it to create XPS files, here is how to to remove it quickly.
Advertisеment
Microsoft ships Windows 10 with the XPS Document Writer printer installed by default. It can be useful when you need to print from some app on a PC where a printer is not physically connected. You can print to this virtual printer to create an XPS file. But for many users, the XPS Writer feature is not required. Some of you would like to get rid of it. This can be done in any of the following ways.
Probably the fastest way to remove the XPS Document Writer printer is to use the command line. Once you execute a command, it will remove the printer without additional prompts, dialogs and confirmations.
Remove the XPS Document Writer printer from Windows 10 using the command line
To remove this printer, open a new command prompt instance, then type or paste the following command:
printui.exe /dl /n "Microsoft XPS Document Writer"
The same can be done using PowerShell. Open a new instance of PowerShell and use the following command:
Remove-Printer -Name "Microsoft XPS Document Writer"
Both commands above do not produce any output and remove the XPS Document Writer printer silently and quickly.
If you prefer the GUI way to remove this printer, you can do the following.
Remove the XPS Document Writer printer from Windows 10 using GUI
- Open Settings.
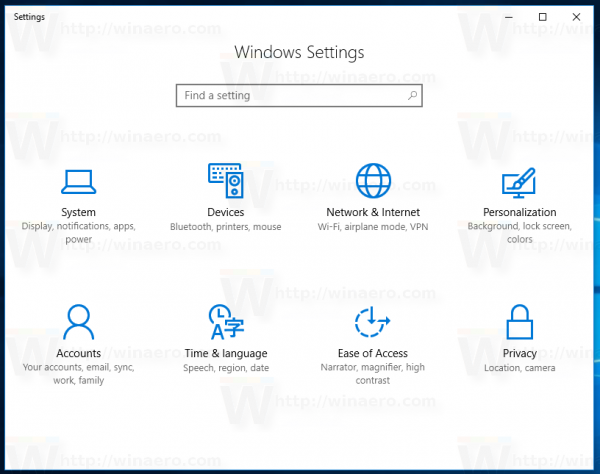
- Go to Devices - Printers & Scanners.
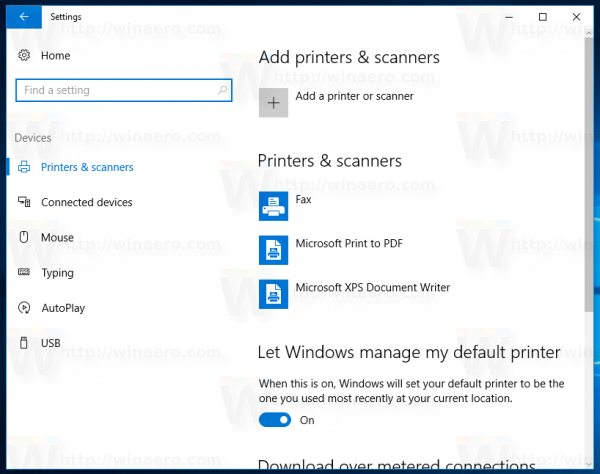
- On the right, select the item named Microsoft XPS Document Writer:
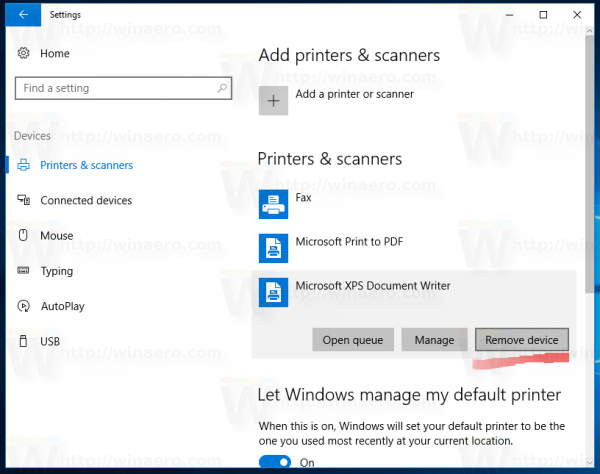
Once you have it selected, the option Remove device will appear under the printer's name. Use it to remove the XPS Document writer.
You are done.
Some day, you might change your mind and decide to add back the XPS Document Writer feature to Windows 10. This can be done as follows.
- Open Control Panel.
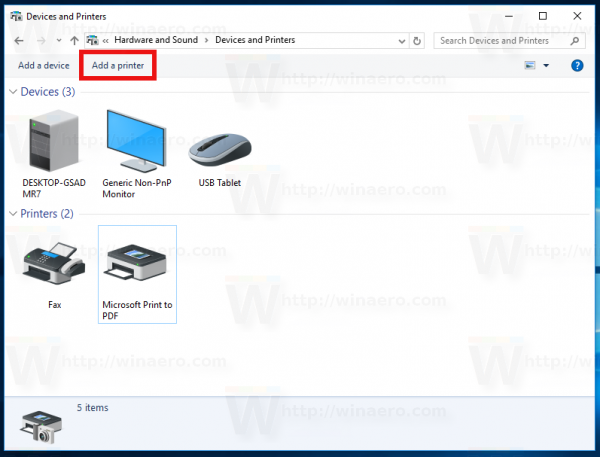
- Go to Control Panel\Hardware and Sound\Devices and Printers:
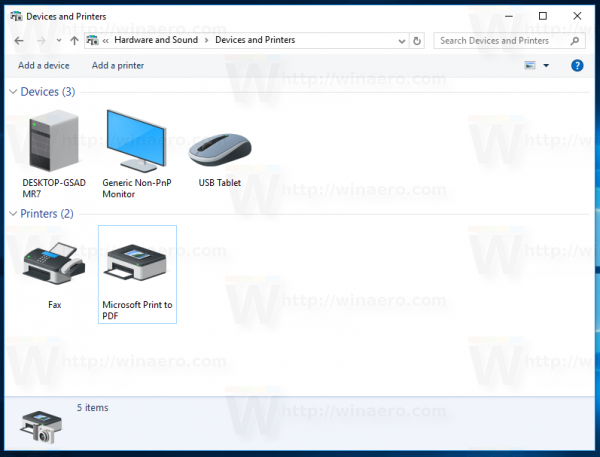
- Click the "Add a printer" button on the toolbar:
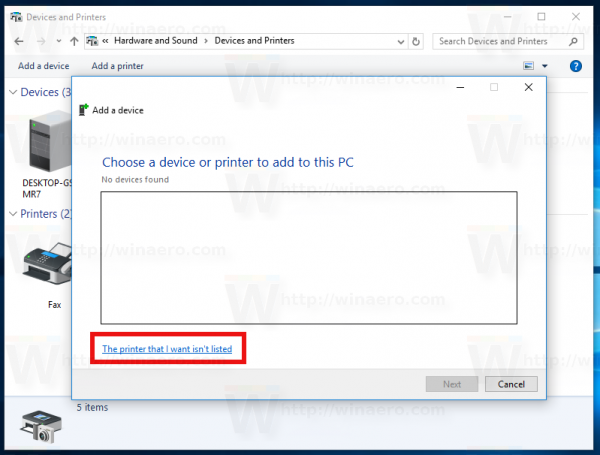
- In the dialog that appears, click the link "The printer that I want isn't listed":
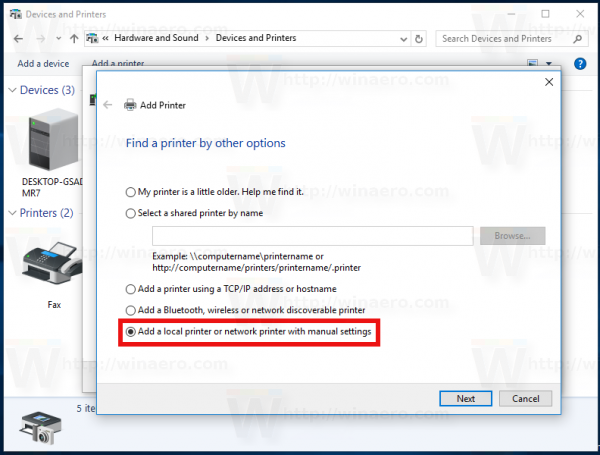
- In "Find a printer by other options", select "Add a local printer or network printer with manual settings":
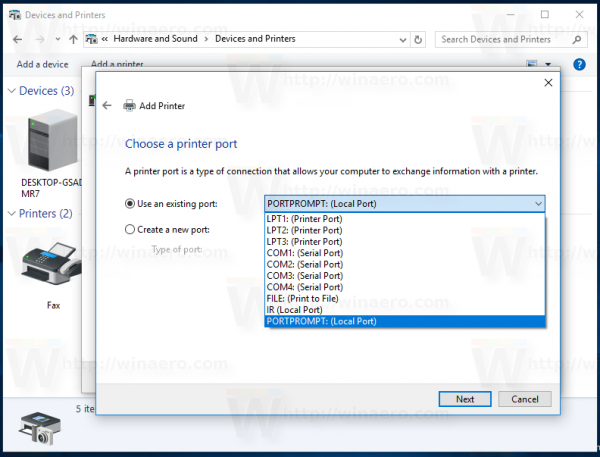
- On the next page under the option "Use an existing port" you need to select "PORTPROMPT: (Local Port)" from the drop down list.
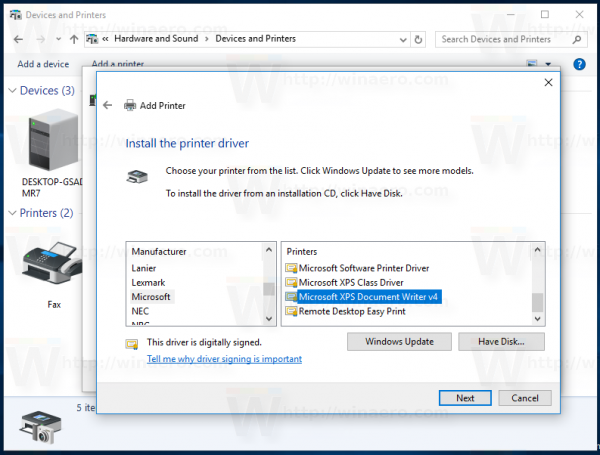
- Select Microsoft in the Manufacturer list on the left and pick the item "Microsoft XPS Document Writer v4" in the right.
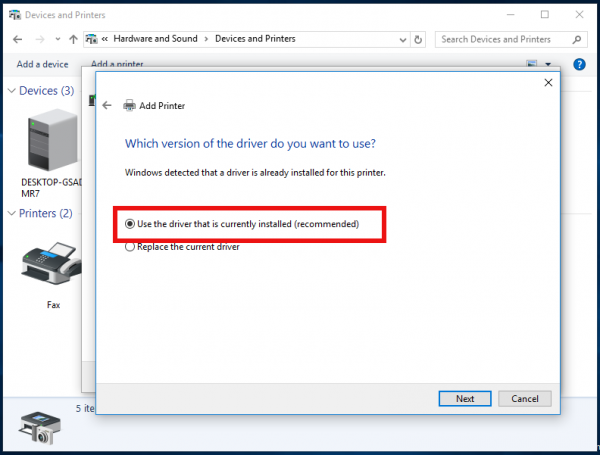
- On the next page, tick the option "Use the driver that is currently installed" and click the Next button.
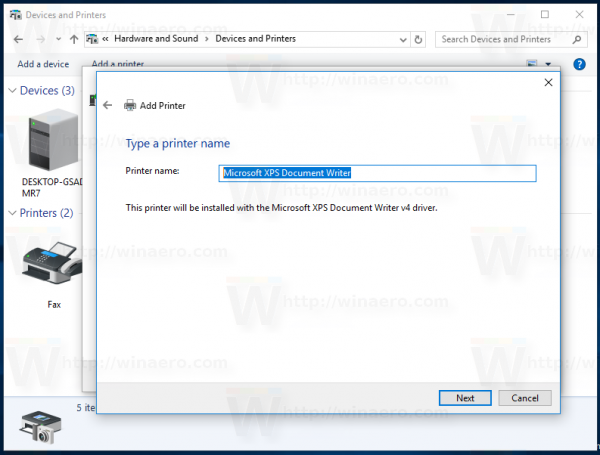
- On the next page, you can customize the printer's name, e.g. remove the "v4" portion to make it use the default name "Microsoft XPS Document Writer".
- The last step allows you to set the printer as default. If you are going to set it as your default printer, then tick the option and you are done.
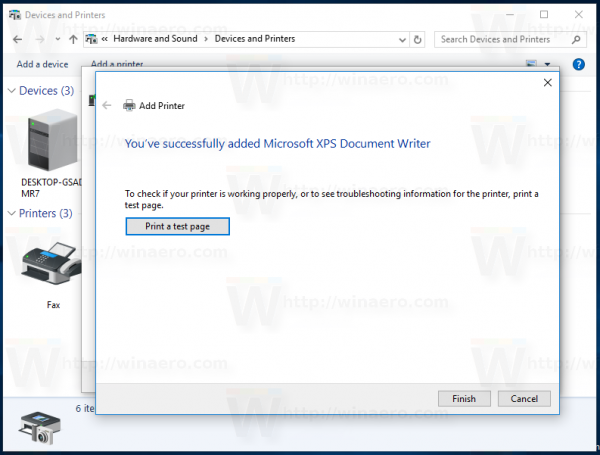
That's it.
Support us
Winaero greatly relies on your support. You can help the site keep bringing you interesting and useful content and software by using these options:


