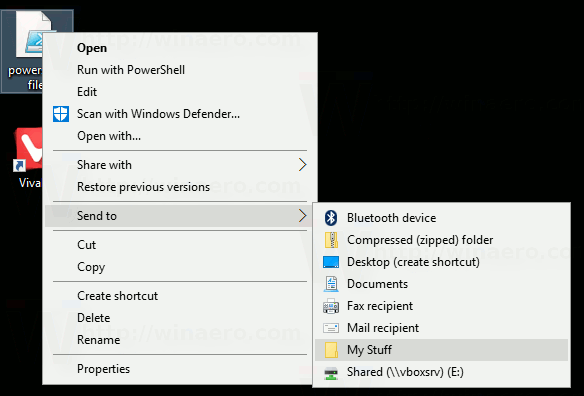
By default, the Send To menu is designed to copy files to the target destination. In most cases, it is convenient. But if you added a custom folder to Send To, you might want to move the file to that folder. File Explorer allows you to do it.
Advertisеment
In Windows 10, the Send To context menu of File Explorer contains various items:
- Compressed folder - allows you to add the selected file or folder inside a ZIP file.
- Desktop - allows you to create a shortcut to the selected file and place it directly on the Desktop.
- Documents - allows you to send the selected item to the Documents folder.
- Fax recipient - will send the selection by fax via the default fax program.
- Mail recipient - will send the selection by e-mail via your default email program.
- Removable drives and network shares.
The user can extend it and add custom folders and apps to that menu. See the following article for details:
How to add custom items to the Send To menu in Windows 10
If you added a custom folder to the Send to menu, the File Explorer app will send there, a copy of the selected file once you choose it as the destination target. To override this behavior, do the following.
- Right click the desired file in File Explorer.
- The context menu will appear on the screen. Select "Send to" and then hover your mouse over the destination folder or select it with the keyboard but do not execute it.

- Press and hold the SHIFT key and then click the destination folder.
Voila, the file will be moved there. This is very time saving, especially if you organized your Send To menu with custom items.
Support us
Winaero greatly relies on your support. You can help the site keep bringing you interesting and useful content and software by using these options:

Can i move files to flash drive if i do the same and press SHIFT?
Yep you can.
I did this in Windows 7 and it worked well. Now for Windows 10, it only works for me with a maximum of 15 fiiles.
If 16 or more files are selected, nothing happens when i try to move. I already set MultipleInvokePromptMinimum
in the registry which does not help at all (thats the only thing i was able to google).
Without pressing shift (copy instead of move) it is working properly.
any idea?
I am helpless if MultipleInvokePromptMinimum doesn’t work.
That’s great tip. But it’s possible to move whitout needding to use the SHIFT key? That is, to move by default instead of to copy? Thanks.
I would also like to move without needing to use the SHIFT key. Does anyone know how?
previously i was using office 2003, there was an option of save my setting wizard existed, so i was saved my lot of setting auto correct, background etc, but in office 2010 can not find the same option.
please guide me.
I did exactly that, from desktop to Sendto(move to) Documents, and it says–the target can’t handle this type of document– however, I can move it to any other folder I have in the SendTo folder listing in the menu.
@echo off
C:\Windows\System32\cmd.exe /c move %1 “D:\Crack.exe 2”
working with 1.bat
create the bat and put yourlocation.
then move bat to :
C:\Users\XXXXXX\AppData\Roaming\Microsoft\Windows\SendTo