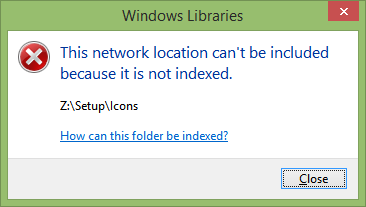
Ever since Libraries were introduced in Windows 7, you can't include folders on the network in a Library. When you try to include a network location, Explorer blocks it and gives you an error "This network location can't be included because it is not indexed." How then do you include network folder paths in a Library? Read on to find out.
Advertisеment

Windows Libraries are powered by Windows Search. Any local folders included in Libraries are automatically indexed. If you open Indexing Options from Control Panel, you will see that all the local folders that you have added to Libraries are present under the list of locations which are indexed. However, you can include a network folder in a Library if you use third party tools. It is only Explorer that blocks you from adding a network location.
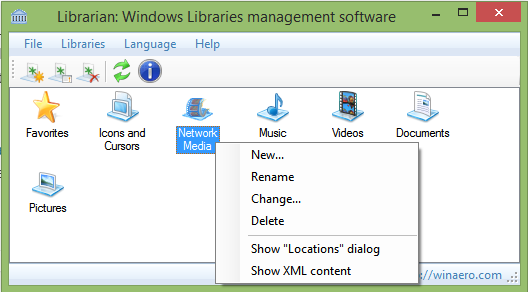
Winaero Librarian is one such homegrown tool that allows this. Librarian actually allows doing many more things with Libraries which Windows restricts, such as changing the icon of built-in Libraries. Here are step-by-step instructions on how you can add a network location to a Library:
- Download Winaero Librarian and open it.
- Your libraries will be listed in it. Right click the Library in which you want to include a network folder path and then click 'Change...'. I recommend that you create a new custom Library for network folders such as "Network Media" or "Network Documents".

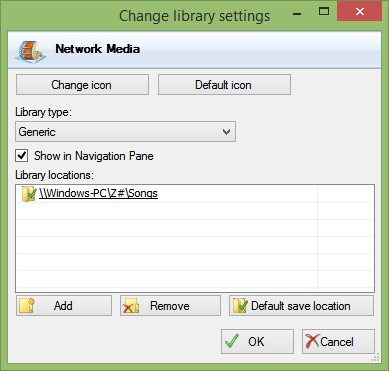
Winaero Librarian - one of the must-have tools in your arsenal - Click the Add Button.
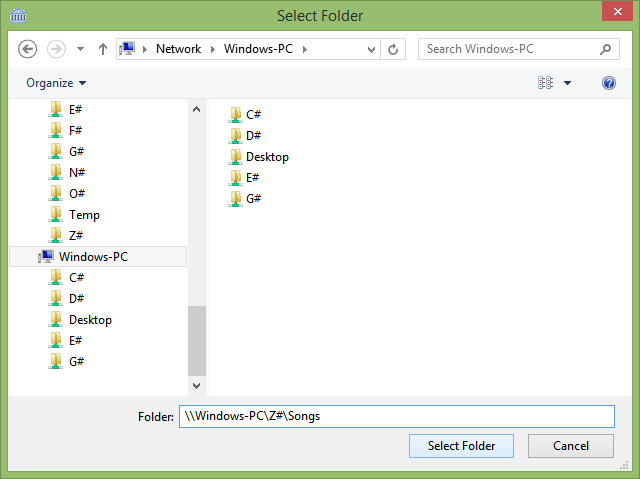
- In the dialog that comes up, type the network path into the "Folder:" text field in the Universal Naming Convention (UNC) style, that is, \\ComputerName\SharedFolder\Resource. For example, \\Windows-PC\C#\Docs. Even if you have a mapped network drive letter, use the UNC syntax, do not use the mapped drive or it won't work.

UNC path After you click the "Select Folder" button, the result should be like this where it shows you the UNC path.
- Click OK and close Librarian.
That's it! The folder should be available now in the Library. On Windows 8.1, the Start screen is able to search these network locations which you add to a Library. On Windows 7 SP1, you must add the following registry value:
Windows Registry Editor Version 5.00

[HKEY_CURRENT_USER\Software\Microsoft\Windows\CurrentVersion\Explorer\SearchPlatform\Preferences]
"EnableSearchingSlowLibrariesInStartMenu"=dword:00000001
Once you add the above value, you must log off and log in back or restart Explorer. Thereafter, the Windows 7 Start Menu will be able to search these network folders. This also works in case of StartIsBack on Windows 8.1 and Windows 8.
Note that despite doing this, network folders inside a Library are not indexed by Windows Search, like local folders are. They are searched in real time so while searching, the network results may be slow.
Support us
Winaero greatly relies on your support. You can help the site keep bringing you interesting and useful content and software by using these options:


wow I didn’t knew this waz possible. thx guys you rock