With recent Windows 10 releases, there is a new Device security page available in the Windows Defender Security Center. It reports the status of security features built into your devices. There, it is also possible to manage various features on to enable enhanced device protection.
Advertisеment
Windows 10 Creators Update version 1703 brought yet another change to Windows 10's UI. There is a new app called Windows Defender Security Center. It has been created to help the user control his security and privacy settings in a clear and useful way.
Before you proceed, here is what you need to know. Don't be confused between Windows Defender and Windows Defender Security Center. Windows Defender is the built-in anti-virus software which provides real-time protection against threats. The Windows Defender Security Center app is just a dashboard which allows you to track your protection state. It can be used to configure various security options like SmartScreen.
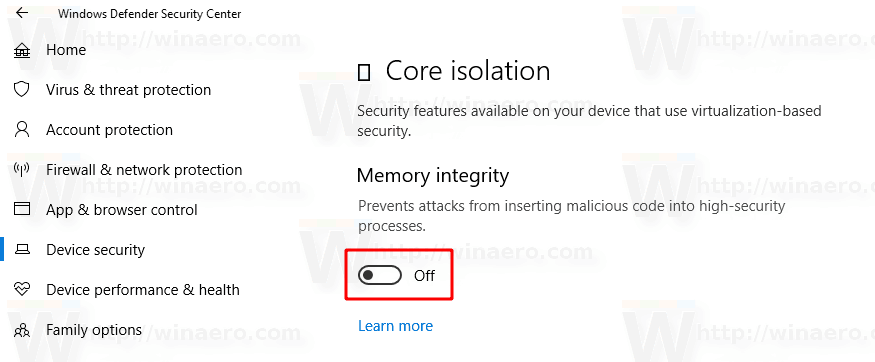
Starting with Windows 10 Build 17093, you can configure Core isolation Memory integrity using Windows Defender Security Center. The Core isolation feature provides a number of virtualization-based security options to protect core parts of your computer. Memory Integrity is part of the Core isolation feature that prevents attacks from inserting malicious code into high-security processes. Let's see how to enable this useful feature.
To enable Core Isolation Memory Integrity in Windows 10, do the following.
- Open the Windows Defender Security Center app.
- Click on the Device security icon.
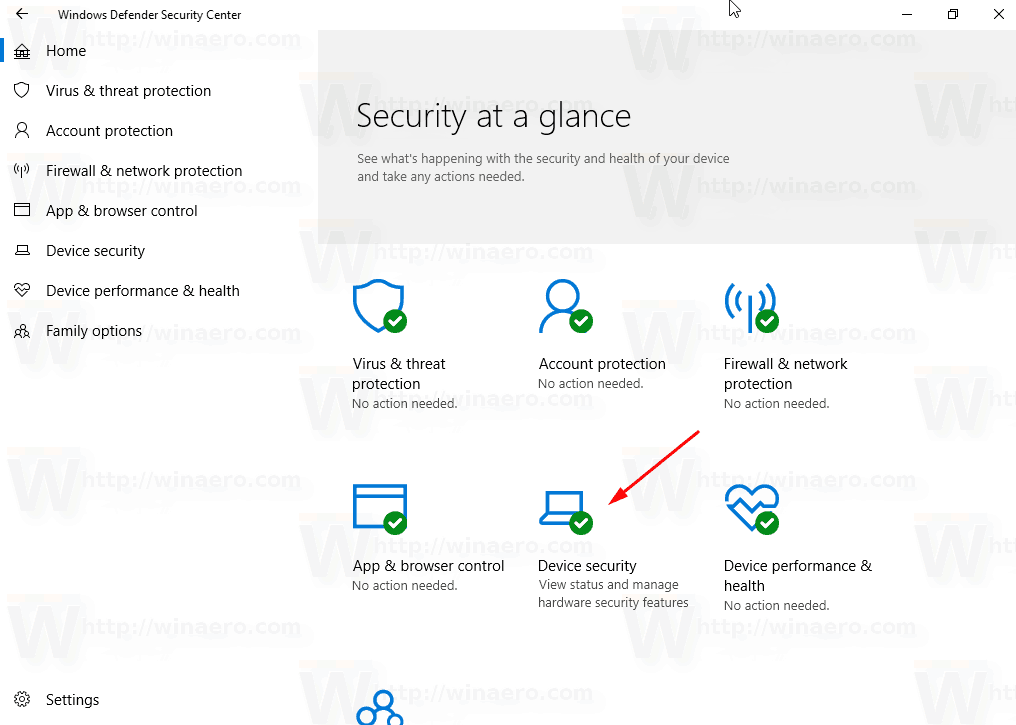
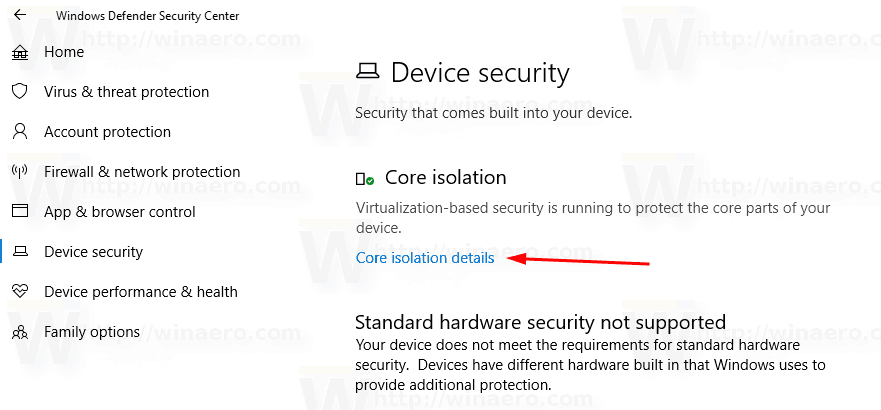
- On the right, click on Core isolation details link.
- Enable the Memory integrity toggle option.
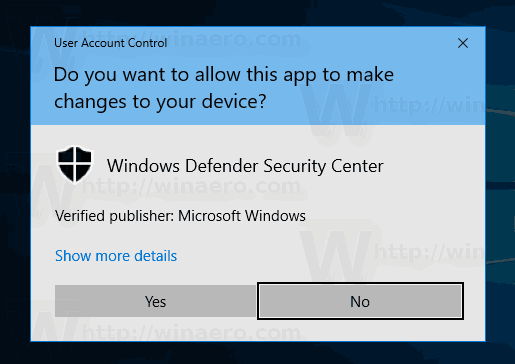
- Confirm the UAC prompt.
- Restart Windows 10 to apply the changes. The reboot is required.
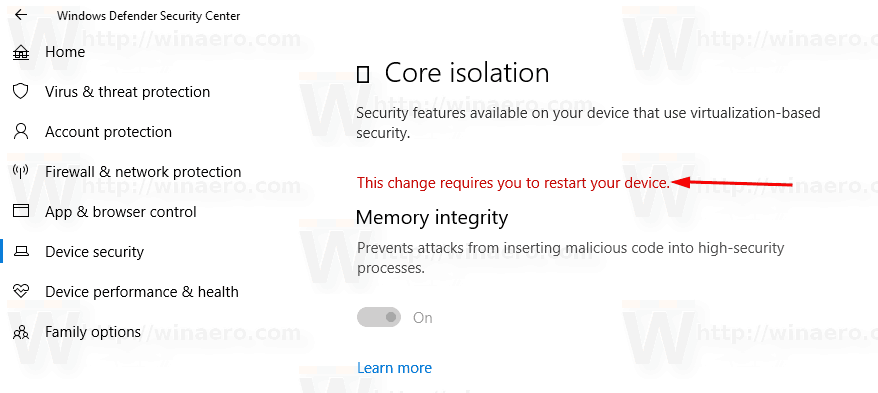
You are done. The Memory Integrity feature will be enabled.
To disable it, you need to perform the same sequence of steps and turn off the toggle option Memory integrity in the Windows Defender Security Center.
Note: The information and options available in the Device security depends on your hardware configuration. In my case, standard hardware security is not supported by the computer, so the OS is using virtualization-based security.
That's it.
Support us
Winaero greatly relies on your support. You can help the site keep bringing you interesting and useful content and software by using these options:

Hey, just to inform that my Creative Xi-Fi driver stopped working after this tweak.
So I disabled it again.
Disabled my intel HD-3000 graphic driver & I wouldn’t allow me to switch off the ‘Memory Integrity’ switch – so I re-imaged.
Later found out this key…
HKEY_LOCAL_MACHINE\SYSTEM\CurrentControlSet\Control\DeviceGuard\Scenarios\HypervisorEnforcedCodeIntegrity\Enabled
Hmm. Does it have any relation to Meltdown and Spectre vulnerabilities?
Unfortunately in this article there is not enough information what this options exactly do and if there is a need to enable them?
Can this be accomplished with a registry edit?
I will look.
So… did you ever find anything? :)
Just wanted to point out that “virtualization based security” doesn’t mean some hardware feature isn’t supported by you pc. It means some core parts of the system are running in a ‘virtual machine’ with a separate kernel.
Now I can’t disable it (This setting is managed by administrator), but I am the administrator of the PC, there is a registry key that I can change?
Might look to see if you have key
HKEY_LOCAL_MACHINE\SYSTEM\CurrentControlSet\Control\DeviceGuard\Scenarios\HypervisorEnforcedCodeIntegrity\Enabled
1=True
0=False
Thanks, had the same problem and setting that registry key to 0 did the trick.
Does core isolation impact performance?
Probably the reason it is off by default? (affects performance; compatibility risks)
Probably very slightly on “modern” computers. If still running a slow duo-core, e.g., then probably noticeable.
Now I can’t turn it back on! MIcrosoft says don’t delete the incompatible drivers to turn on that feature! Memory integrity sounds like a GOOD thing!!