Yesterday, I wrote a tutorial how to disable driver signature requirement in Windows 10. The mentioned solution is not permanent as the driver signature enforcement will be restored after reboot. In this article, we will see how to disable the driver signature enforcement permanently in Windows 10.
To disable driver signature enforcement permanently in Windows 10, you need to do the following:
- Open an elevated command prompt instance.
- Type/paste the following text:
bcdedit.exe /set nointegritychecks on
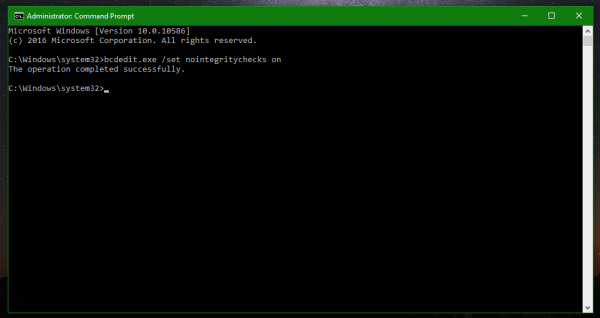
- Restart Windows 10.
This will disable the driver signature enforcement in Windows 10 permanently. This preference will be preserved even after the reboot. So, if you need to flash an Android phone or install some old or specific hardware drivers, you will be able to bypass the driver signature requirement.
To enable the driver signature enforcement back in Windows 10, type the following command in the elevated command prompt:
bcdedit.exe /set nointegritychecks off
That's it.
Support us
Winaero greatly relies on your support. You can help the site keep bringing you interesting and useful content and software by using these options:

yes!!!!!!!!
mi da questo erore:
errore durante l’impostazione dei dati dell’elemento. Il valore è protetto dai criteri di avvio e non può essere modificato o eliminato
translate
I get this error:
error setting item data. The value is protected by the start criteria and can not be modified or deleted
Elevated command prompt.
Use elevated command prompt.
Run as Administrator.
I followed all the steps
elevated command prompt,
run as Administrator
According to your error message, you have no administrator rights.
I get the same error even though I’m in an Administrator: Command Prompt. I even activated the windows created admin account and tried it there without luck. Any idea what else it could be?
(Exact error:
An error has occurred setting the element data.
The value is protected by Secure Boot policy and cannot be modified or deleted.)
@Roel vd Heijden, go to your UEFI BIOS when the computer starts before Windows loads by pressing F10 or Del on the keyboard (or F12 – this key varies with each PC). Once in the BIOS, look for an option to disable Secure Boot. Save settings once it is disabled. Then you will be able to disable the driver signature enforcement.
Hi Sergey!
I have been looking for a solution since Windows 10 was released, but the command you tips on above, is ineffective in all Windows 10 installations that I have tested on.
The following error message still appears when I try to install my driver:
“This INF file comes from a third-party vendor and does not contain any information about digital signatures.”
If I manually select the “Disable Driver Signature Enforcement” mode in the boot menu, then it is no problem to install and run my driver.
The driver I have problem with can be downloaded here:
https://dl.dropboxusercontent.com/u/28287582/USB-emulator_x64.zip
Please feel free to test yourself and see that it does not work, even if you run your command first.
OK I will look.
Well, have you found an explanation why your tip will not work with my driver?
any side effects by doing this?
Unless you will try install unstable drivers, where are no side effects.
Didn’t work. Despite it saying that the operation completed successfully, it still enforces driver signature checking for some reason.
Great work ……..
Thanx
On windows 10 to install unsigned drivers you must enter BOTH these commands:
bcdedit /set testsigning on
bcdedit /set nointegritychecks on
to disable:
bcdedit /set testsigning off
bcdedit /set nointegritychecks off
to remove the keys:
bcdedit /deletevalue testsigning
bcdedit /deletevalue nointegritychecks
Don’t recomend simply disabling the integrity check.
Instead you can go to Windows Group Policy Editor (gpedit.msc)
And go to:
– Users Configurarion (or Computer Configuration to change for everyone)
– Administrative Models
– System
– Driver Installation
Double click Code Signature for Device Drivers
Then select a more appropriate value.
Default is – not configured.
Enable it, then in Options, select “When windows detects an unsigned driver file”, just select to WARN you, instead of ignore or block.
This way you ensure everytime an application installs unsigned drivers, it will warn you of potential problems/threats.
Thanks for heads up.
The setting isn’t supported on >2003
@Leonardo Silva…thank you for your gpedit.msc solution…exactly what I was look for….:)
NONE of those options works under Windows 10 Anniversary Edition version 1607 !!!
This has never worked. This didn’t work in Windows 7 and it won’t work in Windows 10.
Readydriver+ was the only way to do it in Windows 7, but it doesn’t work on Windows 10. So thanks Microsoft, you [censored] us again.
Do you need this just to installed an unsigned (old) driver? Or do you need to keep in in this disabled mode, even later when you are simply using these already installed drivers?
Usually I use this mode to install an unsigned driver for my Android phone to update its firmware/install a custom Rom.
Once the driver is installed, I use the normal mode.
Commands “ bcdedit /set testsigning on“ , “bcdedit /set nointegritychecks off “ , “ bcdedit.exe /set nointegritychecks off“ are not possible to use in OS: Win10, Version 1703, BUILD 15063.483 or Version 1703, BUILD 15063.502 . Therefor you have to “disable Secure Boot (in computer’s UEFI)“.
From the moment that you “enable Secure Boot“ the settings
“bcdedit /set testsigning on“ , “bcdedit /set nointegritychecks off “ ect
are overruled by OS W10.
after doing all highlighted instructions I have a positive result. thanks a lot
Try This in Windows 10 1809:
(To disable)
bcdedit -set loadoptions DISABLE_INTEGRITY_CHECKS
bcdedit -set TESTSIGNING ON
(to Enable)
bcdedit -set loadoptions ENABLE_INTEGRITY_CHECKS
bcdedit -set TESTSIGNING OFF
You have to disable Secure boot in the UEFI CMOS Setup, to use those boot commands like
bcdedit -set TESTSIGNING OFF
bcdedit -set TESTSIGNING ON
bcdedit -set TESTSIGNING ON
bcdedit -set TESTSIGNING ON
bcdedit -set TESTSIGNING ON
however, this works in secure boot at the prompt
bcdedit -set loadoptions ENABLE_INTEGRITY_CHECKS
bcdedit -set loadoptions TestSigning OFF
whether it actually works when rebooting.. Don’t know yet, haven’t tried it.
I keep getting this message when all I’m doing is following the instructions on this page:
C:\Users\clove>bcdedit.exe /set nointegritychecks on
The boot configuration data store could not be opened.
Access is denied.
open cmd.exe as administrator.
After executing above file.
It is showing that
The value is protected by secure boot policy and cannot be modified.
How can i Change this policy if possible?
I did this same but they said that access is denied.so what can i do now?
It needs an elevated console instance. Run cmd.exe as Administrator.