Windows 10 comes with a brand new feature - virtual desktops. For users of Mac OS X or Linux, this feature is not spectacular or exciting, but for casual PC users who have used Windows only since eternity, it is a step forward. The ability to have multiple desktops exists in Windows since Windows 2000 at the API level. Several third party apps have used those APIs to provide virtual desktops, but Windows 10 has made this feature available out-of-the-box in a useful way. To manage virtual desktops, Windows 10 offers the Task View feature.
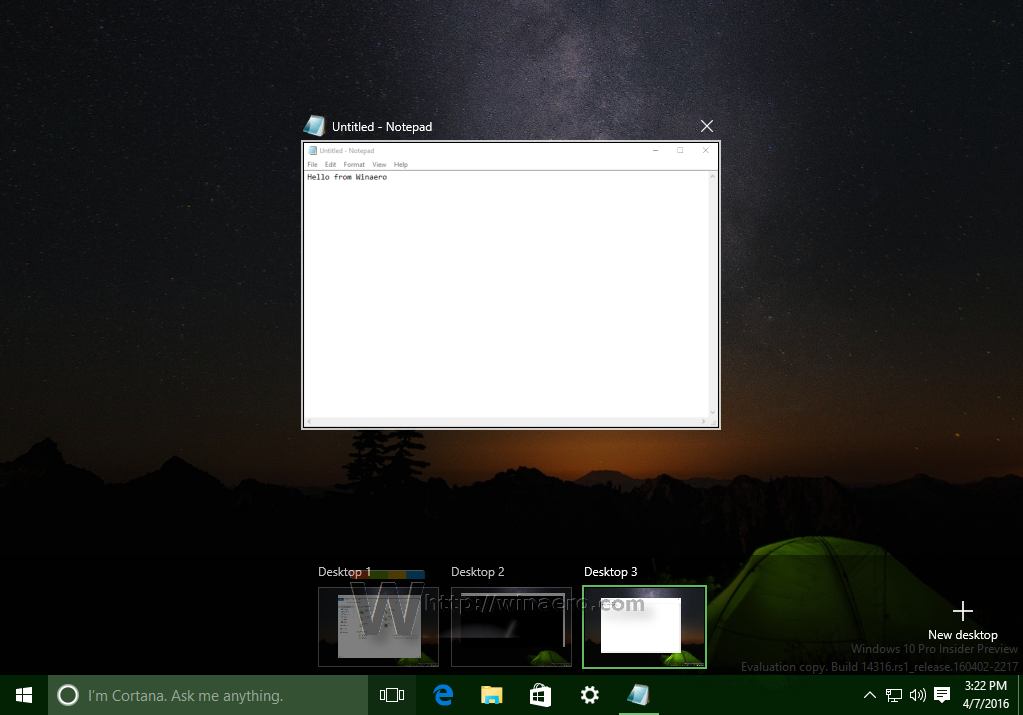
Windows 10 provides a number of ways to access the Task View feature. Task View appears as a button on the taskbar. When you click it, it opens a full screen pane which combines windows you've opened on every virtual desktop. It allows creating new virtual desktops, re-arranging windows between them, and removing virtual desktops. Also, it has close integration with Timeline in recent versions of the OS.
Advertisеment
The keyboard shortcuts is another more effective and productive alternative to the mouse.
Finally, yesterday we saw how to add the Task View context menu in Windows 10
You might be curious what is the reason to create an extra shortcut for Task View?
With your custom shortcut, you will be able:
- To hide the taskbar button, pin your shortcut to the taskbar, and move to any place you want. The default button can't be moved, it is always on the left.
- To create a custom toolbar on the taskbar and put your shortcut there.
- To assign a custom keyboard shortcut to the Task View feature.
- To put Task View in the Start menu.
- To pin it to the right side of the Start menu.
To add the Task View context menu in Windows 10, do the following.
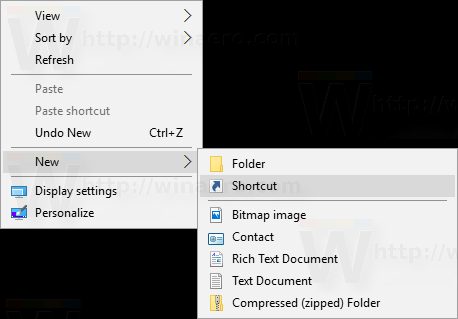
- Right click the empty space on your Desktop. Select New - Shortcut in the context menu (see the screenshot).
- In the shortcut target box, type or copy-paste the following:
explorer shell:::{3080F90E-D7AD-11D9-BD98-0000947B0257}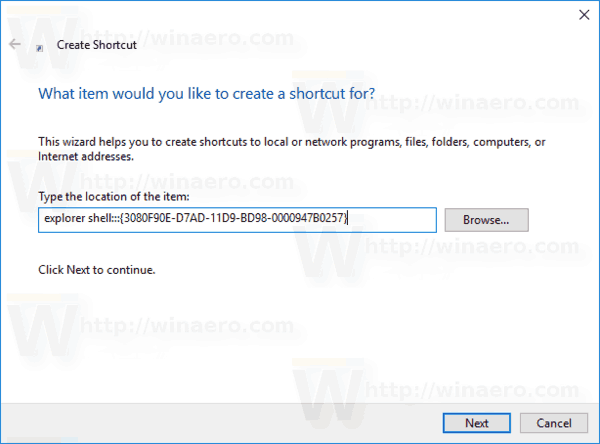
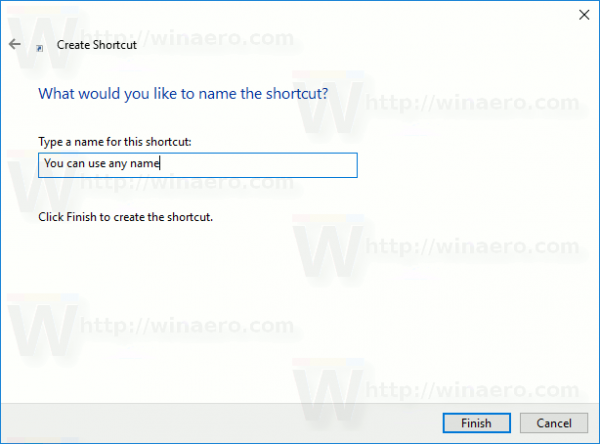
- Use the line "Task View" without quotes as the name of the shortcut. Actually, you can use any name you want. Click on the Finish button when done.
- Now, right click the shortcut you created and select Properties.
- On the Shortcut tab, you can specify a new icon if you wish.
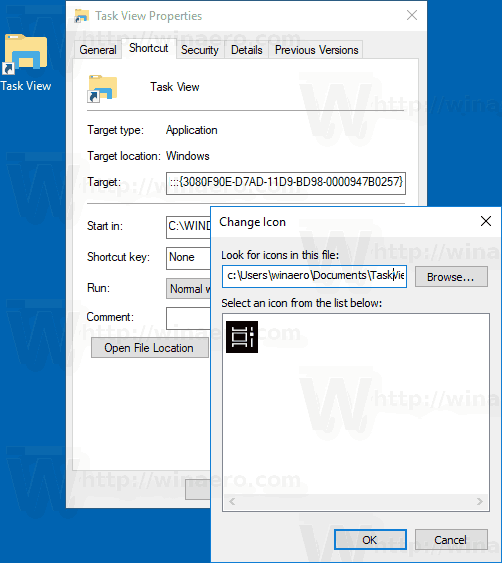 You can use any icon from the c:\windows\system32\shell32.dll file, or you can download the following icon:
- Click OK to apply the icon, then click OK to close the shortcut properties dialog window.
You are done.
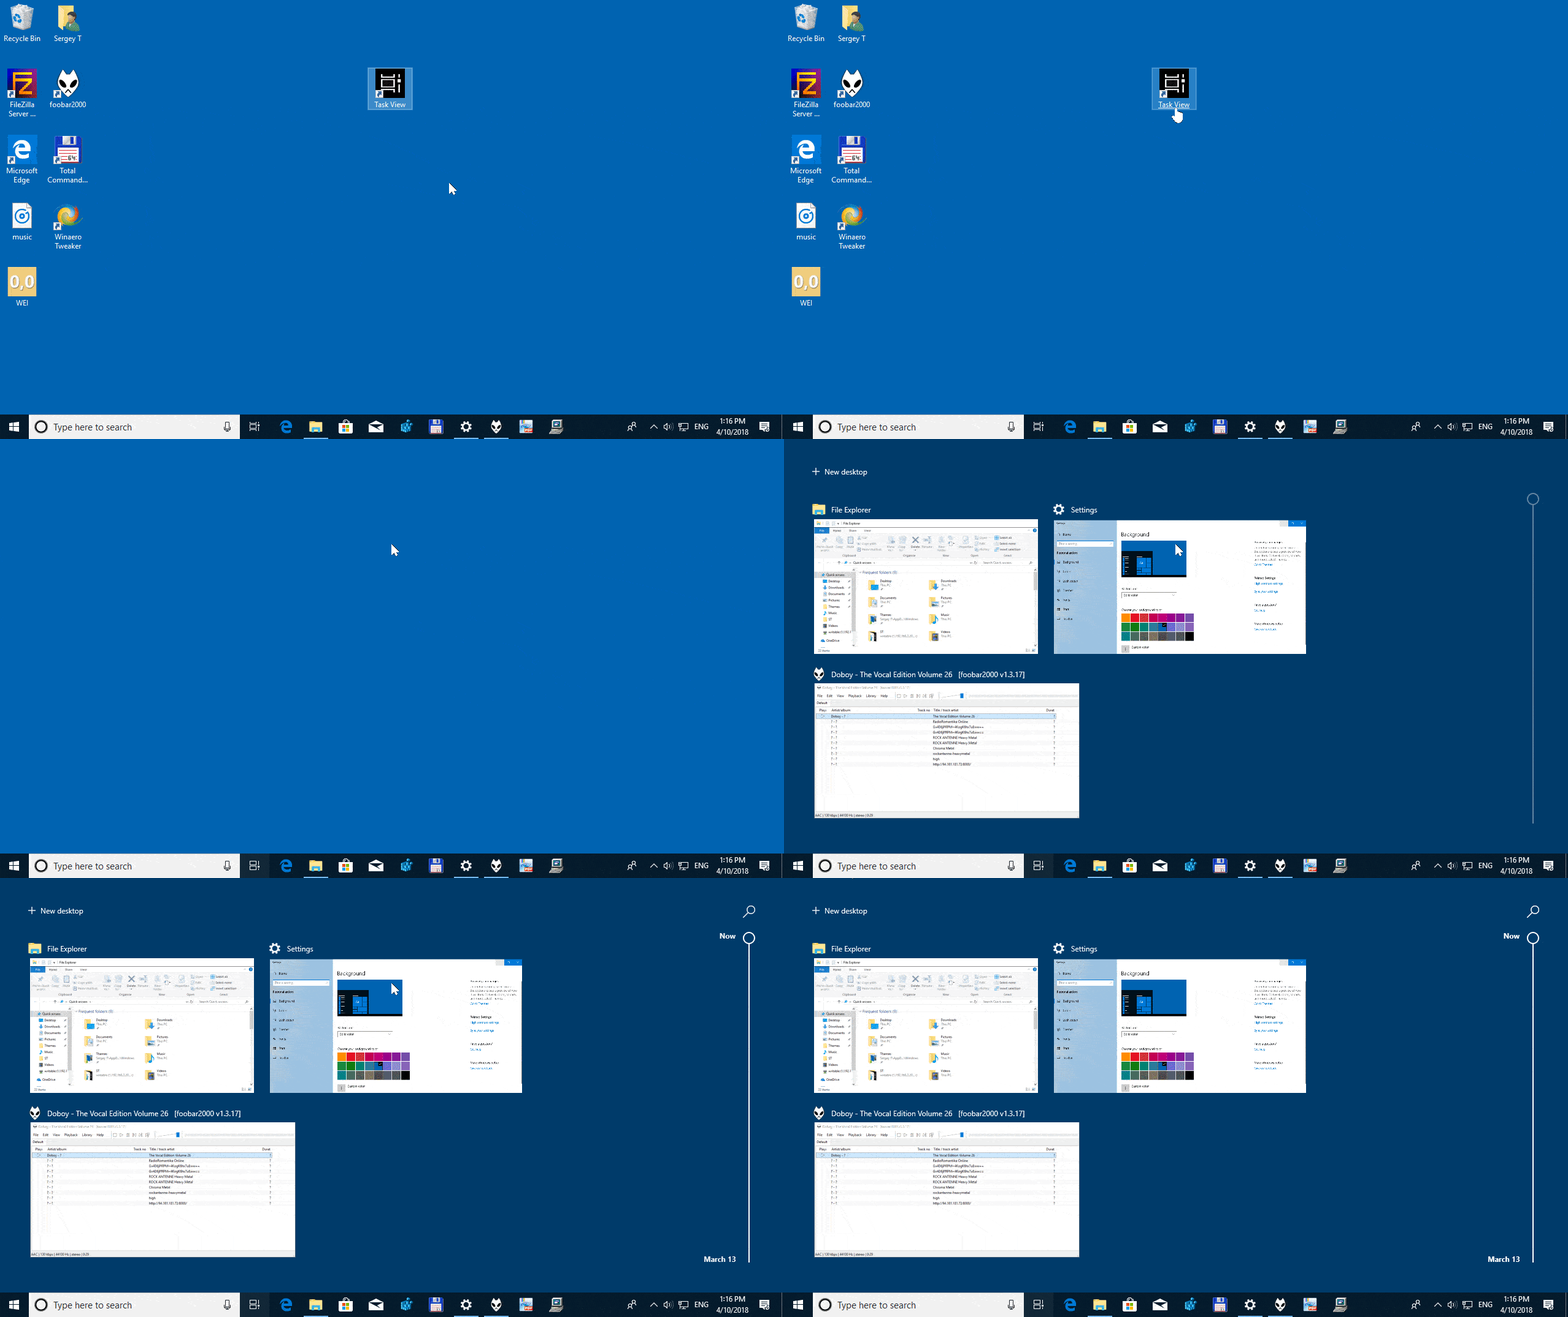
The command used for the shortcut is a special shell:command which allows opening various Control Panel applets and system folders directly. To learn more about shell: commands available in Windows 10, refer to the following article:
The list of shell commands in Windows 10
Now, you can move this shortcut to any convenient location, pin it to taskbar or to Start, add to All apps or add to Quick Launch (see how to enable Quick Launch). You can also assign a global hotkey to your shortcut.
That's it.
Support us
Winaero greatly relies on your support. You can help the site keep bringing you interesting and useful content and software by using these options:
