Windows 10 supports plenty of apps created for earlier versions of Windows. However, some older apps have issues with scaling, especially if you have a high resolution display like Full HD or 4K. Other apps like games can have issues or not start at all if they cannot detect the version of Windows for which they were created. Compatibility mode settings in Windows 10 are intended to solve these issues for you.
Advertisеment
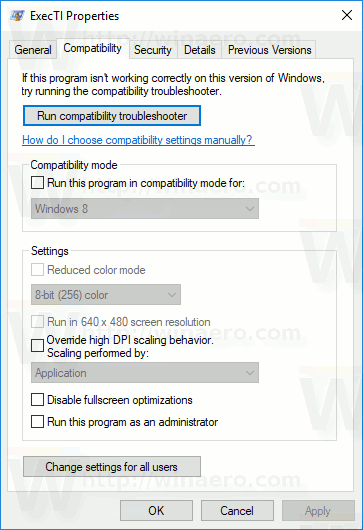
Windows 10 comes with a number of compatibility options that you can turn on for an app to improve how it works in the latest version of the operating system. These include:
The ability to run the app in compatibility mode for Windows 95, Windows 98/Me, Windows XP SP2, Windows XP SP3, Windows Vista RTM, Windows Vista RTM SP1, Windows Vista RTM SP2, Windows 7 and Windows 8.
Reduced color mode - This limits the palette of colors available for your app. This can be useful for some old apps, that could run only in 256 color mode.
Run in 640 × 480 screen resolution - changes the display resolution to VGA mode.
Run this program as an administrator - Make the app always run elevated (as administrator). You must be signed in as an administrator to use this option.
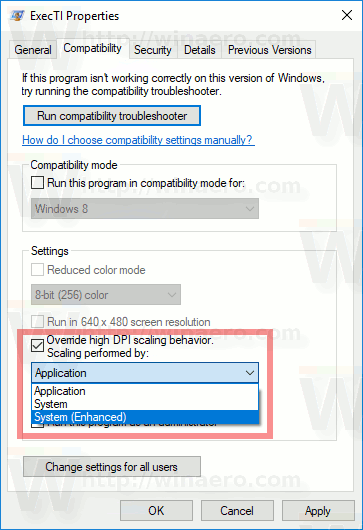
Override high DPI scaling behavior - Windows 10 Creators Update adds another interesting option to override high DPI scaling mode, which can be performed by the Application itself, by the System, or in System Enhanced mode.
Disable fullscreen optimizations - improves compatibility of the full screen apps.
The last option is only available in Windows 10 version 1703. The System (Enhanced) mode improves scaling on classic Desktop apps. It makes them look really better on high-DPI displays.
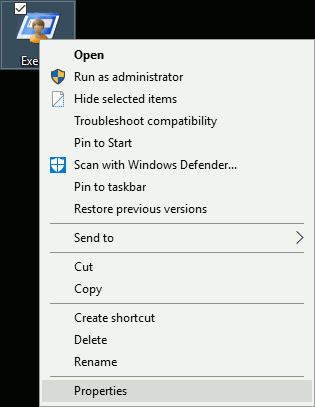
To enable Compatibility Mode Settings for an app, right click its EXE (executable) file or the shortcut on the Desktop.
For an app in the Start menu, you can right click its entry and choose "More - Open location" in the context menu (see the screenshot below).
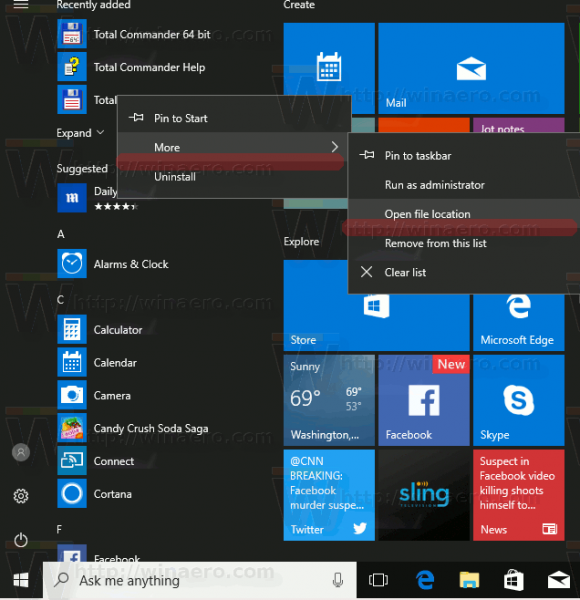
When the folder containing the app's shortcut is opened, you will be able to open its properties from the context menu as usual.
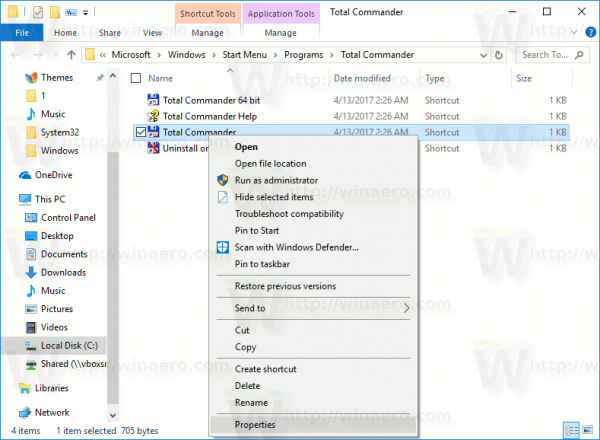
Tip: You can save your time and open the shortcut properties dialog faster. See the article How to open file or folder properties quickly in Windows File Explorer.
In the Shortcut properties dialog, go to the compatibility tab:

There, enable one of the options mentioned above.
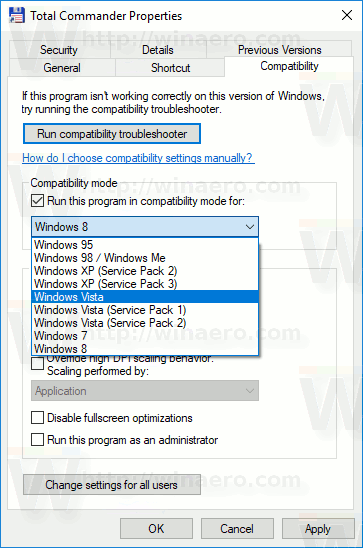
If you had your app open (running), close all its instances and re-open it in order to apply the compatibility mode settings.
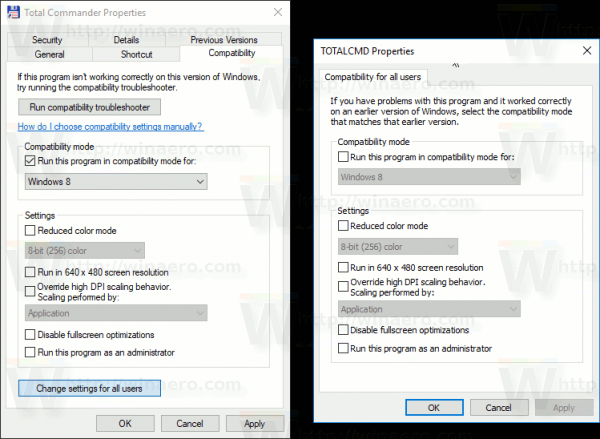
These changes will be applied to your personal account only.
If you are signed in as an administrator, then you can adjust the compatibility mode setting for all users. Click the button "Change settings for all users". The next dialog looks similar to the Compatibility tab, but all the changes you make there will be applied to all accounts on your PC.
It is worth mentioning that Windows 10 has a special compatibility troubleshooter, which can be started from the context menu of the app or from the Settings app (Tip: See the article How to Run a Troubleshooter in Windows 10 to Resolve Problems). In properties, you can click the button "Run compatibility troubleshooter" and follow the wizard to adjust the options on each page, step-by-step.
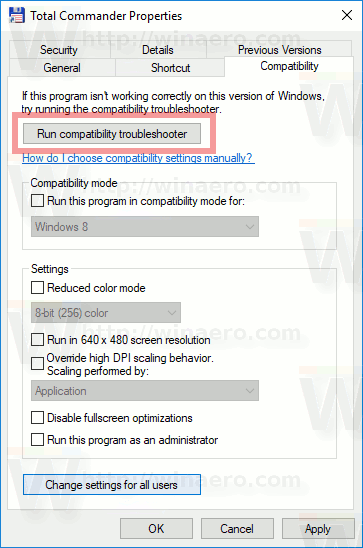
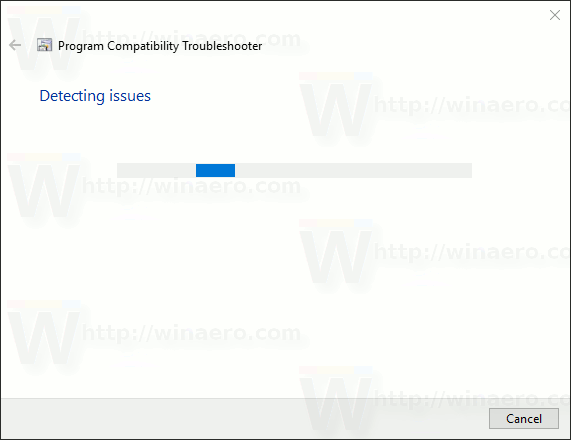
This can be useful for novice users. In this mode, Windows 10 will try to automatically find and apply the most suitable solution for the app. It can use the online solution database, which contains information on how to run various older apps smoothly in the latest OS.
Support us
Winaero greatly relies on your support. You can help the site keep bringing you interesting and useful content and software by using these options:

hello
how i can unlock reduced color mode cause its grayed out and any tweak to force hdr win 10 on non official hdr monitor but capable hardware via registry or … tnx