File attributes are special metadata or properties of files stored in the file system which instruct computer software to change its behavior. Some of them may be enforced by operating system. For example, the read-only attribute prevents apps from writing to such files and tells File Explorer to warn the user that the file or folder can be important. The console DEL command doesn't remove files with the read-only attribute. In this article, we will review different methods to change file attributes in Windows 10.
Advertisеment
Windows 10 offers the user a number of methods to change file system attributes for folders and files. Each attribute can have only one state at a moment: it can be set or disabled. While file attributes are part of file system metadata, they always considered separate from other metadata values like file date or permissions.
In Windows 10, you can use File Explorer (both the Ribbon option and the File Properties dialog), PowerShell, and the good old command prompt to modify or set file attributes. Let's review each method in detail.
Change file attributes in Windows 10
- Open File Explorer and go to the folder that contains your files.
- Select the file whose attributes you want to change.
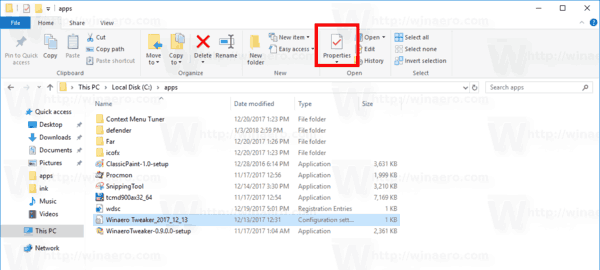
- On the Home tab of the Ribbon, click on the Properties button.
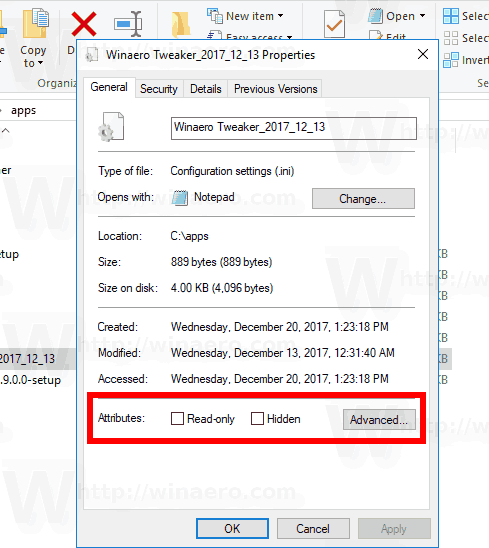
- In the next dialog, under Attributes, you can set or remove the Read-only and Hidden attributes.
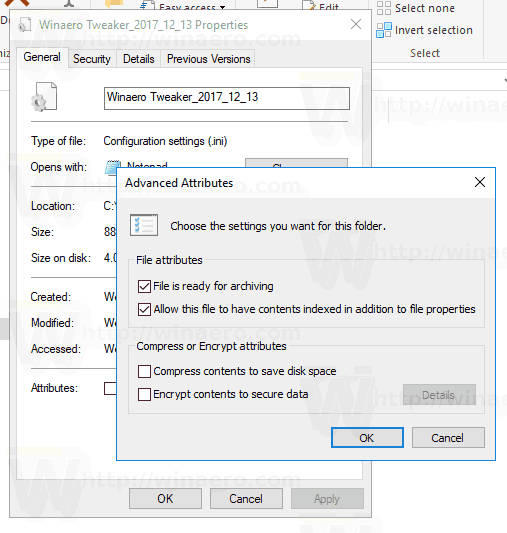
- Click on the Advanced button to set or clear extra attributes available for the file.
You are done.
The extra file attributes include:
- File is ready for archiving.
- Allow this file to have contents indexed in addition to file properties.
- Compress file contents to save disk space.
- Encrypt contents to secure data.
Tip: You can open the File Properties dialog using the context menu. Right-click a file and select the Properties command. Also, you can quickly open the file properties if you press and hold the Alt key and double-click the file or press Enter. See the article:
How to open file or folder properties quickly in Windows File Explorer
For the "Hidden" attribute, one more way is to use the button Hide selected items in the View tab of the Ribbon. See the following article:
How to hide and unhide files quickly in Windows 10.
Change file attributes with PowerShell
It is possible to change file attributes using the PowerShell console. There are a couple of cmdlets which can be used to view, set, or remove them. Here is how you can use them.
Open a new PowerShell console and use the following commands.
To view file attributes with PowerShell, run the following cmdlet:
Get-ItemProperty -Path path_to_file
Replace the path_to_file with the actual path to your file. The command will print all the attributes for the file.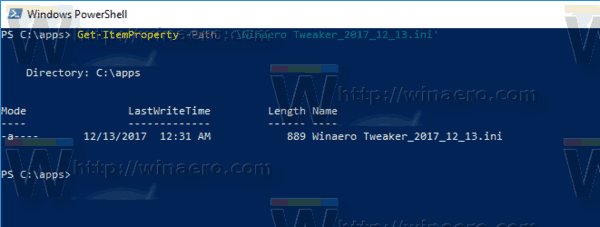
To view all of the information that is available, combine the output with the Format-List cmdlet, as shown below:
Get-ItemProperty -Path path_to_file | Format-list -Property * -Force
This will show more details about your file.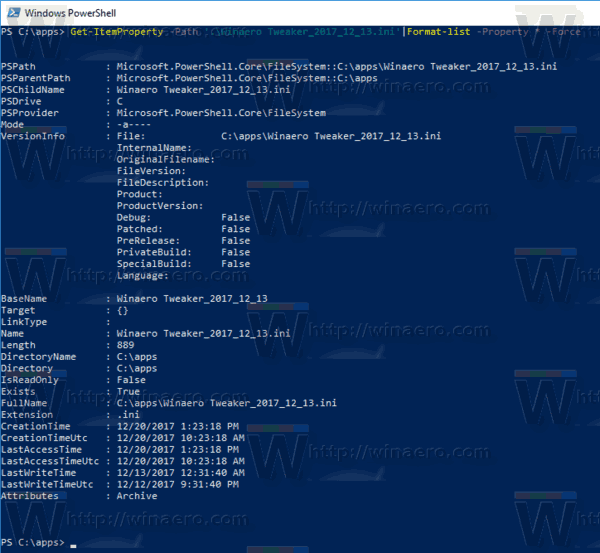
To change file attributes with PowerShell, run the following cmdlet:
Set-ItemProperty -Path path_to_file -Name IsReadOnly -Value True
This will set the ReadOnly attribute for the specified file.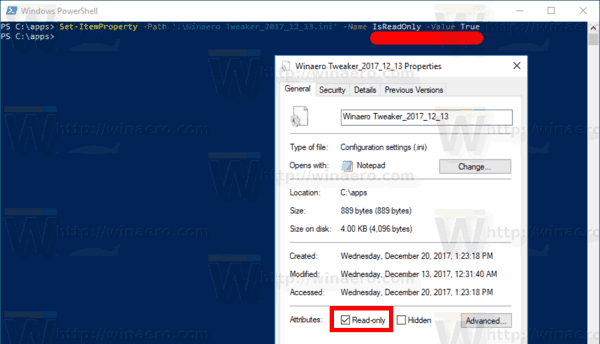
The possible values for the -Name argument are as follows:
- Archive
- Hidden
- Normal
- ReadOnly
- System
Set the appropriate value to True to set the attribute. A value of False will clear the attribute.
Change file attributes using Command Prompt
The command prompt comes with a console attrib command which allows managing file attributes. It supports the following attributes:
R Read-only file attribute.
A Archive file attribute.
S System file attribute.
H Hidden file attribute.
O Offline attribute.
I Not content indexed file attribute.
X No scrub file attribute.
V Integrity attribute.
P Pinned attribute.
U Unpinned attribute.
B SMR Blob attribute.
Each attribute can be set using the syntax like this (for example, for read-only attribute):
attrib +R path_to_file
To remove the attribute, you can use the following command:
attrib -R path_to_file
So, "+" sets an attribute, and "-" clears an attribute.
For example, here is how to set a hidden attribute using the command prompt.
Change the hidden attribute using the command prompt
- Open a new command prompt window.
- Type the following command to set the hidden attribute:
attrib +H c:\data\myfile.txt

- To remove the attribute, use the command:
attrib -H c:\data\myfile.txt
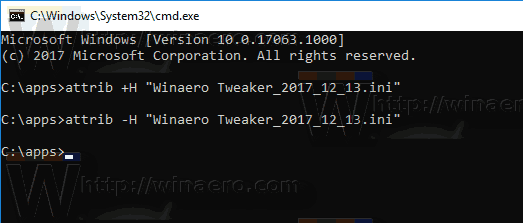
You are done. For more information, run the attrib command as follows:
attrib /?
That's it.
Support us
Winaero greatly relies on your support. You can help the site keep bringing you interesting and useful content and software by using these options:
