When you click on the shutdown or restart command in the Start menu or Win + X menu of Windows 10, the operating system performs the selected action directly. You may want to prevent certain users or a group from being able to shut down a Windows 10 device. Here is how it can be done.
Advertisеment
Windows has undergone many changes from Windows XP to Windows 10. Today, the operating system has slightly different ways to do the same tasks. Windows 10 offers various ways to restart and shutdown a PC. The 'Shut down the system' user right is required to enable hibernation support, to set the power management settings, and to cancel a shutdown.
There is a special security policy that can be used to prevent certain user accounts or group from shutting down a Windows 10 device. Let's see how it can be done.
If you are running Windows 10 Pro, Enterprise, or Education edition, you can use the Local Security Policy app to change the policy. All editions of Windows 10, including Windows 10 Home, can use an alternative solution mentioned below.
To Allow Users or Groups to Shut Down Windows 10,
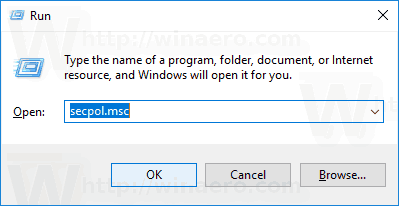
- Press Win + R keys together on your keyboard and type:
secpol.msc
Press Enter.
- Local Security Policy will open. Go to User Local Policies -> User Rights Assignment.
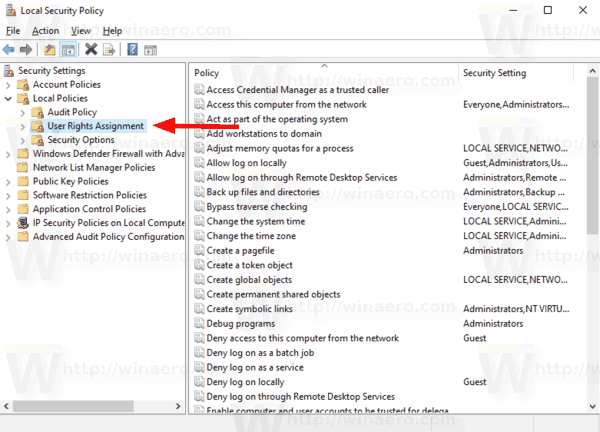
- On the right, double-click the option Shut down the system.
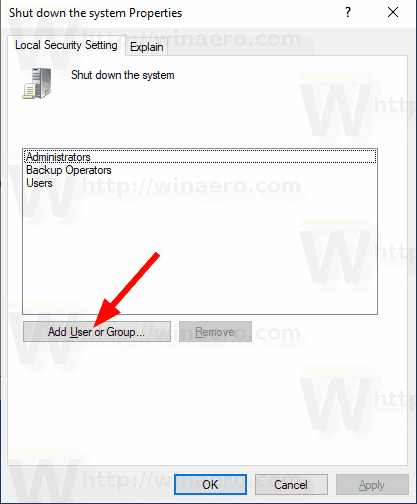
- In the next dialog, click Add User or Group.
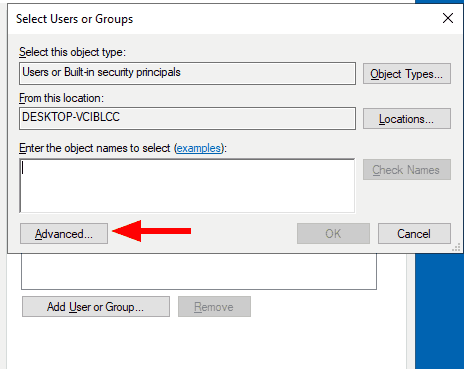
- Click on the Advanced button.
- Now, click on the Object Types button.
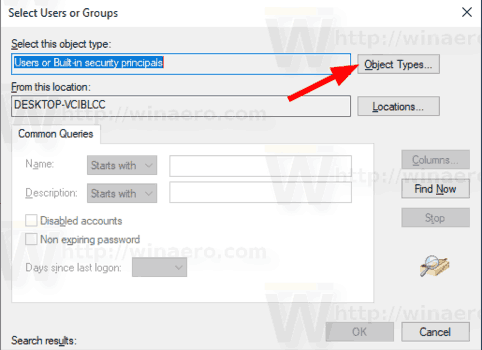
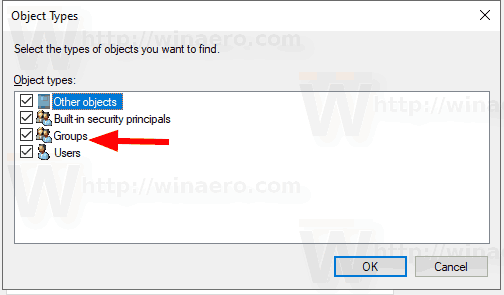
- Ensure that you have the Users and Groups items checked and click on the OK button.
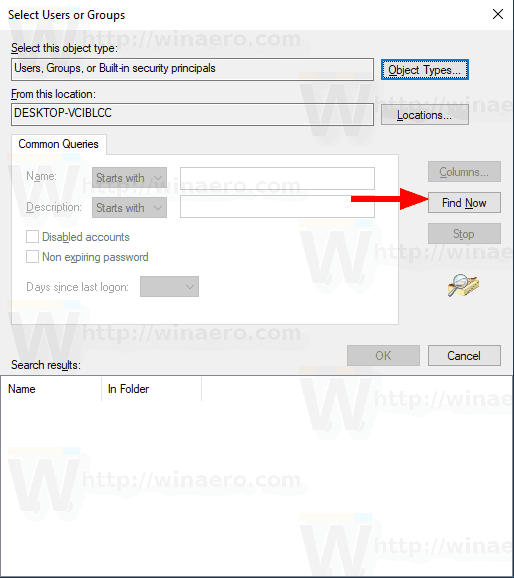
- Click on the Find now button.
- From the list, select the user account or group to deny log on locally for it. You can select more than one entry at once by holding the Shift or Ctrl keys and clicking on the items the list.
- Click on the OK button to add the selected items to the Object names box.
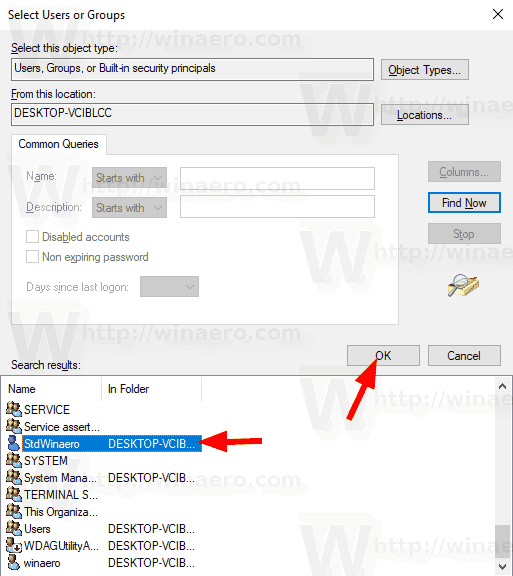
- Click on the OK button to add the selected items to the policy list.
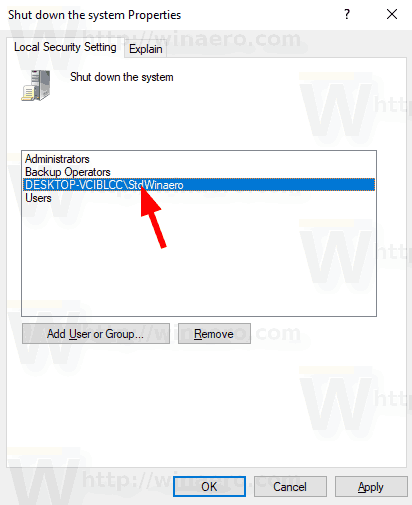
You are done.
To Prevent Users or Groups from Shutting Down Windows 10,
- Press Win + R keys together on your keyboard and type:
secpol.msc
Press Enter.

- Local Security Policy will open. Go to User Local Policies -> User Rights Assignment.

- On the right, double-click the option Shut down the system.
- Select an entry, use the Remove button in the policy dialog.
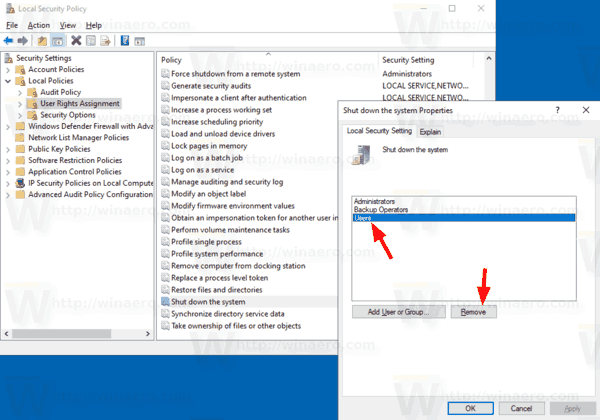
If your Windows edition doesn't include the secpol.msc tool, here is an alternative solution.
If your Windows edition doesn't include the secpol.msc tool, you can use the ntrights.exe tool from Windows 2003 Resource Kit. Many resource kit tools released for previous Windows versions will run successfully on Windows 10. ntrights.exe is one of them.
The ntrights tool
The ntrights tool allows you to edit user account privileges from the command prompt. It is a console tool with the following syntax.
- Grant a right:
ntrights +r Right -u UserOrGroup [-m \\Computer] [-e Entry] - Revoke a right:
ntrights -r Right -u UserOrGroup [-m \\Computer] [-e Entry]
The tool supports plenty of privileges which can be assigned to or revoked from a user account or group. Privileges are case sensitive. To learn more about the supported privileges, type ntrights /?.
To add ntrights.exe to Windows 10, read this post: What is the ntrights app and how you can use it. You can place the ntrights.exe file to the C:\Windows\System32 folder to quickly call it.
Revoke Shut Down Right with ntrights
- Open an elevated command prompt.
- Type the following command to deny Shut Down right:
ntrights -u SomeUserName +r SeShutdownPrivilege
Substitute the SomeUserName portion with the actual user name or group name. The specified user will be prevented from locally signing to Windows 10.
- To undo the change and allow the user to log on locally, execute
ntrights -u SomeUserName -r SeShutdownPrivilege
That's it.
Related articles.
- How to set the default action for the Shutdown dialog in Windows 10
- All ways to restart and shutdown Windows 10
- The Slide-to-Shutdown feature in Windows 10
- Speed up slow shutdown in Windows 10
- Enable Shutdown Event Tracker in Windows 10
- How to Find the Shutdown Log in Windows 10
- How to Clear Pagefile at Shutdown in Windows 10
- Add Shutdown Context Menu in Windows 10
- Create a Shut Down Windows Dialog Shortcut in Windows 10
- Create Shutdown, Restart, Hibernate and Sleep Shortcuts in Windows 10
- Create Slide to Shutdown Shortcut in Windows 10
- How to create a shortcut to the Shut Down Windows dialog in Windows 10
- Abnormal Shutdown Diagnosis in Windows 10
- Close Apps Automatically at Restart, Shut Down, or Sign Out in Windows 10
- Disable Shut Down, Restart, Sleep, and Hibernate in Windows 10
Support us
Winaero greatly relies on your support. You can help the site keep bringing you interesting and useful content and software by using these options:
