In our previous article, we saw how to calculate Hash values for a file without using third party tools. A special cmdlet "Get-FileHash" allows you to calculate the SHA1, SHA256, SHA384, SHA512, MACTripleDES, MD5, and RIPEMD160 hash values of the given file. Here is how to integrate this into the context menu in Windows 10.
Advertisеment
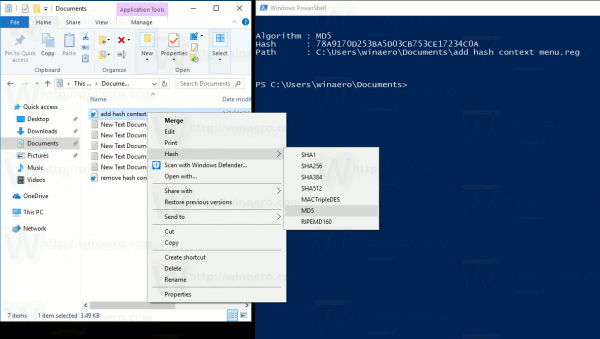
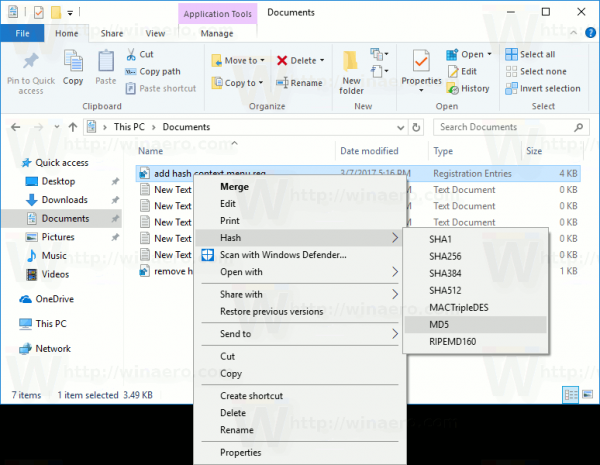
You can add the commands for calculating the File Hash to the context menu of File Explorer in Windows 10. This way, you can get the hash value for the selected files directly with one click.
Here is how it looks:
To add File Hash to the context Menu in Windows 10, do the following.
Apply the Registry tweak listed below. Paste its contents inside Notepad and save as a *.reg file.
 Windows Registry Editor Version 5.00


[HKEY_CLASSES_ROOT\*\shell\GetFileHash]
"MUIVerb"="Hash"
"SubCommands"=""

[HKEY_CLASSES_ROOT\*\shell\GetFileHash\shell\01SHA1]
"MUIVerb"="SHA1"

[HKEY_CLASSES_ROOT\*\shell\GetFileHash\shell\01SHA1\command]
@="powershell.exe -noexit get-filehash -literalpath '%1' -algorithm SHA1 | format-list"

[HKEY_CLASSES_ROOT\*\shell\GetFileHash\shell\02SHA256]
"MUIVerb"="SHA256"

[HKEY_CLASSES_ROOT\*\shell\GetFileHash\shell\02SHA256\command]
@="powershell.exe -noexit get-filehash -literalpath '%1' -algorithm SHA256 | format-list"


[HKEY_CLASSES_ROOT\*\shell\GetFileHash\shell\03SHA384]
"MUIVerb"="SHA384"

[HKEY_CLASSES_ROOT\*\shell\GetFileHash\shell\03SHA384\command]
@="powershell.exe -noexit get-filehash -literalpath '%1' -algorithm SHA384 | format-list"


[HKEY_CLASSES_ROOT\*\shell\GetFileHash\shell\04SHA512]
"MUIVerb"="SHA512"

[HKEY_CLASSES_ROOT\*\shell\GetFileHash\shell\04SHA512\command]
@="powershell.exe -noexit get-filehash -literalpath '%1' -algorithm SHA512 | format-list"

[HKEY_CLASSES_ROOT\*\shell\GetFileHash\shell\05MACTripleDES]
"MUIVerb"="MACTripleDES"

[HKEY_CLASSES_ROOT\*\shell\GetFileHash\shell\05MACTripleDES\command]
@="powershell.exe -noexit get-filehash -literalpath '%1' -algorithm MACTripleDES | format-list"


[HKEY_CLASSES_ROOT\*\shell\GetFileHash\shell\06MD5]
"MUIVerb"="MD5"

[HKEY_CLASSES_ROOT\*\shell\GetFileHash\shell\06MD5\command]
@="powershell.exe -noexit get-filehash -literalpath '%1' -algorithm MD5 | format-list"

[HKEY_CLASSES_ROOT\*\shell\GetFileHash\shell\07RIPEMD160]
"MUIVerb"="RIPEMD160"

[HKEY_CLASSES_ROOT\*\shell\GetFileHash\shell\07RIPEMD160\command]
@="powershell.exe -noexit get-filehash -literalpath '%1' -algorithm RIPEMD160 | format-list"
In Notepad, press Ctrl + S or execute the File - Save item from the File menu. This will open the Save dialog. There, type or copy-paste the name "Hash.reg" including quotes.
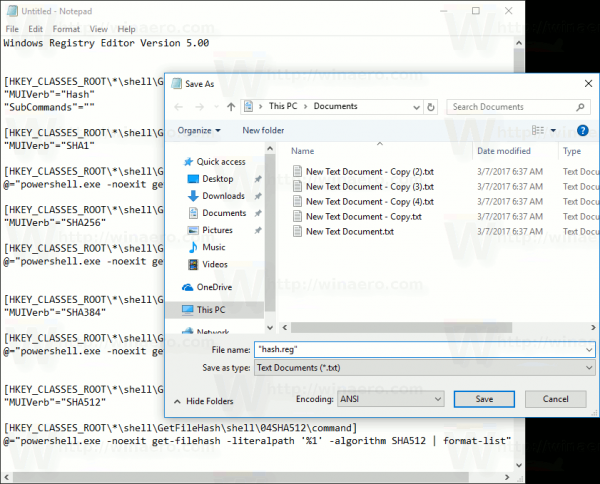
Double quotes are important to ensure that the file will get the "*.reg" extension and not *.reg.txt. You can save the file to any desired location, for example, you can put it in your Desktop folder.
Double click the file you created, confirm the import operation and you are done!
In the tweak above, a special command line argument -noexit of powershell.exe keeps the PowerShell window opened after the Get-FileHash finishes its work. So you can easily see or copy the hash value from the cmdlet output. Other command line arguments of Powershell.exe are just parameters described in the previous article.
To save your time, I made ready-to-use Registry files. You can download them here:
The undo tweak is included.
You can save your time and use Winaero Tweaker instead. It comes with the following feature:
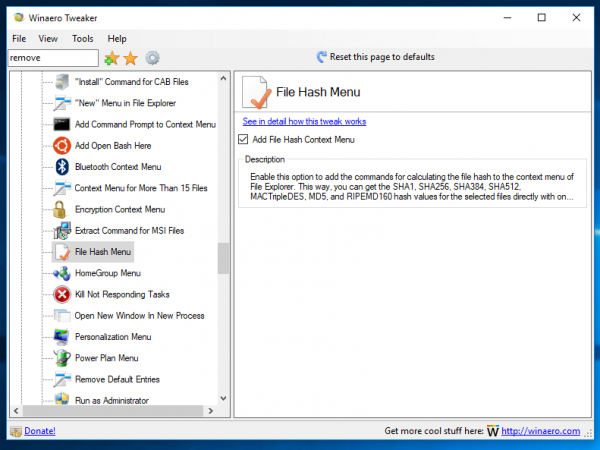
You can download it here: Download Winaero Tweaker.
That's it.
Support us
Winaero greatly relies on your support. You can help the site keep bringing you interesting and useful content and software by using these options:

Thanks this is much more convenient than using File Checksum Integrity Verifier from Microsoft!
Very nice, thanks.
Or you could just use HashTab ( http://www.majorgeeks.com/files/details/hashtab.html ).
This little jewel of a program adds a ‘File Hashes’ tab within the Windows properties dialog…
I love this program
How do I workaround without “Open with” pops up on Windows 7?
Any way to get CRC32 into the hash context menu?
Something goes wrong if an apostrophe (‘) exists in the file name. It maybe caused by “…’%1’…” But I don’t know how to fix it. Do you have some ideas?