After updating to Windows 11 24H2 you may face access errors 0xc000a000, -1073700864, STATUS_INVALID_SIGNATURE or The cryptographic signature is invalid when opening NAS. The reason is a change in Windows 11 that makes the mandatory use of SMB signing for all outgoing packets. It may cause a flow of issues with accessing plent of network access storage devices when Windows 11 24H2 will hit the market.
Advertisеment
The issues can be sorted out by enabling SMB signing in the NAS settings or disabling the SMB signing on the client computer. From the security point of view the first option is preferable, but the NAS must support this feature.
SMB Signing is one of the security features of the SMB/CIFS file sharing protocol. When enabled, each SMB message is digitally signed in the header. This signature ensures that the message content has not been modified and verifies the authenticity of the sender. This prevents SMB man-in-the-middle and NTLM relay attacks. Previously, SMB signing was required only when accessing the SYSVOL and NETLOGON network folders on AD domain controllers.
Also note that the new configuration for the network stack will eventually be applied to other versions of Windows 11 and 10. On one hand, the use of SMB signing increases the load on the client and server. It also reduces the data transfer rate. On the other hand, it improves the network security and data safety.
So, with Windows 11 version 24H2, SMB signing will be required for all outgoing connections . That's why accessing a third-party NAS may fail. If the SMB server does not support this mode, the Windows client will reject the connection. You can find if SMB signing is enabled on your computer as follows.
Check if SMB Signing is enabled
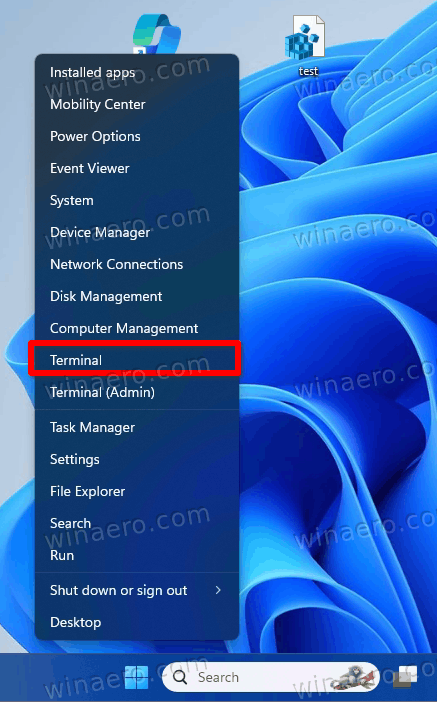
- Right-click the Windows logo icon in the taskbar and select Terminal from the menu.
- The Terminal app opens to the PowerShell tab, there type the following command:
Get-SmbClientconfiguration | Format-List EnableSecuritySignature,RequireSecuritySignature.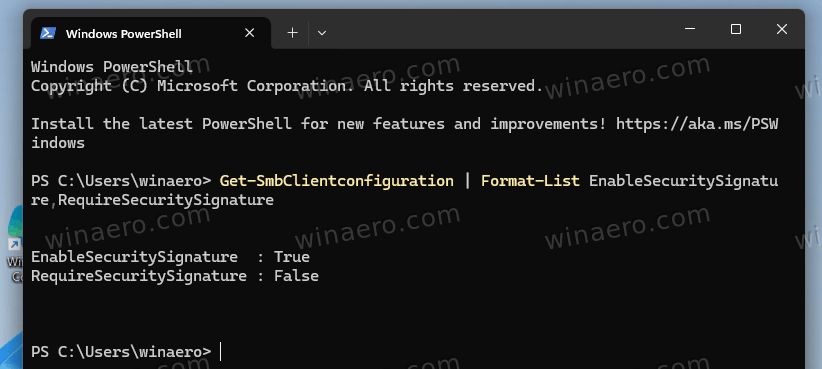
- If EnableSecuritySignature is set to True, the server endpoint defines should your Windows use SMB signing. If not, Windows 11 will not sign the packets by default.
- If RequireSecuritySignature is False, then SMB signing is not mandatory, regardless of it is enabled or not. If it is True, Windows 11 will always sign the SMB traffic.
Obviously, to access a NAS that has become inaccessible due to changes in Windows 11 24H2, you have to set RequireSecuritySignature to false in case if it is set to true.
Fix NAS Access in Windows 11 24H2
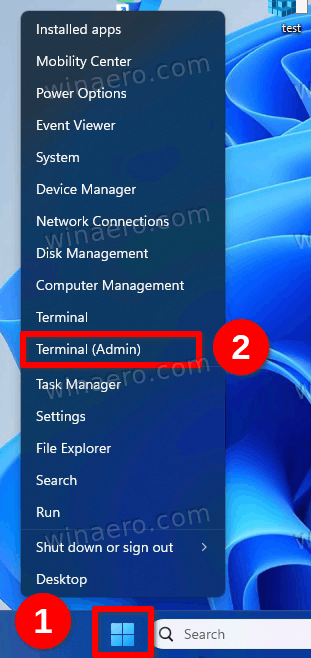
- Press Win + X on the keyboard and select Terminal(Admin) from the menu.
- In the elevated Terminal app on the PowerShell tab, type
Set-SmbClientConfiguration -RequireSecuritySignature $falseand hit Enter. - Confirm the change by pressing Y.

- Restart the computer.
- Open your NAS. It will open without issues, and work as is should.
That's it.
Alternatively, you set the network configuration with a Registry tweak.
Disable Client SMB Signing in the Registry
- Press Win + R on the keyboard, and type regedit in the Run dialog; then press Enter.
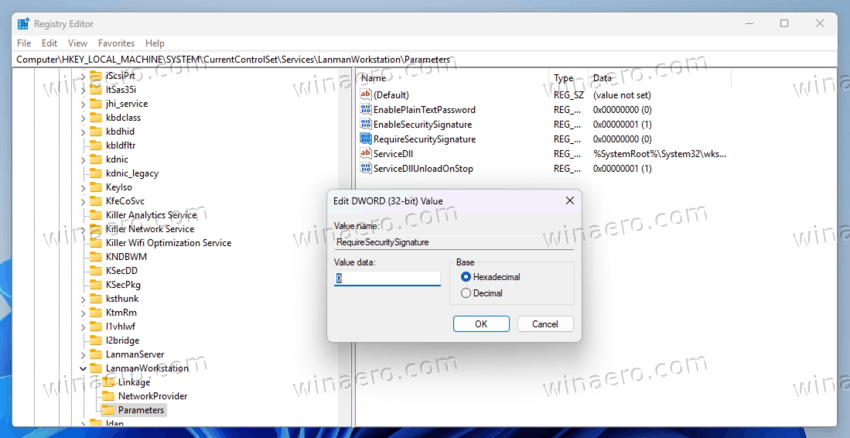
- In the Registry Editor, go to the HKEY_LOCAL_MACHINE\SYSTEM\CurrentControlSet\Services\LanmanWorkstation\Parameters key in the left pane.
- Right-click the Parameters on the left, and select New > DWORD (32-bit) Value from the context menu.
- Name the new value RequireSecuritySignature and leave its value data 0.
- Restart the computer.
From now, SMB signing will not be enforced when you connect to a NAS or to any other shared network resource.
Note: If you already have the RequireSecuritySignature value in the Registry, simply set it to 1 and restart Windows.
Ready-to-use REG files
To save your time, you can download the following REG files.
The linked zip archive includes two files. Extract them to any folder of your choice.

Double-click the disable-smb-signing-client.reg file to turn off the mandatory signature requirements for outgoing connections. Click Yes in the User Account Control prompt, and then once again the Registry Editor confirmation. After that, you need to restart Windows 11.
Finally, the second file, enable-smb-signing-client.reg, is the undo tweak.
Command Prompt method
Besides the manual editing of the Registry, you can execute a reg.exe command to change the RequireSecuritySignature value. Such commands are great for using in batch files, administrative scenarios, logon commands and so on.
Here are the commands. Run them as Administrator.
- Turn off SMB signing requirement:
reg add "HKLM\SYSTEM\CurrentControlSet\Services\LanmanWorkstation\Parameters" /v RequireSecuritySignature /t REG_DWORD /d 0 /f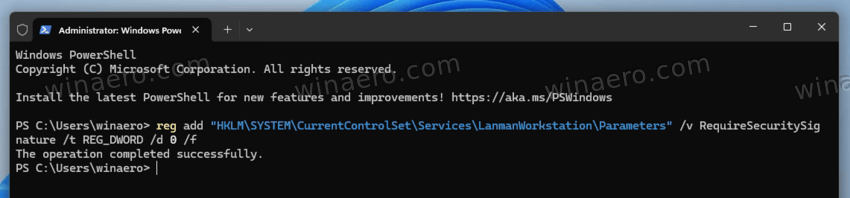
- Make the signature requirement mandatory (default in 24H2):
reg add "HKLM\SYSTEM\CurrentControlSet\Services\LanmanWorkstation\Parameters" /v EnableSecuritySignature /t REG_DWORD /d 1 /f.
Besides the network access storage devices, sometimes you need to access a shared folder on your computer running Windows 11 24H2. In this case, it will act as a server. If the client device doesn't support SMB signing, like Android phone, or a PC with a legacy Windows release, it will not able to access your shared folder. For that, you need to disable SMB signing on the server components of your Windows OS.
- Open Terminal as Administrator from Start button's right-click menu in the taskbar.
- Type the following command and press Enter:
Set-SmbServerConfiguration -RequireSecuritySignature $false. Confirm the change by pressing Y.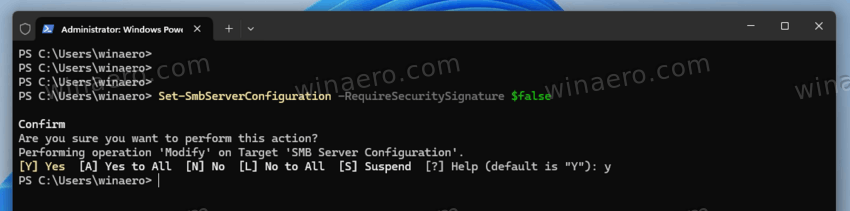
- Restart the computer. Windows 11 will no longer require SMB signing for shared folders.
- To check the current status of SMB signing in Windows 11, run in Terminal/PowerShell:
Get-SmbServerconfiguration | Format-List EnableSecuritySignature,RequireSecuritySignature.
That's it.
Similarly to the client settings, there are a Registry tweak and console commands that you can use instead of /in addition to PowerShell.
Disable Server SMB Signature Requirement in the Registry
- Press Win + R on the keyboard, and type regedit in the Run dialog; then press Enter.
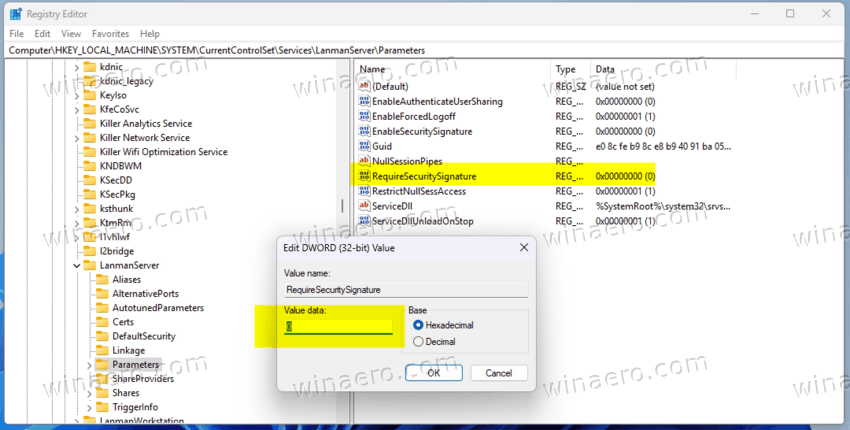
- Navigate to the HKEY_LOCAL_MACHINE\SYSTEM\CurrentControlSet\Services\LanmanServer\Parameters key on the left.
- Right-click the Parameters on the left, and select New > DWORD (32-bit) Value from the context menu.
- Name the new value RequireSecuritySignature and leave its value data 0.
- Restart the computer.
That's it!
Similarly, you can save your time by using the REG files I have created.
REG files
Download the ZIP archive linked here, and extract it to any folder of your choice.

To deactivate the mandatory signature requirement for incoming connections to shared folders, double-click the disable-smb-signing-server.reg file. Confirm in the User Account Control window by clicking Yes, and then confirm again in the Registry Editor prompt. Afterward, restart Windows 11.
The second file, enable-smb-signing-server.reg, serves as the reversal tweak.
Console commands
Instead of the Registry editing, you can run the following commands in a batch file, Terminal, or Command Prompt - whatever more suites for your tasks.
- To disable SMB signing requirement for shared folders:
reg add "HKLM\SYSTEM\CurrentControlSet\Services\LanManServer\Parameters" /v RequireSecuritySignature /t REG_DWORD /d 0 /f.
- Restore the default behavior in 24H2 (enable enforcement):
reg add "HKLM\SYSTEM\CurrentControlSet\Services\LanManServer\Parameters" /v EnableSecuritySignature /t REG_DWORD /d 1 /f.
Finally, if your Windows 11 edition is Pro, Education, Workstation or Enterprise, it includes the gpedit.msc tool, which is the Local Group Policy Editor app. In this case, you can use it to manage the SMB signing options via the GUI.
Turn off SMB Signing in Group Policy
To disable SMB Signing with Group Policy and restore NAS access in Windows 11 24H2, do the following.
- In Windows Start menu or search pane type gpedit.msc, and select "open" to launch it.

- Now, on the left, go to Computer Configuration > Windows Settings > Security Settings > Local Policies > Security Options.
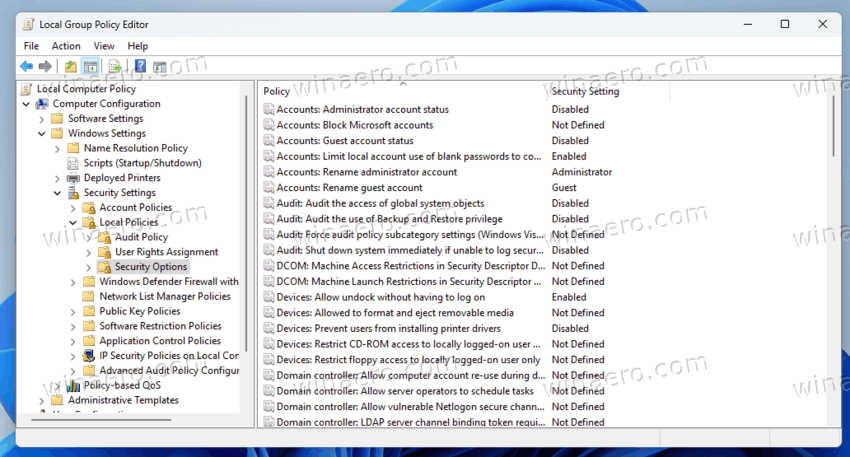
- In the lift on the right, find the Microsoft network client: Digitally sign communication (always) option.
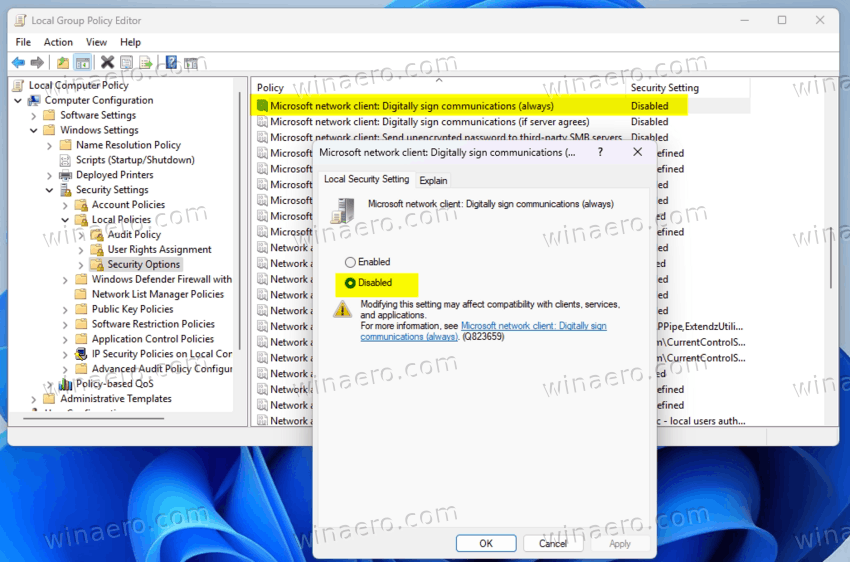
- Double-click it and set to Disabled, the click Apply and OK.
- Similarly, disable the Microsoft network client: Digitally sign communication (if server agrees) policy.
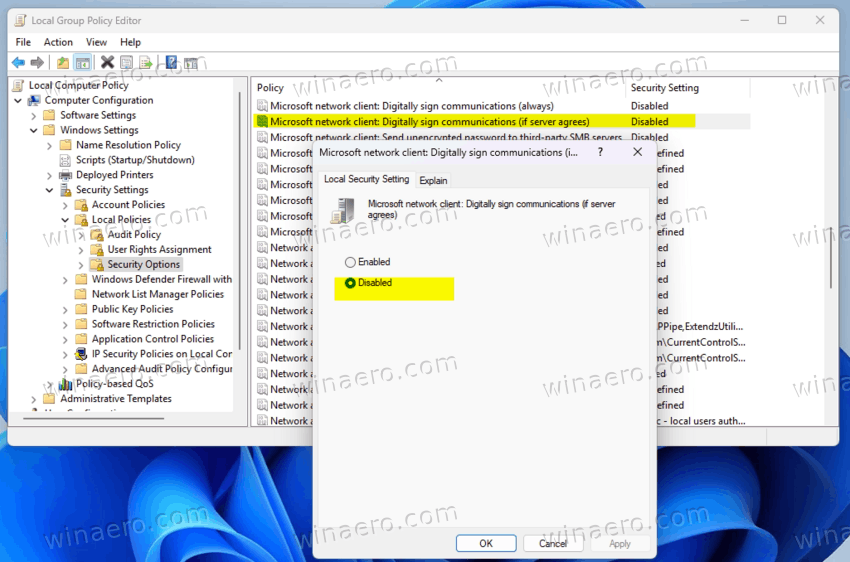
- Restart the computer.
That's how you can disable SMB Signing in order to access your NAS after installing Windows 11 version 24H2.
It is worth noting that some recent NAS models may have a dedicated option to activate SMB signing on their side. If your NAS is not that old, check its manual for presence of such an option. Also, its vendor may issue a software update that brings with it the appropriate option.
Article Summary
So, to access NAS that refuses to open after installing Windows 11 24H2, you can use one of the following solutions.
- Open Terminal as administrator, and run this command in the PowerShell tab:
Set-SmbClientConfiguration -RequireSecuritySignature $false. - Alternatively, run these commands in the command prompt:
reg add "HKLM\SYSTEM\CurrentControlSet\Services\LanmanWorkstation\Parameters" /v RequireSecuritySignature /t REG_DWORD /d 0 /freg add "HKLM\SYSTEM\CurrentControlSet\Services\LanmanServer\Parameters" /v RequireSecuritySignature /t REG_DWORD /d 0 /f
- Alternatively, open gpedit.msc, go to Computer Configuration > Windows Settings > Security Settings > Local Policies > Security Options, and set to disabled these policies: Microsoft network client: Digitally sign communication (always) and Microsoft network client: Digitally sign communication (if server agrees). Keep in mind that gpedit.msc is missing in home editions of Windows 11.
That's it!
Support us
Winaero greatly relies on your support. You can help the site keep bringing you interesting and useful content and software by using these options:

thank you, a lot of “fixes” don’t work, this did!!!! Thank you, Thank you, Thank you,