Windows 10 shows you a list of all user accounts available on your PC in the bottom left corner of the logon screen. You can click the user avatar, enter the password if necessary, and login using the provided credentials. It is possible to disable certain user accounts in Windows 10. It won't be possible to use them for signing in after doing that. Here is how.
Advertisеment
The ability to disable a user account is a good way to prevent it from being used. For example, if you delete an account, all its related data, settings and options will be forever removed. But when you disable a user account in Windows 10, you can re-enable it later and use it without issues.
Disabling a user account makes it disappear from the logon screen and from the Start menu's list of accounts. It also won't be possible to access the computer using the disabled account via the network. You need to be signed in as an administrator to proceed.
To disable a user account in Windows 10, do the following.
Right click the Start button on the taskbar and choose Computer Management from its context menu.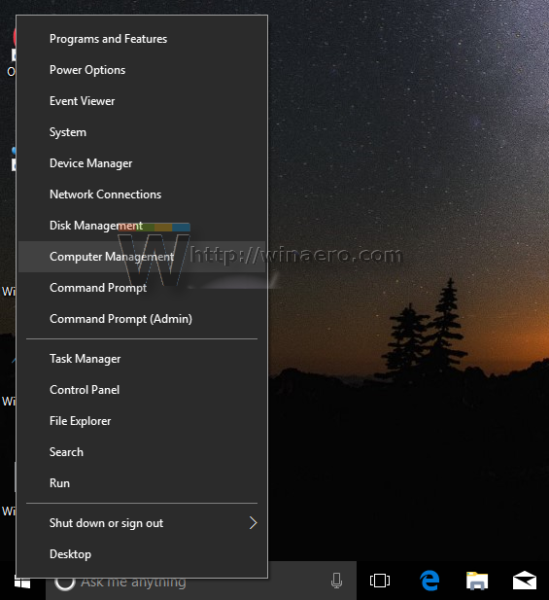
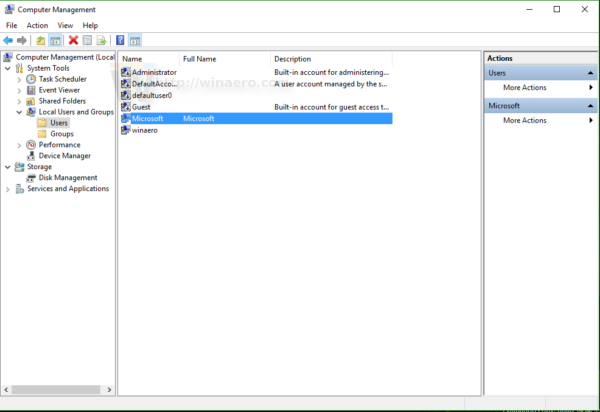
Under Computer Management -> System Tools, select the item Local Users and Groups -> Users.
Double-click on the user account you want to enable or disable. This will open the account's properties.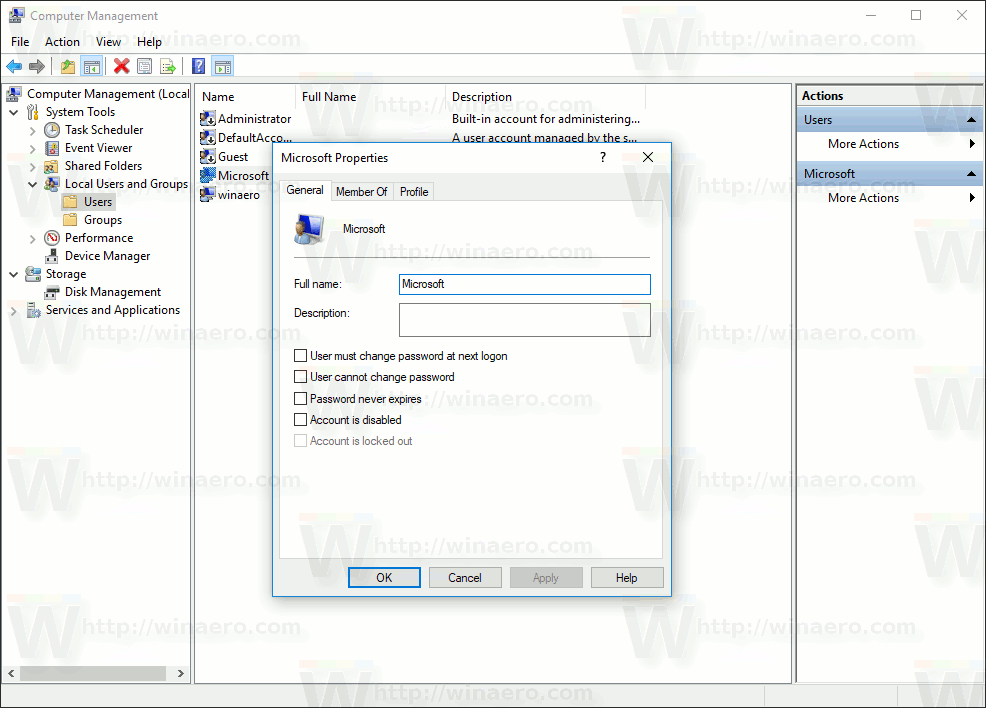
Now, tick the checkbox Account is disabled and click the OK button.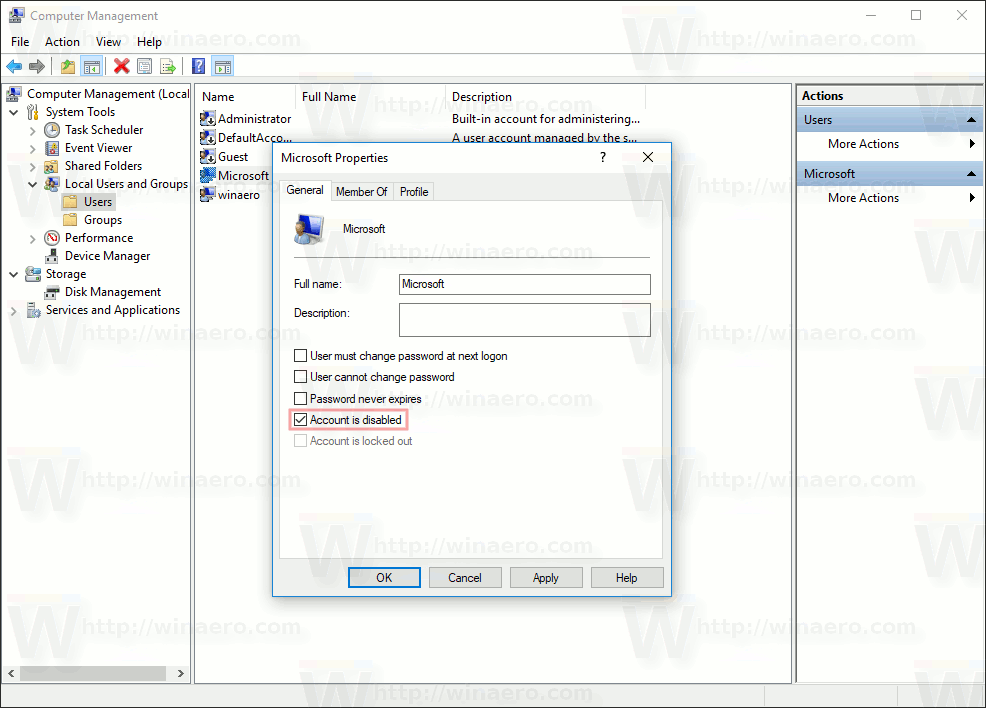
This will disable the selected user account.
The Local Users and Groups tool is not available in the Home (Core) edition of Windows 10. Instead, you can use a special console command.
To disable a user account in Windows 10 Home, you need to open an elevated command prompt. There, type the following command:
net user "some user name" /active:no
Replace the "some user name" portion with the actual name of the user account that you want to disable.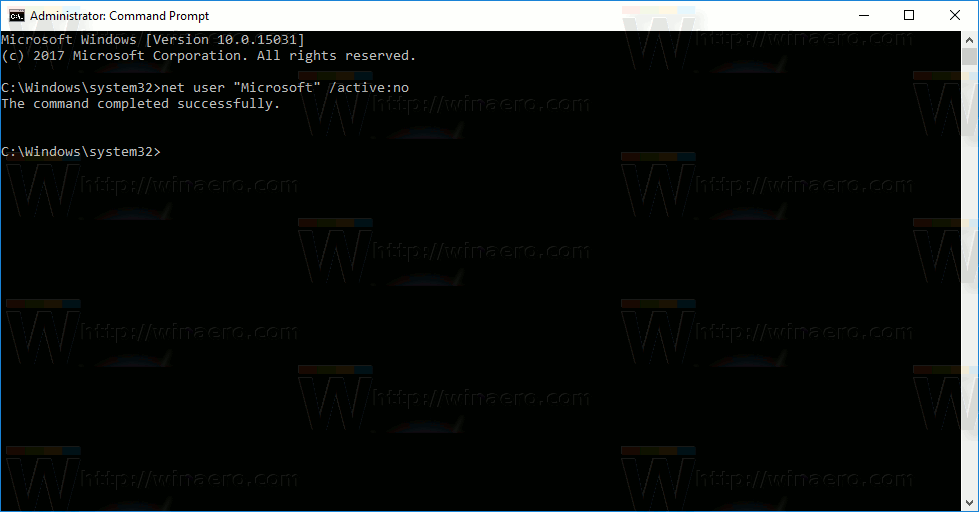
To enable a user account in Windows 10, you can use Computer Management or the net user console command.
To enable a user account with Computer Management, open the account properties and untick the checkbox "Account is disabled":
To enable a user account with a special console command, open an elevated command prompt and type
net user "some user name" /active:yes
Replace the "some user name" portion with the actual name of the user account that you want to enable.
Additionally, you might be interested in reading how to hide user accounts from the login screen in Windows 10. Hiding the account is different from disabling it entirely.
That's it.
Support us
Winaero greatly relies on your support. You can help the site keep bringing you interesting and useful content and software by using these options:

Windows 10 appears to have “Default” user account enabled without a password and with local administrator rights! This is surely a huge security risk!
This is wrong. Local Users & Groups doesn’t appear on Computer Management in Windows 10 Home.
Hi Ed.
This is mentioned in the article.
Have you read it?
For Home users, there is an alternative solution, again mentioned in the article.
Well this doesn’t work anymore due to the uselessness that is Microsoft, removing the user field and trying to force you to use their stupid “settings” menu…
Hi, please enable my account
How?