

Wake-on-LAN (WOL) is a great feature of PCs which allows you to wake them up from sleep or shutdown over your local area network or over the Internet. It is like a remote power on button. If your hardware has WOL support, you can power on the computer remotely using any of the dozens of freeware tools available on the web to initiate the wake up event. In this article, I will cover the basic steps which are required to configure WOL under Windows 10.
- First, you must enter your BIOS to find and enable the 'Wake on LAN' feature if you have some integrated Ethernet network card. For my Phoenix BIOS, it is located at Advanced -> Wake Up Events -> Wake up on LAN and also requires the 'Deep Sleep' option to be disabled. This option in the BIOS varies from PC to PC, so refer to your hardware manual for your motherboard.
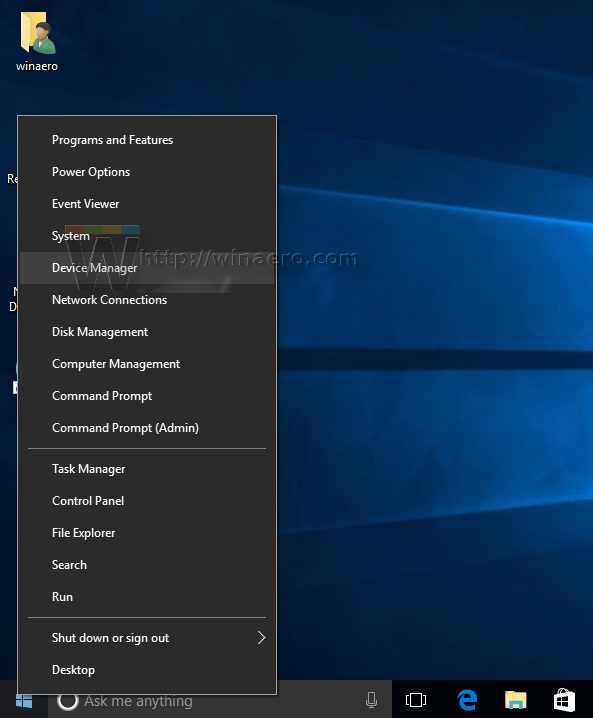
- Boot into Windows 10 and press Win + X keys together to bring up the Power User menu. There, select the Device manager item:

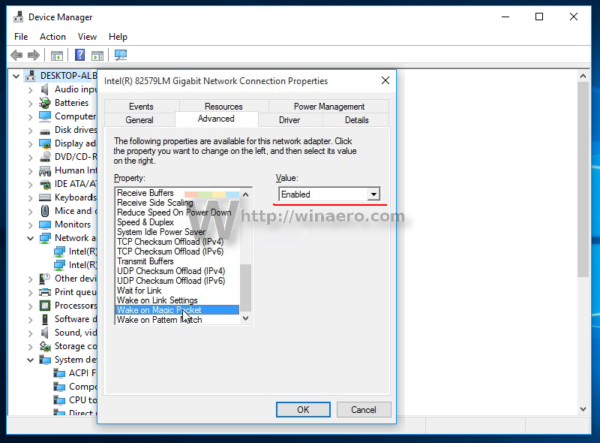
- In Device Manager, locate you network adapter and double click it. It will display the network adapter's properties.
- Switch to the Advanced tab and scroll down in the settings to locate the network adapter's option called Wake on Magic Packet. Set it to 'Enabled':
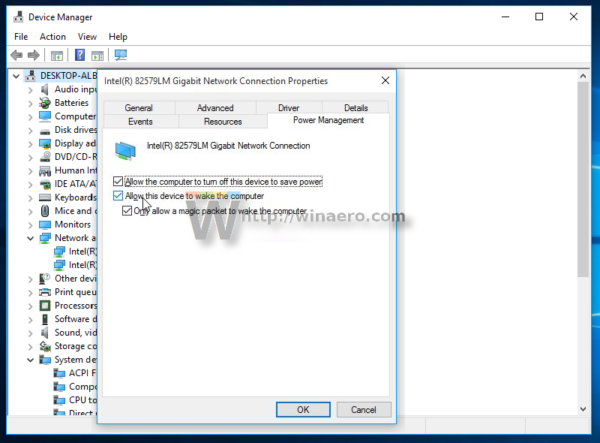
- Now go to the Power Management tab, and check the settings there. It should be something like this:
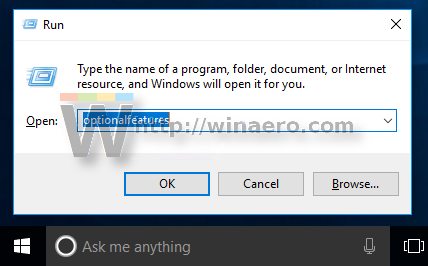
- Install the Simple TCPIP Services feature: press Win + R shortcut on your keyboard and type the following command in the Run dialog:
optionalfeatures.exe
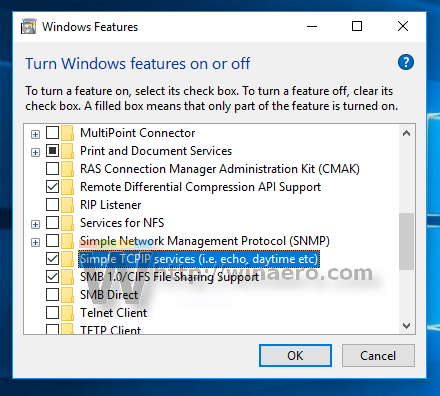
- Tick the Simple TCPIP Services option:
- Reboot your PC.
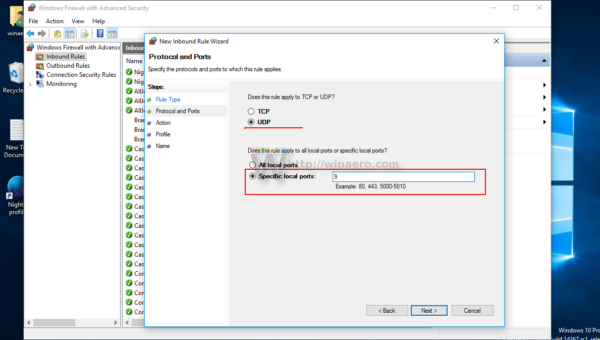
- Open UDP port 9 in Windows Firewall - to do this, go to Control Panel\All Control Panel Items\Windows Firewall, click "Advanced Settings" on the left, and create a new Inbound Rule to open the required port.


That's it.
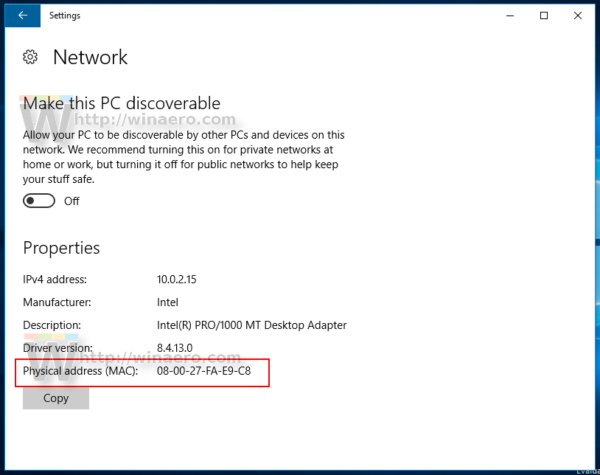
Now you need to write down the MAC address of your network adapter somewhere. To see it, do the following.
- Open Settings.
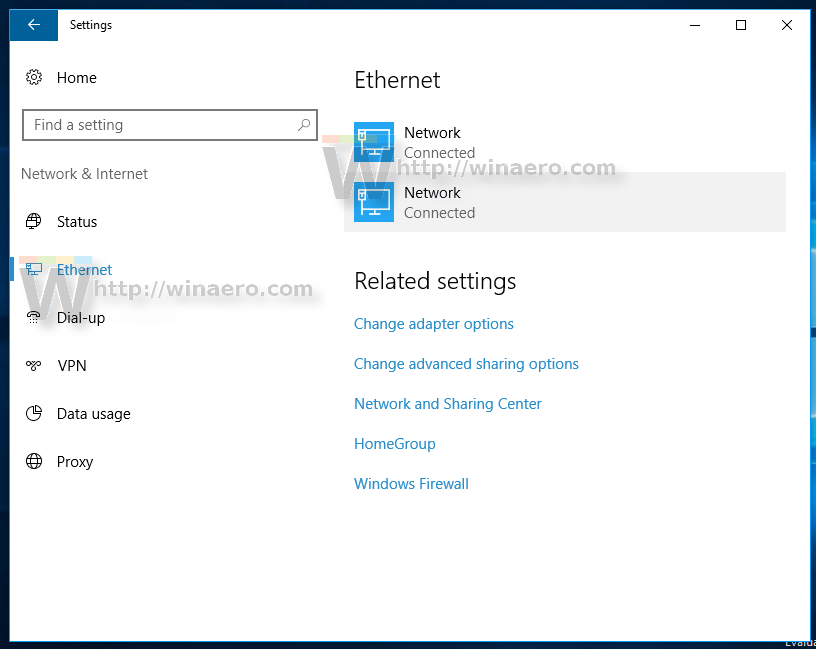
- Go to Network & Internet -> Ethernet if you are using a wired connection. In case if your network adapter is wireless, go to Network & Internet -> Wi-Fi.

- Click your connection name and see the physical address of the adapter:

On another PC, download this little freeware app called WolCmd. It is my recommended command line utility which must be used according to the following syntax:
wolcmd [mac address] [ip address] [subnet mask] [port number]
So in my case, to wake up my own PC, I have to run it as follows:
wolcmd D43D38A6A180 192.168.0.100 255.255.255.0 9
While typing the syntax, just delete the "-" char from the MAC address and use your actual network parameters.
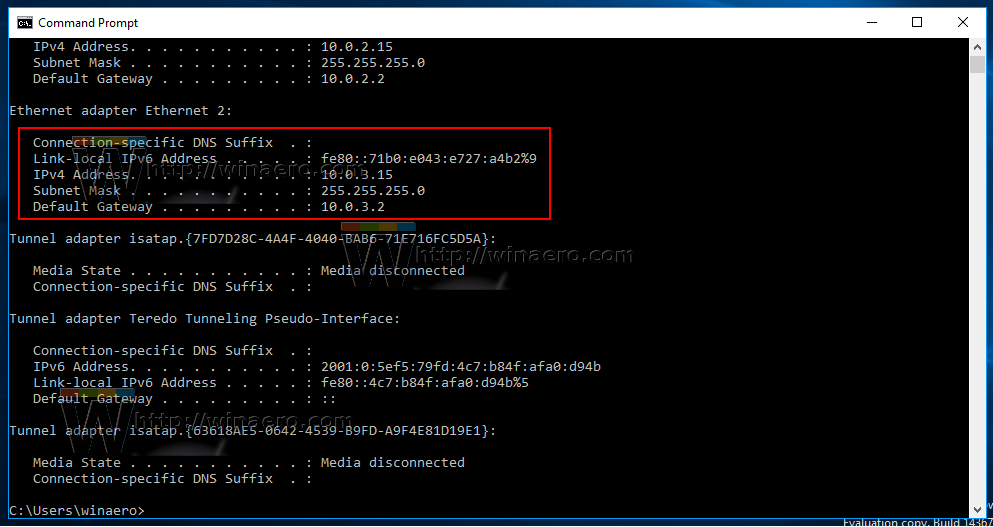
In case you don't know what is subnet mask and your IP address, you can find them quickly by using the ipconfig command. Open a new command prompt instance and type ipconfig. The output will be as follows:
Support us
Winaero greatly relies on your support. You can help the site keep bringing you interesting and useful content and software by using these options:
This doesn’t work. I got all the way to the end where in the command prompt you put in wolcmd mac address ip address subnet mask port and its states wolcmd is not recognized as an internal or external command
This Article also did not explain how I know which port to use….
The port is 9.
Download WOLCMD then……
There’s no “Wake …” options of any kind in my Win 10 (device manager, network adapter, advanced tab), but I have enabled WoL in BIOS. There’s only “UDP …” and the next and last is “Wait for Link”. That’s all, sadly.
There is no need to modify the windows firewall or install simple TCP/IP services to use WOL. Think about it, windows is not functioning. The computer is turned off. The magic packet is sent on layer 2.
Been wrestling with this for a while – my NUC8 wasn’t waking despite all the NIC and BIOS settings being correct.
Turns out somehow during my Win10 install my wired ethernet was set to “Public” in Network Settings. Wake On Lan doesn’t work on “Public” networks. I had to go in and change it to “Private” and it immediately started working.
I had to dig this out of my Intel NIC driver release notes and haven’t seen it mentioned anywhere else on the interwebs so sharing here in case it helps save someone my heartache in the future.
Thanks for the great guide!
If you have an Android phone, there’s an app called Wake on LAN with a blue circle icon and WOL in white inside it.