
Recently, we covered how to disable the automatic repair feature that starts during the boot process in Windows 10. Our readers asked us what to do if the PC has entered an automatic repair loop. Instead of starting normally, the operating system starts automatic repair every time you start it making it impossible to recover from it. Microsoft has not made it easy to exit this process due to bad changes in Windows 8. Here is what you can do to exit it.
Usually, Windows starts automatic repair when it fails to boot twice consecutively. But sometimes an error occurs during the repair process making it unable to proceed further and so it gets stuck in a loop. If your PC has entered this state, you obviously cannot access the bootloader settings, which are responsible for starting the repair process. To change it, you need to boot from a bootable recovery media with the appropriate operating system you have installed. The best way to get such media is to create a bootable USB on some other PC. Refer to these articles:
- How to install Windows 10 from a bootable USB stick.
- How to create a bootable UEFI USB drive with Windows 10 Setup
- How to create a recovery USB drive for Windows 10
If you have an installation DVD with Windows 10, you can also use it. Note that if your PC has a UEFI BIOS with Compatibility Support Module turned off, then it is also likely to have a GPT disk partition. In that case, the bootable USB media you create will also need to be UEFI drive. If your PC BIOS is non-UEFI or has Compatibility Support Modile turned on, you can create a regular USB with legacy MBR bootloader.
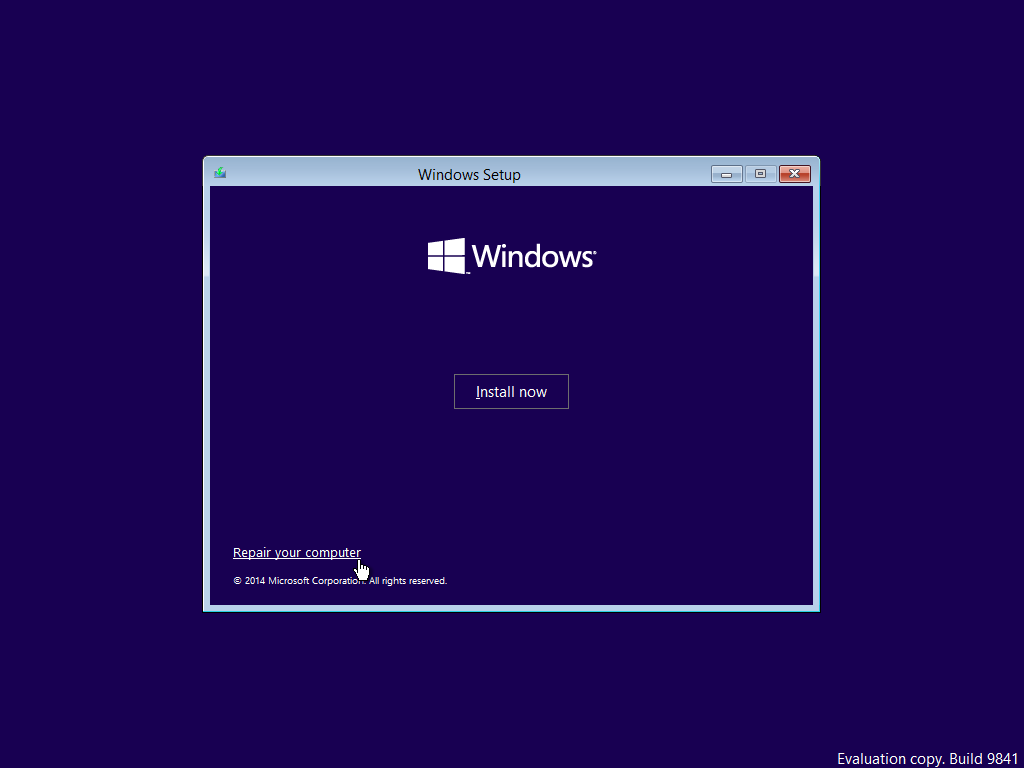
Next, start your PC from the USB stick or DVD. When you see the Install Windows screen, click the link "Repair Your Computer" at the bottom left:
In the screen titled Choose an option, pick the Troubleshoot item.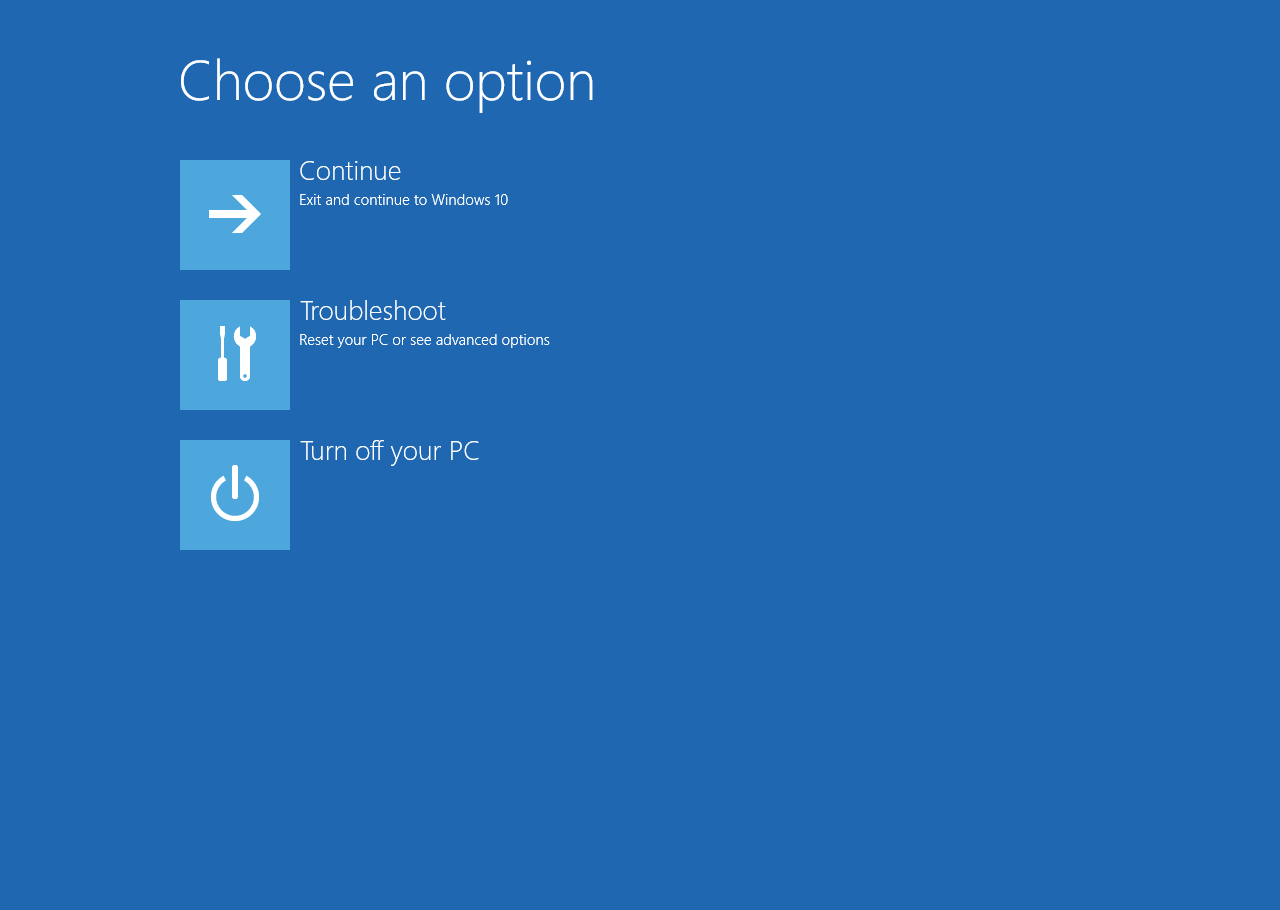
On the next screen, select "Advanced Options"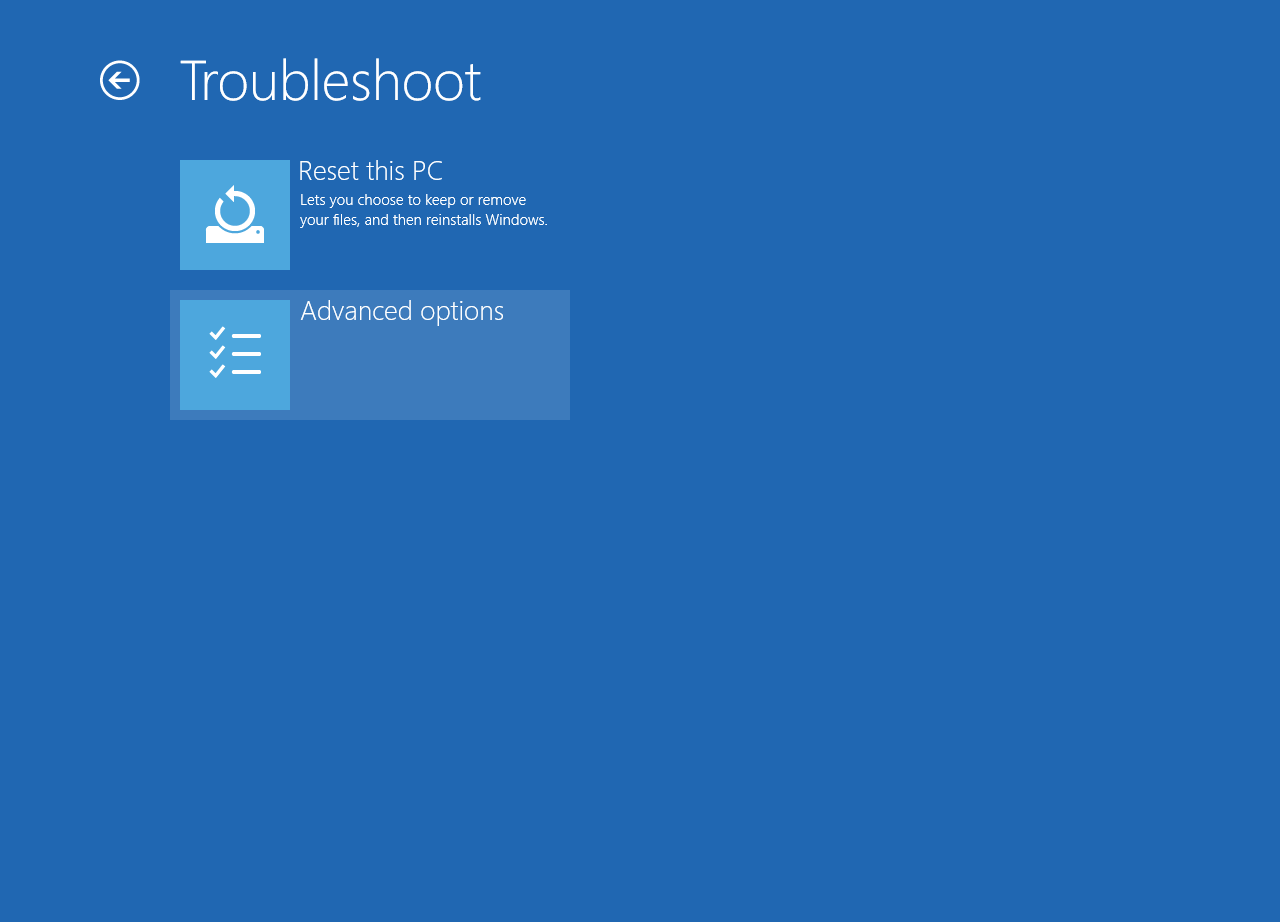
In the Advanced Options screen, pick the item named "Command Prompt".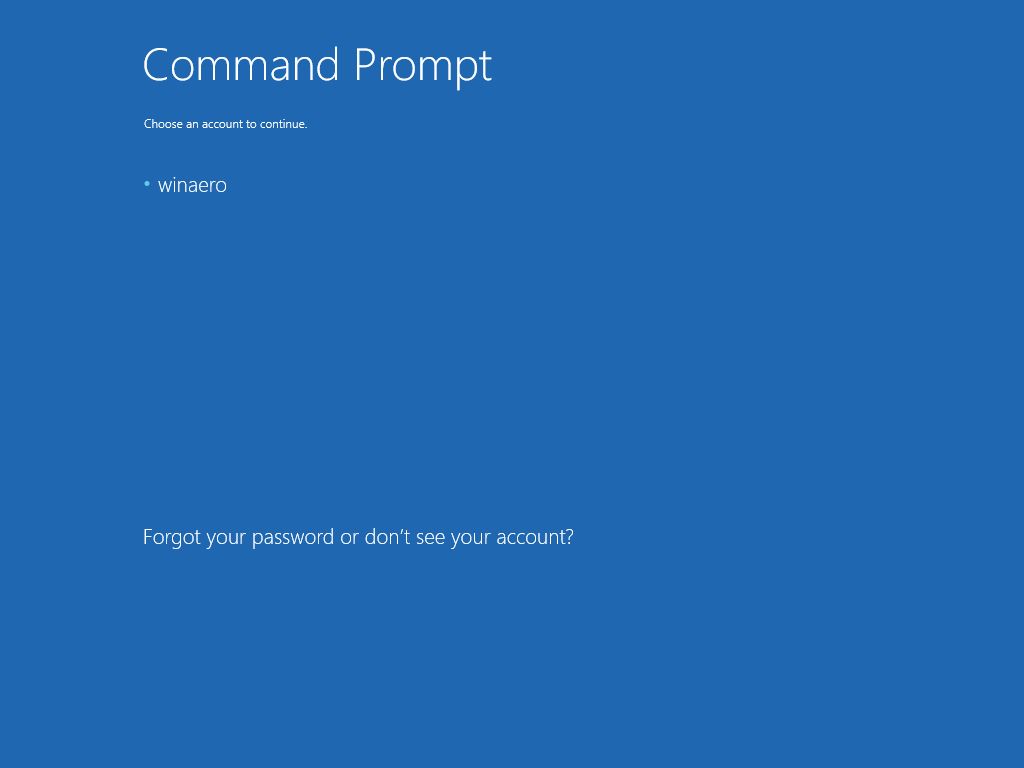
You will now enter the Windows Recovery Environment. The command prompt will appear. Type the following command:
bcdedit
You will see list of boot options with its {GUID} identifiers. Look for the one containing the line resumeobject.
Note or copy the identifier which contains the resumeobject item and type the following command:
bcdedit /set {GUID} recoveryenabled No
In the above command, substitute {GUID} by the identifier you copied earlier.
So, you just disabled the automatic recovery feature for the installed operating system. It is a good idea to enable the safe mode option while you are running the Recovery Environment. Do it as described in the following article:
How to start Windows 10 in safe mode and access F8 options when it doesn’t boot normally
Finally, perform the drive check manually. Type the following command in the recovery environment:
chkdsk /r c:
This will check your file system for errors. It can take a notable amount of time, so be patient.
After chkdsk reports that it has finished, you can reboot your PC and try to start the installed operating system. It should work as expected. If some operating system files are corrupted or damaged, you can try to run the following command before rebooting normally:
sfc /scannow
That's it.
Support us
Winaero greatly relies on your support. You can help the site keep bringing you interesting and useful content and software by using these options:
Really great Tip how to fix this endless loop misery!
To late for me: After upgrading to Windows 10 my acer apire stuck in the loop. Nowhere any suitable solution on the web (until now). So the only way was to recover an entire partition back to Windows 8.1.
Now with both your How to… (disable automativ recovery / how to exit endless loop) I’ll give it another shot with windows10! (I wouldn’t otherwise).
Thanks!
Bonjour !
Jusqu ici tout va bien mais a la fin j obtiens le message suivant:
le type du systeme du fichier est RAW.
CHKDSK nest pas disponible pour RAW lecteurs.
Que faire ?? Merci par avance car je compte vraimemt sur vous pour me sortir de la !!
You file system is damaged. You need to recover it.
Use something like GetDataBack for NTFS.
CheckDisk is helpless in your case.
Hi,
Sergey Tkachenko man you did great job here and I wonder if you could help me. I want to remove all windows boots option, like recovery, repair and so on. No matter what the windows start or don’t, simple, Thanks a lot man
You are welcome.
Sorry I thought the article was in french this is why I didn’t respond in english.
I’m trying to use a USB with windows 10 on it that I dowloaded on microsoft webiste to re install it again on my computer (I installed it on free 1 year ago and suddenly had the loop when starting the computer) is it safe or no ? I have a toshiba from France but currently living in Japan, do you think a pc repairer can do something and keep my data because I really need some data and have no backup…
Thank you very much for your help.
Did not work for my Windows 10….
Still looping…
Same for me, this made no difference.
Just Disable Security Boot option in Security section, when press Power Button then Choose F2 quickly,
its never happen , Automatic repair start up Anymore
ur rit i got it just disable the security option yeyyyyy!!! thanks
At least for me.
What do you do after pressingen f2?
What do you do after pressingen f2?
After purchasing a 4GB USB Drive specifically for this task Windows 10 recovery drive system tells me I need 8 GB of space! Disappointing sir.
Reinstall Windows
If all the components are in good condition, “Windows 10 blue screen loop,” could be caused by your Windows, which is unfixable. Reinstalling Windows may fix the error.
This actually worked! And just when I was about to lose hope. Thank you so much!