
If you installed Windows 10 version 1709 "Fall Creators Update" over a previous Windows version, you might have noticed that free disk space on your disk drive was considerably reduced. You can get back up to 40 Gigabytes.
When you do an in-place upgrade from a previous version of Windows, Windows 10 saves a lot of files from the earlier installed OS during the upgrade and fills your hard drive with files that you might never need again if your upgrade is successful. The reason setup saves these files is so that if something goes wrong during setup, it can safely rollback to the earlier version of Windows. However, if your upgrade was successful and you've got everything working perfectly, then there's no need to keep these files. You can reclaim all the wasted disk space by following these simple instructions.
Before you proceed: Keep in mind that deleting these files will remove the ability to uninstall Windows 10 Fall Creators Update. You won't be able to rollback to the earlier version of Windows.
To free up space after you have upgraded to Windows 10 Fall Creators Update, do the following:
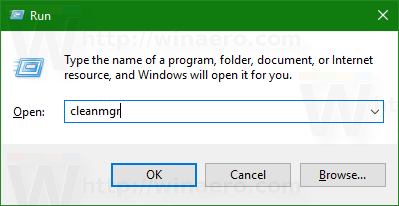
- Press Win + R shortcut keys together on the keyboard to open the Run dialog.
Tip: See the ultimate list of all Windows keyboard shortcuts with Win keys. - Type the following in the Run box:
cleanmgr
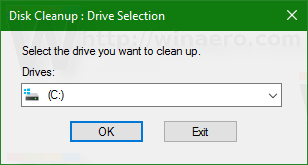
- Select your system drive:
- Click the Clean up system files button to switch the Disk Cleanup tool to extended mode.
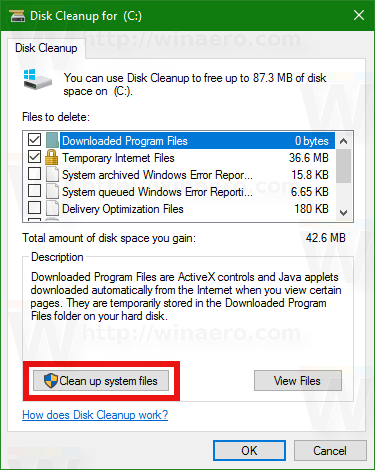
- Find and check the Previous Windows installation(s) item.
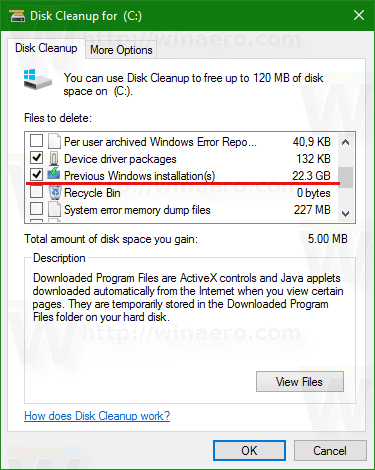
- Click OK and you are done.
Tip: You might be interested in learning more about the cleanmgr app's features and options. Refer to the following articles:
- Start Disk Cleanup With All Items Checked
- Clear Temp Directory on Startup with Disk Cleanup
- Add Cleanup Drive Context Menu in Windows 10
- Disk Cleanup Cleanmgr Command Line Arguments in Windows 10
- Create a Preset for Cleanmgr (Disk Cleanup)
Alternatively, you can use the Storage Sense feature to remove the files from the earlier installed OS. Here is how it can be done.
Free up space after you have upgraded to Windows 10 Fall Creators Update using Storage Sense
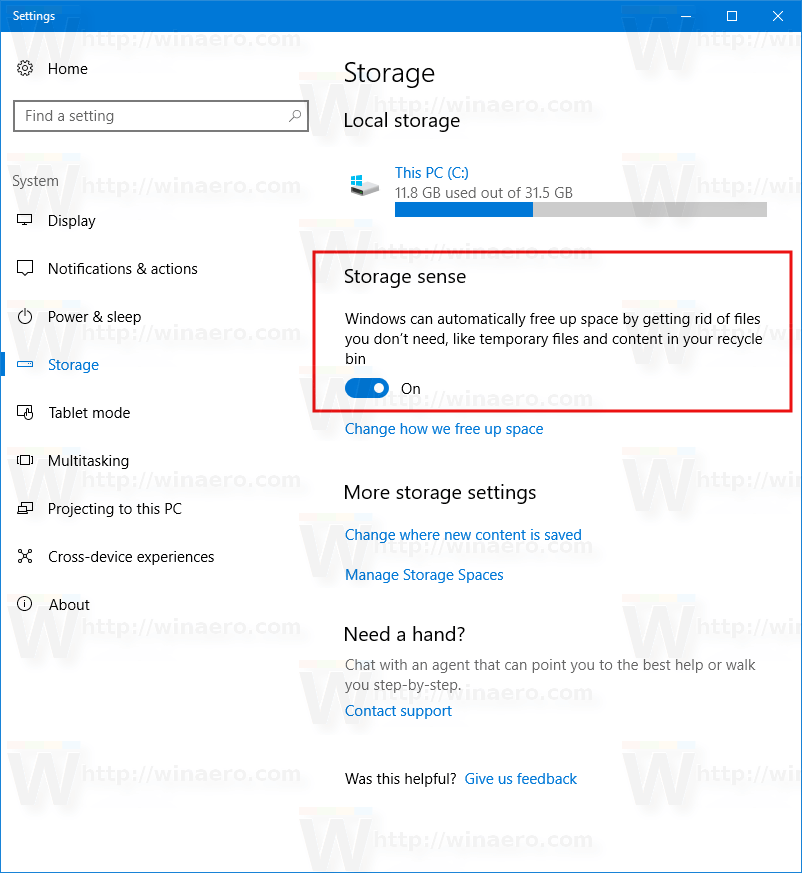
- Open Settings.
- Go to System -> Storage.
- There, you will find the option named "Storage Sense". Enable it.
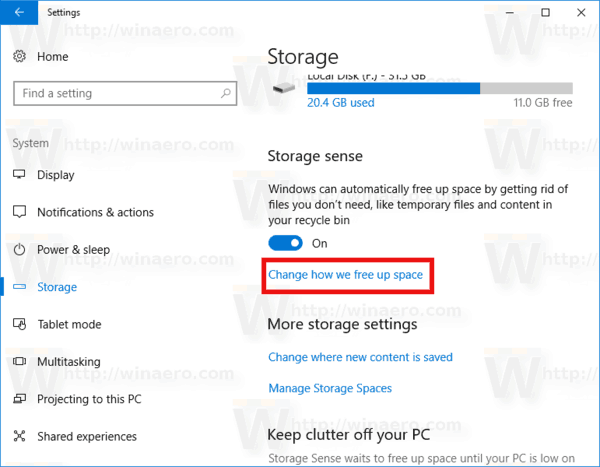
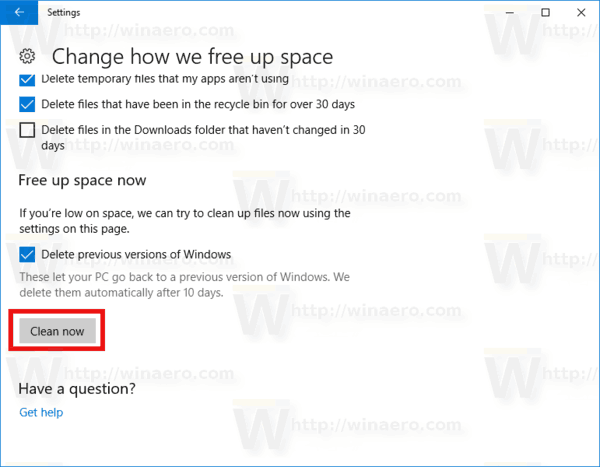
- Now, click the link Change how we free up space.
- The Change how we free up space page will appear. Under Free up space now, enable (check) the option Delete previous versions of Windows. See the following screenshot.
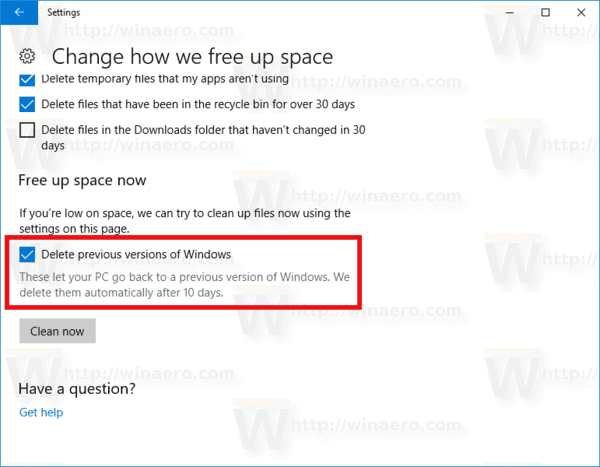
- Now, click the button Clean now. This will remove the files from the earlier installed OS instantly.


That's it. You can see how easy it is to reclaim disk space which was unnecessarily being consumed after the upgrade to Windows 10 Fall Creators Update.
Support us
Winaero greatly relies on your support. You can help the site keep bringing you interesting and useful content and software by using these options: