
Windows 10 allows the user to share his locally connected printers and stored files with other users over the network. Shared files can be accessible for reading and writing to others. Shared printers can be used for printing on the remote computer. Let's see how to configure File and Printer Sharing in Windows 10.
By default, Windows 10 allows file and printer sharing only over a private (home) network. It is disabled when your network type is set to Public.
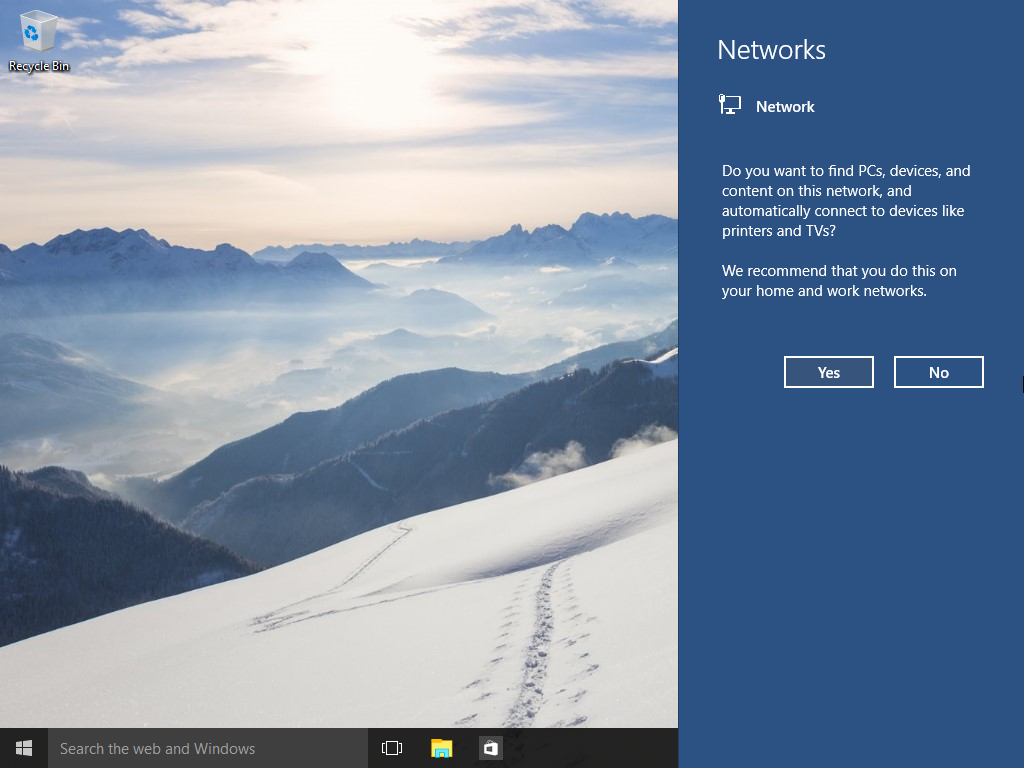
When you are signing in to your account and the first time your network is operational, Windows 10 asks you which kind of network you are connecting to: Home or Public. In a sidebar prompt, you are asked whether you want to find PCs, devices and content on the network that you just connected to.
See the following articles:
- Change network location type (Public or Private) in Windows 10
- Change network location type with PowerShell in Windows 10
To enable file and printer sharing in Windows 10, do the following.
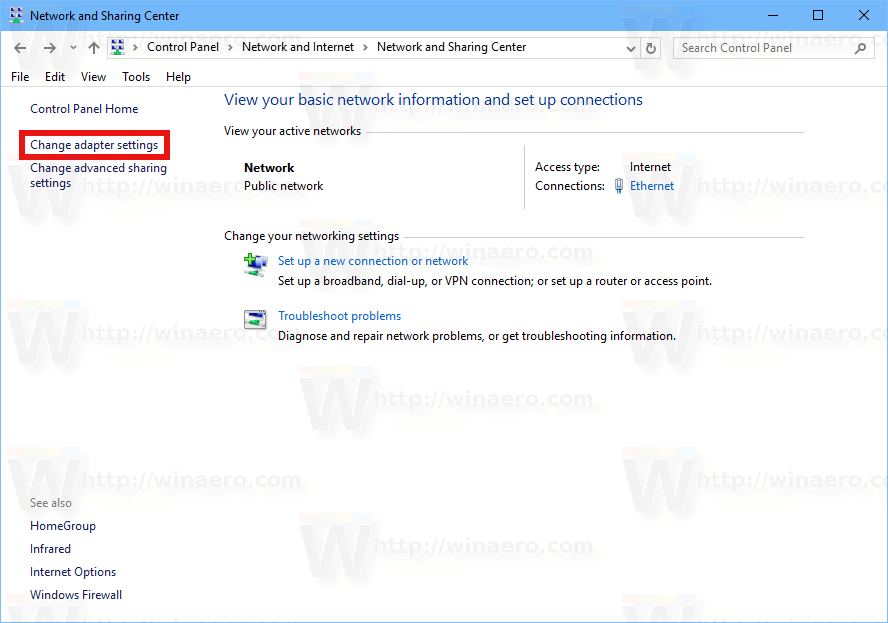
- Open the classic Control Panel app.
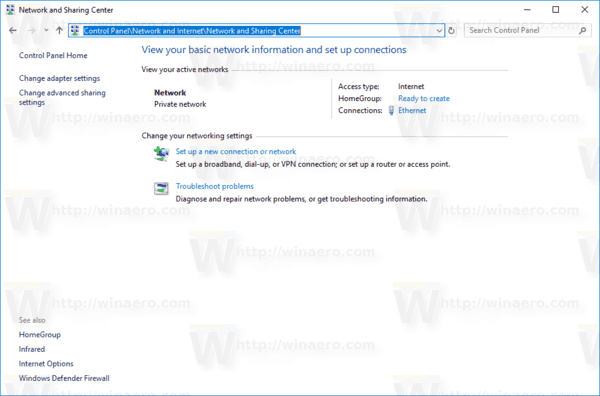
- Go to Control Panel\Network and Internet\Network and Sharing Center:
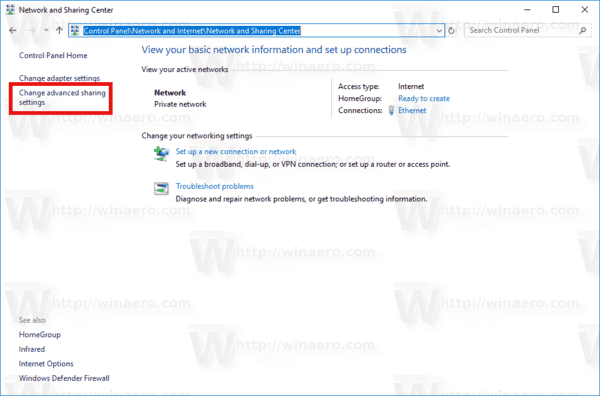
- On the left, click the link Change advanced sharing settings.
- Expand the Private, Guest or Public network profile item to configure network sharing for each type of network.
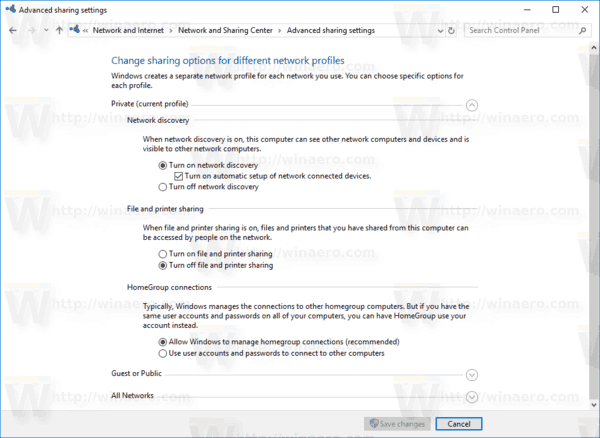
- Enable the option Turn on file and printer sharing for the selected profile and you are done.
- Repeat this procedure for other network profiles if required.


To disable file and printer sharing, select the option Turn off file and printer sharing on the same page of the Control panel.
Alternatively, you can use the console tool netsh to switch the state of the feature.
Disable or enable File and Printer sharing using netsh
- Open an elevated command prompt.
- Type or copy-paste the following command:
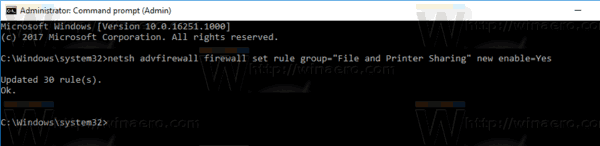
netsh advfirewall firewall set rule group="File and Printer Sharing" new enable=Yes
This will enable the File and Printer Sharing feature for all network profiles.
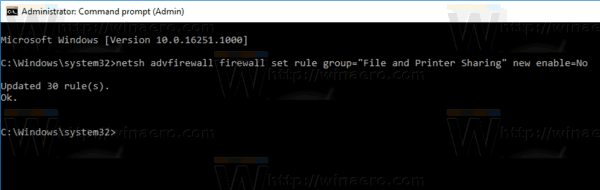
- To disable the File and Printer Sharing feature for all network profiles, execute the following command:
netsh advfirewall firewall set rule group="File and Printer Sharing" new enable=No


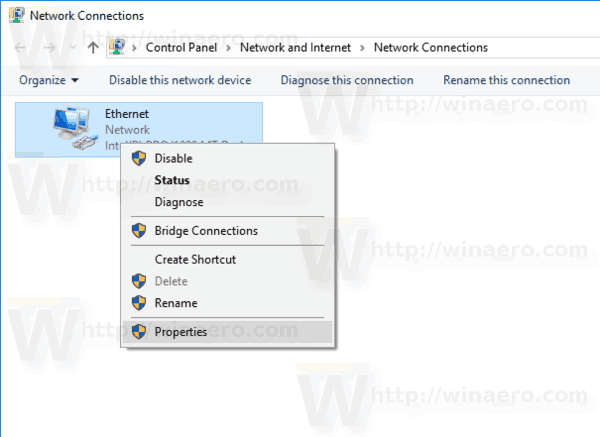
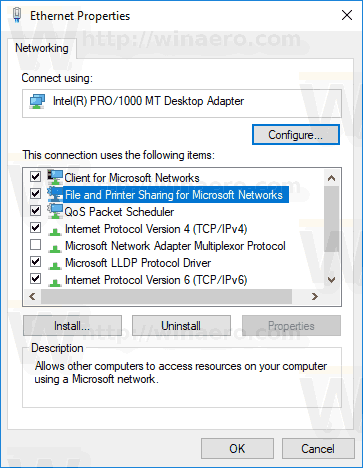
Tip: If you have enabled File and Printer Sharing, ensure that you also have enabled the option File and Printer Sharing for Microsoft Networks in your network adapter properties. Open the classic Control Panel and check your network adapter properties under Control Panel\Network and Internet\Network Connections. See the screenshot below.


That's it.
Support us
Winaero greatly relies on your support. You can help the site keep bringing you interesting and useful content and software by using these options:
Your netsh command only works for ALL profiles. If I specify profile=private, it says
Only the enable parameter can be used to update rules specified by a group.
I need to turn it on for private networks and off for public networks.
Like all the other options this f[censored] didn’t work.
what exactly didn’t work you? could you explain further please.
I have to disable and then enable the “file and printer sharing for Microsoft Networks” from network setting to make the sharing work.
When i reboot i need to repeat the steps again to make this working.
How do you enable or disable sharing for a specific adapter?
Okay well I also encountered the error “Works best with windows updates” when attempting to install on Hyper-V Core 2019. Unfortunately your work around of installing “version 79” is not an option on the download page :( The lowest version is 84.
Sorry, but what are you talking about?