
Controlled Folder Access is a new feature of Windows 10 Fall Creators Update. It is intended to protect valuable data from malicious apps and threats, such as ransomware. In this article, we'll see how to configure and use this feature.
Controlled folder access monitors the changes that apps make to files in certain protected folders. If an app attempts to make a change to these files, and the app is blacklisted by the feature, you’ll get a notification about the attempt. You can complement the protected folders with additional locations, and add the apps that you want to allow access to those folders.
The Controlled Folder Access feature is first introduced in Windows 10 build 16232 as part of the Windows Defender Antivirus app. It can be enabled in its settings.
To enable Controlled Folder Access in Windows 10, you need to perform these steps.
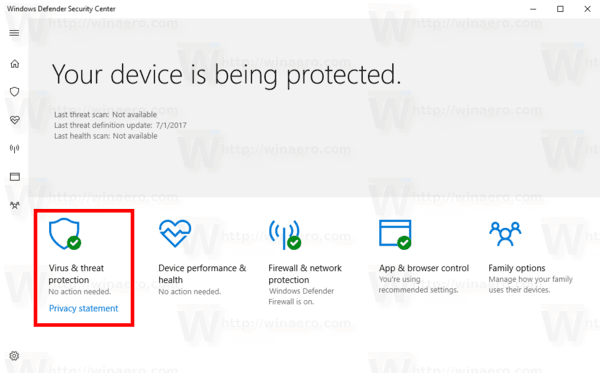
- Open the Windows Defender Security Center.
- Click on the Virus & threat protection icon.
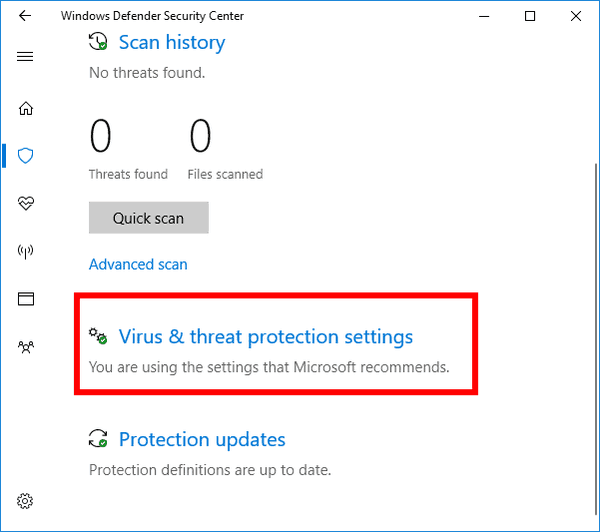
- On the next page, click the Virus & threat protection settings link.
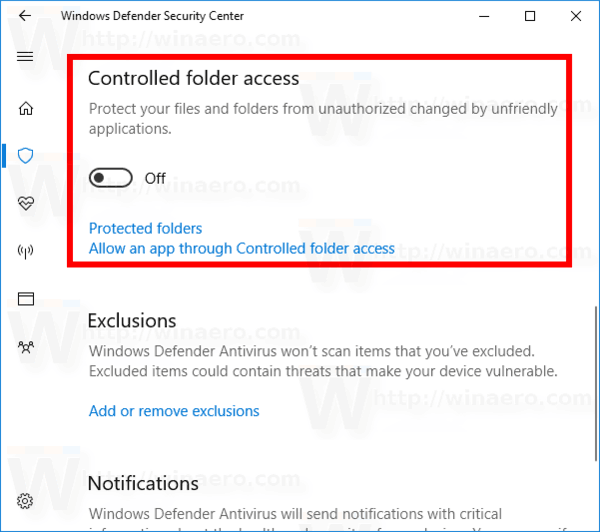
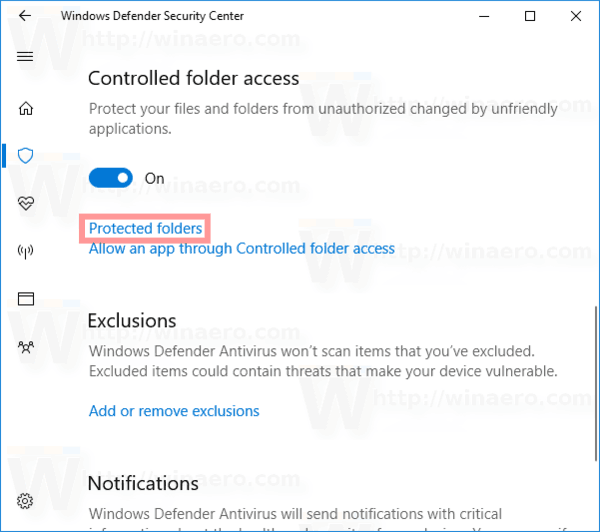
- Enable the option Controlled folder access.
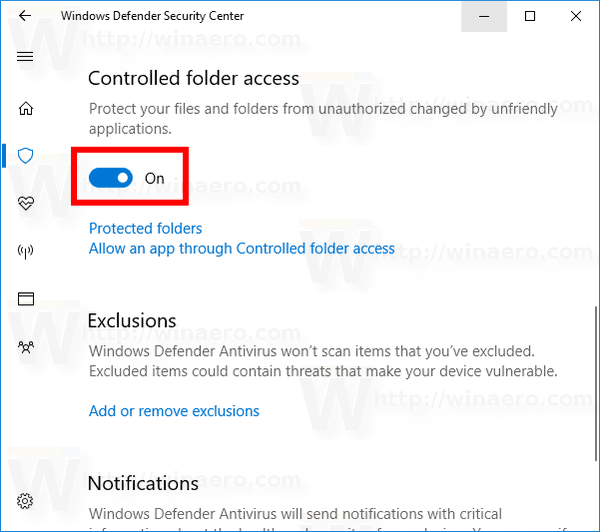
- If prompted by UAC, confirm the operation.
- Now, click the Protected folders link below the Controlled folder access category.
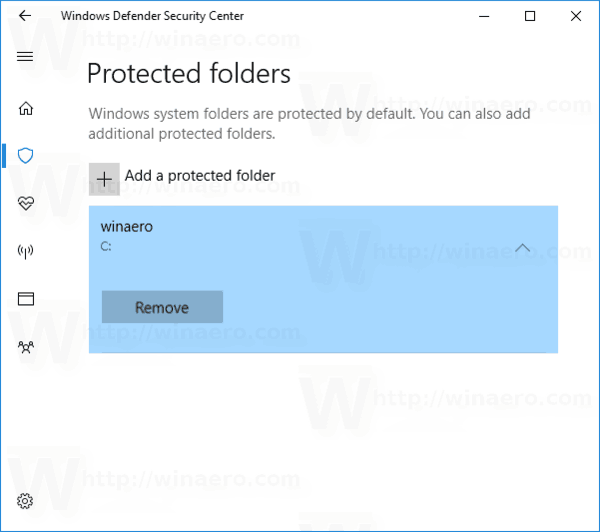
- On the next page, click the button + Add a protected folder.
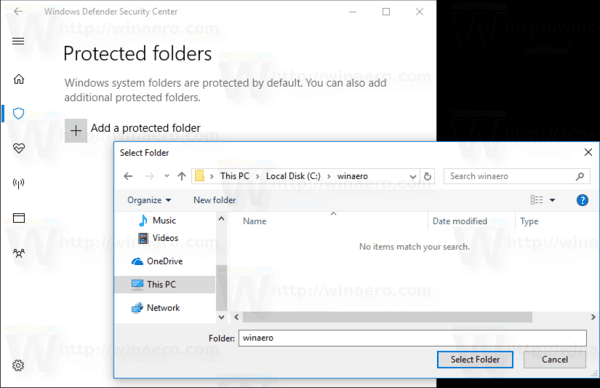
- Browse for the folder you want to protect with Controlled Folder Access. It will be added to the list of folders as shown below.
- Finally, you can define which apps are allowed to access the protected folders. To define apps, click the Allow an app through Controlled folder access link below the Controlled folder access category.
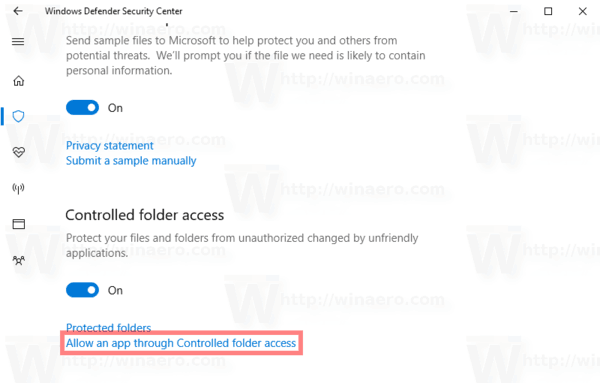
- On the next page, click the button + Add an allowed app.
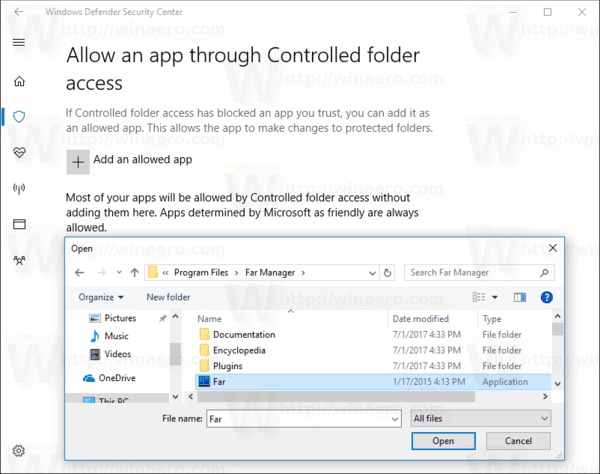
- Browse for the executable file of the app which will have access to the folder.


You are done. Now, only the selected apps will have access to the folder protected by the Controlled folder access feature. If some other app will try to modify files in the protected folder, a notification will appear. See the screenshot below.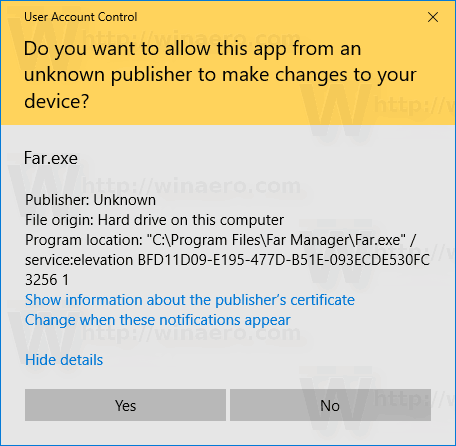

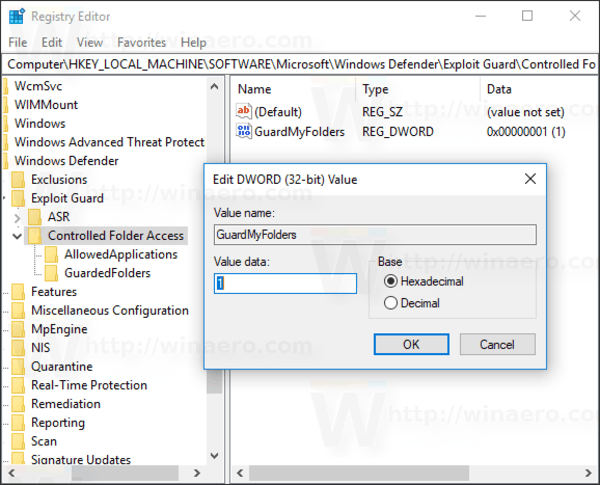
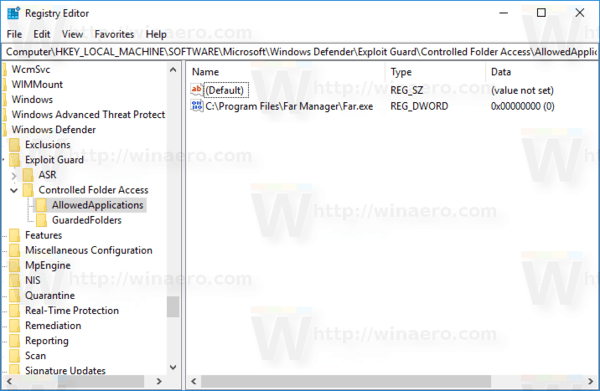
Here are some extra details for those who would like to control the feature with a Registry tweak.
To enable the feature, set the GuardMyFolders 32-bit DWORD to 1 under the key
HKEY_LOCAL_MACHINE\SOFTWARE\Microsoft\Windows Defender\Exploit Guard\Controlled Folder Access

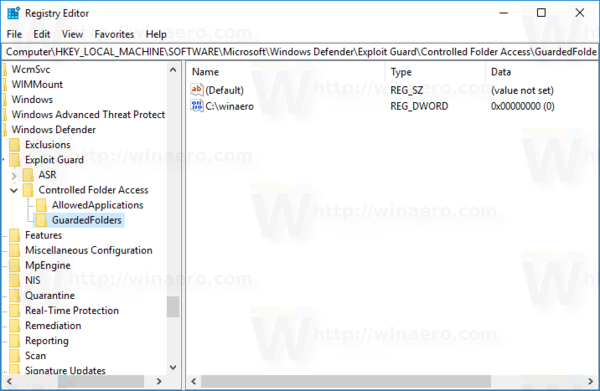
The folders protected by Windows Defender are stored under the following key:
HKEY_LOCAL_MACHINE\SOFTWARE\Microsoft\Windows Defender\Exploit Guard\Controlled Folder Access\GuardedFolders

HKEY_LOCAL_MACHINE\SOFTWARE\Microsoft\Windows Defender\Exploit Guard\Controlled Folder Access\AllowedApplications
That's it.
Support us
Winaero greatly relies on your support. You can help the site keep bringing you interesting and useful content and software by using these options: