
By default, Windows 10 automatically assigns drive letters to connected drives, including internal and external drives. You might want to change these letters. Here is how it can be done.
Windows 10 assigns an available drive letter to a new drive connected to the computer. The operating system goes through the alphabet from A to Z to find the first available letter to assign it to various drives. Historically, it reserves the drive letters A and B for floppy drives.
Modern Windows versions assign the C letter to the system partition which Windows is installed on. Even in a dual-boot configuration, Windows 10 displays its own system partition as C:.
![]()

Changing drive letters will allow re-arranging drives in the This PC folder. This can be useful after you add an extra drive or create a new partition. For example, you might want to change its drive letter to display it before the DVD drive. Also, when you change the drive letter of a USB drive, it will be assigned permanently. Often Windows 10 randomly changes the drive letter for external drives when you connect them, so this way you can make this process more predictable.
Tip: Show drive letters before drive names in This PC / Computer folder.
There are a number of methods you can use to change the drive letter of a drive in Windows 10. Let's review them.
To change the drive letter in Windows 10, do the following.
- Press the Win + X keys together.
- In the menu, select Disk Management.
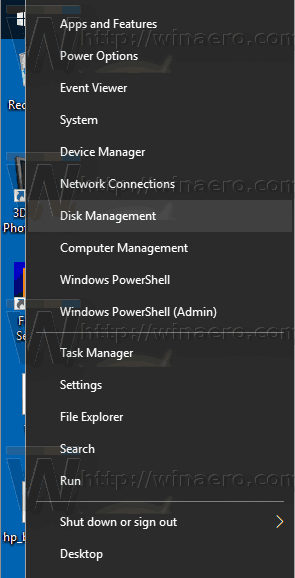
- In Disk Management, right-click on the partition whose drive letter you would like to change. Select Change Drive Letter and Paths in the context menu.

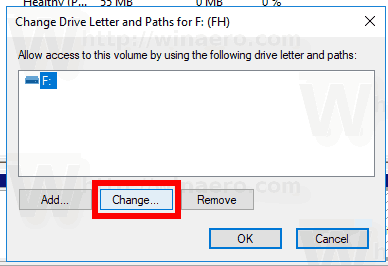
- In the next dialog, click on the Change... button.
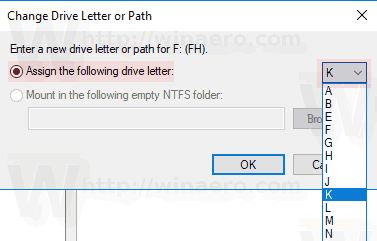
- Select Assign the following drive letter and choose the desired letter in the drop down list.
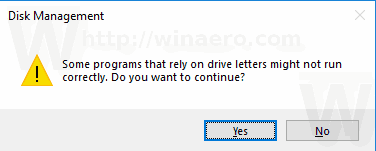


You are done. The drive will appear in File Explorer under the letter you've chosen.
Change the drive letter in the command prompt
- Open an elevated command prompt.
- Type
diskpart. - Type
list volumeto see all drives and their partitions.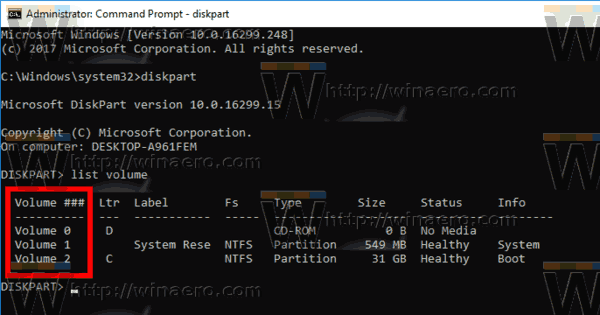
- Look at the ### column in the output. You need to use its value with the command
select volume NUMBER. Substitute the NUMBER portion with the actual partition number for which you want to change the drive letter.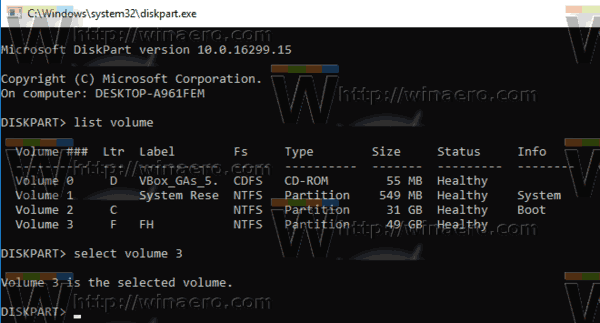
- Type the command
assign letter=Xto change the drive letter. Substitute the X portion with a desired letter. Note: If the new drive letter you are trying to use is not available, you will get an appropriate error message.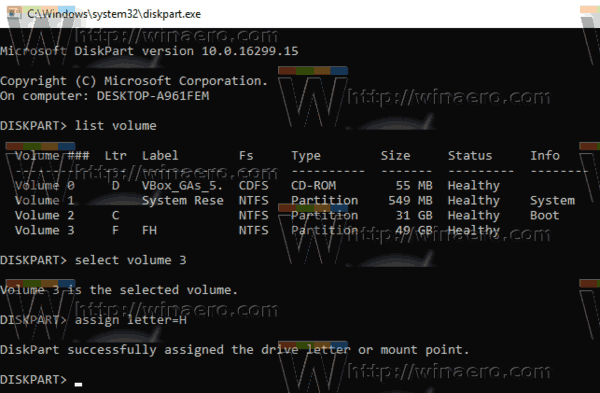


You are done.
Change the drive letter in PowerShell
- Open an elevated PowerShell instance.
- Type
Get-Partitionto see the list of your partitions.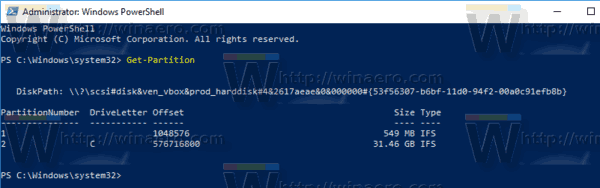
- Note the drive letter and type the next command:
Get-Partition -DriveLetter <your_current_drive_letter> | Set-Partition -NewDriveLetter <a_new_drive_letter>
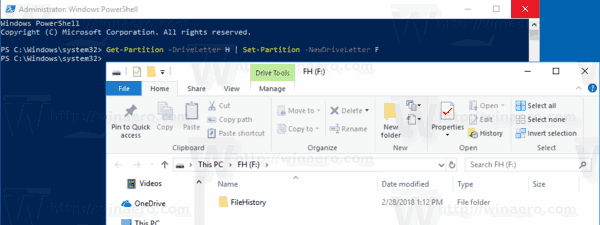
For example, the command can look as follows:
Get-Partition -DriveLetter H | Set-Partition -NewDriveLetter F


That's it!
Support us
Winaero greatly relies on your support. You can help the site keep bringing you interesting and useful content and software by using these options:
Really thank you
this steps very helpful