Mapping a network drive in Windows is an essential task for those who have to refer to network resources many times a day. Once a network location is mapped to a network drive, it can be accessed like a local drive with File Explorer. There are a number of ways to do it. Let's review them all.
Advertisеment
When a network location is mapped to a network drive, a special shortcut appears in the This PC folder. It will be visible under "Network locations". Windows assigns a drive letter for mapped drives, so they look like any other partition on your local drive.
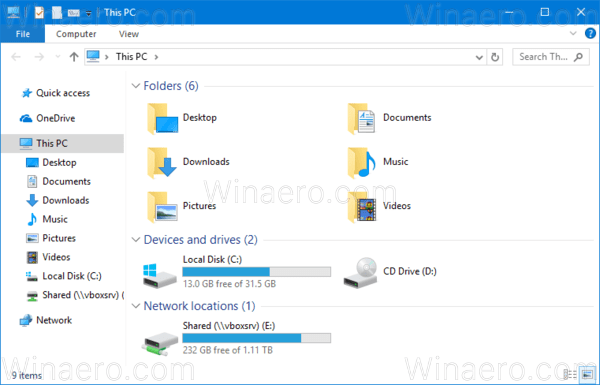
When you click it, it opens the network location directly in File Explorer. Most third-party file managers support mapped drives as well. After a reboot, Windows has the ability to re-connect the mapped network drive automatically, so it saves your time. Tip: see what to do if Windows does not reconnect to mapped network drives. Before you continue, you might need to learn the username and password credentials for the network resource you are going to map.
To map a network drive in Windows 10, do the following.
- Open File Explorer.
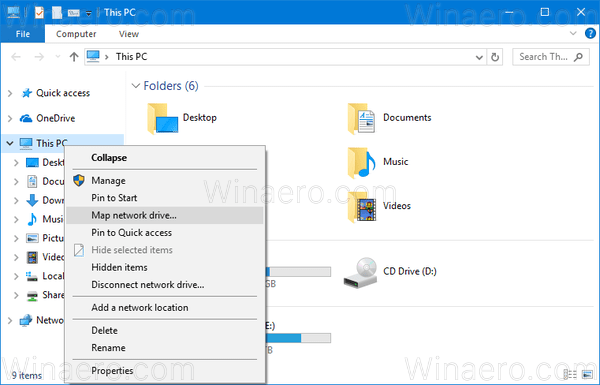
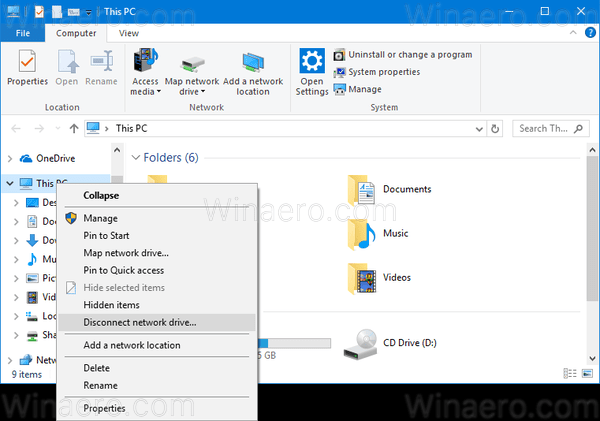
- Right click the This PC icon in the navigation pane and select "Map network drive..." from the context menu. See the following screenshot.
 Alternatively, you can open This PC and click the "Map network drive" icon on the Home tab in the Ribbon user interface.
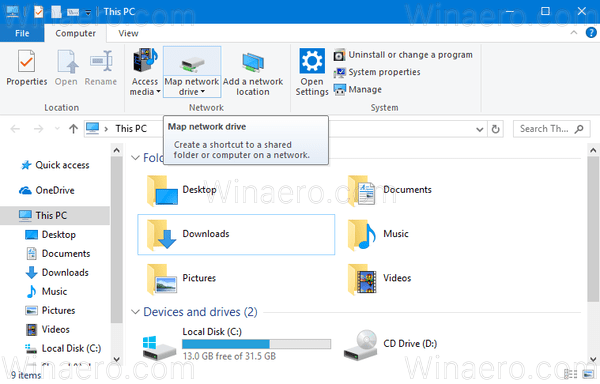
- The Map Network Drive wizard will appear on the screen. There, type the full path to the network share you want to map as a drive. You can browse for your share using the "Browse..." button. The path must be in UNC format: It must start with "\\", followed by the remote computer's name, and then followed by "\" and the name of the share. For example, \\WinaeroPC\Share1.
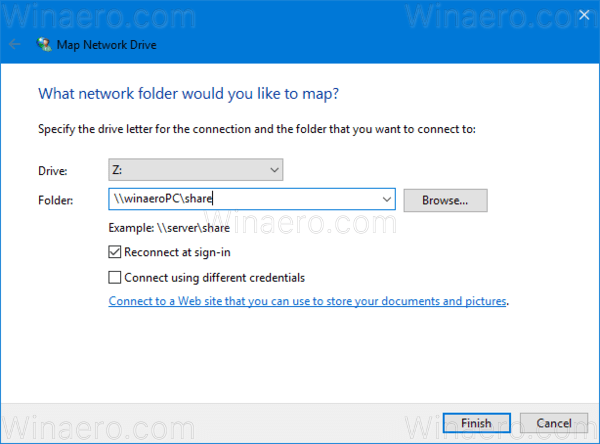
- Enable the option Reconnect at sign-in to restore the mapped drive automatically at sign-in.
- Enable the option Connect using different credentials if required to access the share. Fill in the credentials in the Windows Security dialog if prompted.
- Click the Finish button and you are done.
The mapped network drive will appear in This PC.
Alternatively, you can use one of the following methods to map a network drive in Windows 10.
- Open a new command prompt window and type or copy-paste the following command:
net use drive_letter:\\Computer\Share /user UserName Password /persistent:yes
If you omit the /persistent:yes portion, or use the argument "/persistent:no" instead, the mapped drive will be removed after the next logon.
- Open a new PowerShell instance and type or copy-paste the following command:
New-PSDrive -Name drive_letter -PSProvider FileSystem -Root "\\ComputerName\ShareName" -Credential "UserName" -Persist
If you omit the -Persist portion, the mapped drive will be removed after the next logon.
Finally, to disconnect the mapped network drive, you can do the following.
- In the context menu of This PC, select the "Disconnect network drive..." command.
 In the next window, select a drive you want to disconnect and click OK.
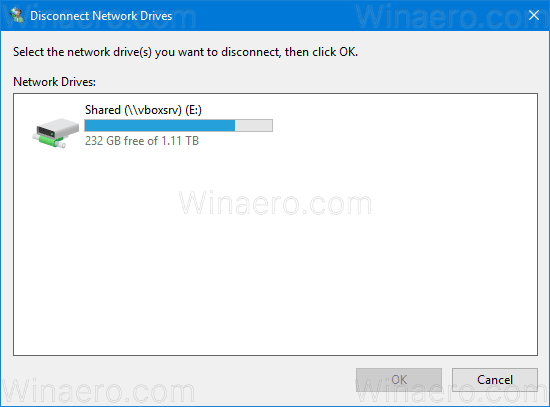
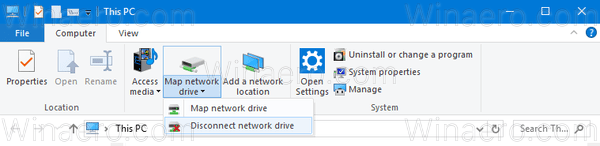
- The same command can be called from the Map network drive drop down menu. See the following screenshot.
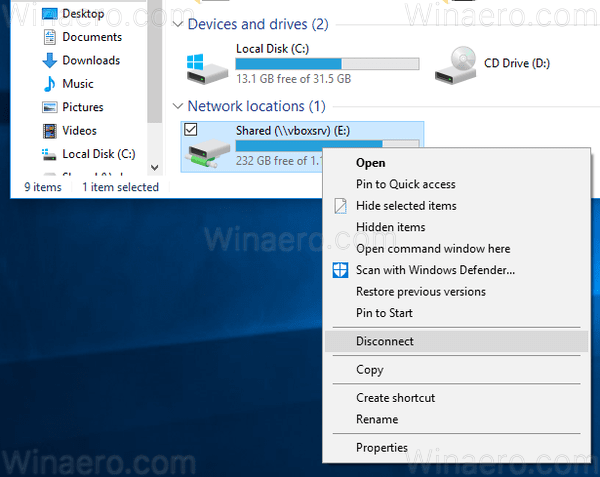
- You can right click the mapped network drive in This PC and select "Disconnnect" from the context menu.
- At the command prompt, type or copy-paste the following command:
net use drive_letter: /Delete
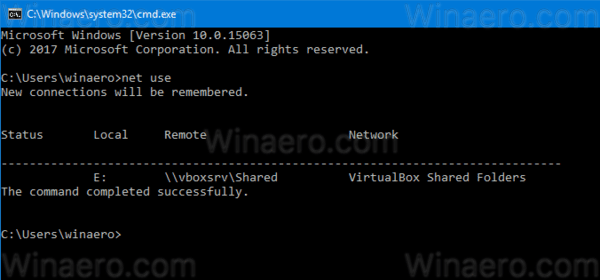
If you execute the net use command without other arguments, you'll see the list of the available mapped drives.
Now see how to access your network drives from elevated apps running as administrator.
That's it.
Support us
Winaero greatly relies on your support. You can help the site keep bringing you interesting and useful content and software by using these options:
If you like this article, please share it using the buttons below. It won't take a lot from you, but it will help us grow. Thanks for your support!
Advertisеment

Do you know how to map a network drive and rename it at the same time? Like ive only seen scripts where you can map a drive and make it persistent. Thanks
You can map it, unmap and map it once again with a different name.
Hi do you know how to rename a network drive in that command above. Ive only seen commands where it names the drive but doesnt make it permanent
the net use allows to specify the required drive letter.