If you changed your Windows 8.1 user account picture, that is, the avatar several times, the images you used will be shown on the right side of your user account settings.![]()
If you don't plan to use them again, there is no reason to keep them there. But Windows 8.1 provides no way to remove unused user pictures. Here is very simple way to delete unused user images.
- In File Explorer, type the following in the address bar:
C:\Users\YOUR USER NAME\AppData\Roaming\Microsoft\Windows\AccountPictures
Replace the "YOUR USER NAME" text with your actual user name, i.e. for my PC it should be
C:\Users\winaero\AppData\Roaming\Microsoft\Windows\AccountPictures
Alternatively, you can type just this:
%appdata%\Microsoft\Windows\AccountPictures
This is a bit shorter, but will give the required result.
- The following folder will appear on the screen:
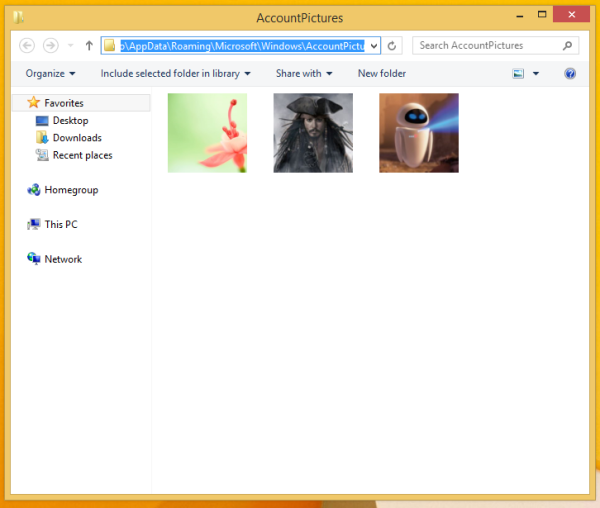
Delete all the images you do not want to see in your personalization settings.
That's it! Your user picture cache is clean now.
Bonus tip: If you have Windows 7 or Windows Vista installed on another partition on your PC, you can go to C:\ProgramData\Microsoft\User Account Pictures\Default Pictures (replace C:\ with the drive letter of your Windows 7 or Vista partition). From there you can copy all the account images to the new Windows 8 location at %appdata%\Microsoft\Windows\AccountPictures.
Support us
Winaero greatly relies on your support. You can help the site keep bringing you interesting and useful content and software by using these options:
If you like this article, please share it using the buttons below. It won't take a lot from you, but it will help us grow. Thanks for your support!
Advertisеment

Thanks for this note. Was digging in Internet so long time when I finally found this! Cheers :)
Hi, I removed the images in one area by typing in ‘%appdata%…’ as suggested, but the images were still showing on my account profile pics. One I restarted the computer, all extra images were gone, with the one main one selected still remaining. Then I retook another photo and selected that as the main profile picture. (I may have typed the ‘%appdata%…’ again). Now there is only one photo in my profile, the last one I took. Yay – much better!
its not working…..
Hey,
thanks for this, it worked…however I have noticed it is still showing up as i go into ‘This PC’ and under the ‘Homegroup’ icon on the left hand side. Is there a remedy for this too?
I have to look closer
Do you have a solution for this yet?
Unfortunately, I found no solution yet.
well it worked for me but i had to do two different methods and after that i shutdown my computer and on it again and the previous user account picture was gone ,do this is how i did it
first i followed the step this steps
=go to This PC or MY COMPUTER on the desktop (this pc is what it look like on my computer )
=double click on the C drive and you will need to go to the top bar and on View you have to click and then check the box with hidden items ,after you have done that a new list of folders will appear
= then click on Program Data and then
=click on Microsoft and the
=click on Default Account Pictures (here you will see some blank pics and then select all of them and them delete and you will be prompted to force to do it and by this you have to click on CONTINUE and this will delete all the blank face picture.
=after this is done open file explore and type in this %appdata%\Microsoft\Windows\AccountPictures and then
= all the pictures that were ever used as account picture will appear ,now choose the ones you want to delete and delete them,and then
=go to the Recycle Bin and empty it and then shout down your computer and then on it again ……
THIS IS HOW I DID MINE AND THE PIC WAS GONE HOPE IT CAN HELP YOU GUY AND WORK S WELL THANKS
Thank you !
You are welcome
OMG I LOVE LOVE LOVE YOU!! thank you So much!!!
Haha, we love you too!
it worked , thanks man !
thanks for the help. the first one didnt work for mine even if i changed it but the second one did so thank you :)