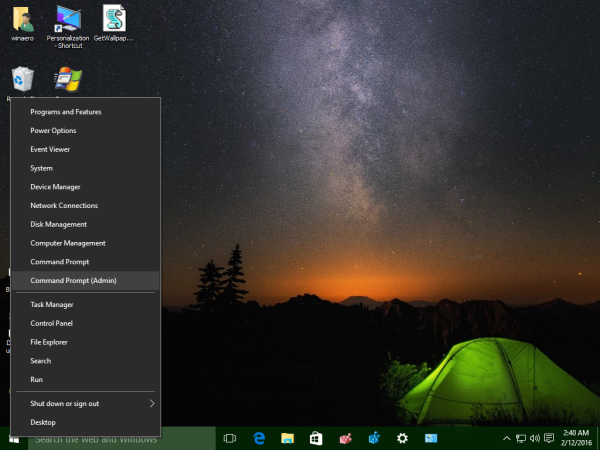
TRIM is a special ATA command which was developed to keep the performance of your SSD drives at peak performance for the duration of your SSD's life. TRIM tells the SSD controller to erase invalid and unused data blocks from the storage in advance, so when a write operation happens, it finishes faster because no time is spent in erase operations. Without TRIM automatically working at the system level, your SSD performance will degrade over time unless you manually use a tool which can send the TRIM command to it. Here is how to disable or enable the TRIM function for your solid state drives in Windows 10.
Advertisеment
By default, TRIM is enabled for all SSDs. However, it is a good idea to check if TRIM is correctly enabled for your SSD in Windows 10 before proceeding. Refer to the following article:
How to see if TRIM is enabled for SSD in Windows 10
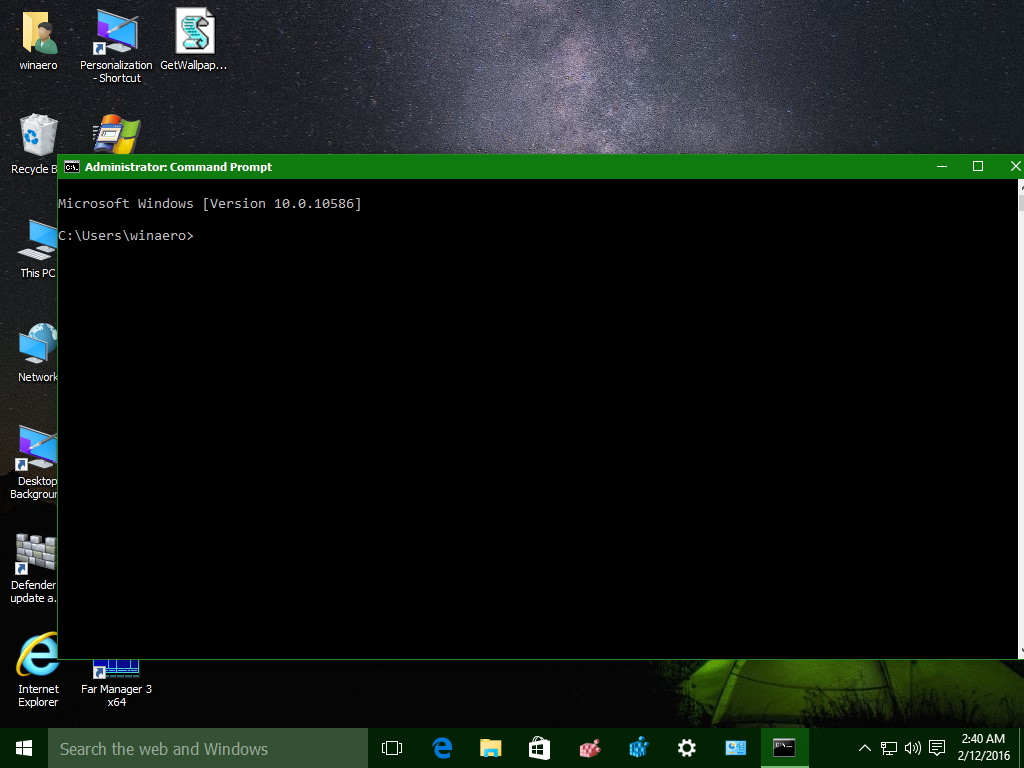
In short, you need to execute the following command in an elevated command prompt:
fsutil behavior query disabledeletenotify
In the output, you may find one of the following values.
NTFS DisableDeleteNotify = 0 - TRIM support is enabled for SSDs with NTFS
NTFS DisableDeleteNotify = 1 - TRIM support is disabled for SSDs with NTFS
NTFS DisableDeleteNotify is not currently set - TRIM support for SSDs with NTFS is not currently set, but will automatically be enabled if a SSD with NTFS is connected.
In Windows 10, TRIM is supported for both NTFS and ReFS file systems. If your drive is formatted with ReFS, the fsutil command will report the following.
ReFS DisableDeleteNotify = 0 - TRIM support enabled for SSDs with ReFS
ReFS DisableDeleteNotify = 1 - TRIM support disabled for SSDs with ReFS
ReFS DisableDeleteNotify is not currently set - TRIM support for SSDs with ReFS is not currently set, but will automatically be enabled if a SSD with ReFS is connected.
As you may know, when you delete any data from your solid state drive, Windows marks it as deleted. However, the data physically remains on the drive and can be recovered. It is the SSD controller's garbage collection, wear levelling algorithms and TRIM which tell it to wipe the blocks so they are empty and ready to be rewritten. Thanks to TRIM, storage blocks which contain the deleted data will be wiped and the next time the same area is written to, the write operation will be performed faster.
To enable TRIM for SSD in Windows 10, you need to use the FSUTIL tool. Do the following.
- Open an elevated command prompt instance.

- If your drive is formatted with NTFS, use the following command to enable it.
fsutil behavior set disabledeletenotify NTFS 0
The following command will disable it.
fsutil behavior set disabledeletenotify NTFS 1
- If your drive is formatted with ReFS, use the following command to enable TRIM for your SSD:
fsutil behavior set disabledeletenotify ReFS 0
The opposite command is as follows.
fsutil behavior set disabledeletenotify ReFS 1

That's it.
Support us
Winaero greatly relies on your support. You can help the site keep bringing you interesting and useful content and software by using these options:
If you like this article, please share it using the buttons below. It won't take a lot from you, but it will help us grow. Thanks for your support!
Advertisеment

I get:
“Please use “fsutil 8dot3name query /?” for more information.”
as a response. I used that and got a response that did not really lead me further.
Version 1703 Build 15063.138
To enable TRIM on NTFS you state command “fsutil behavior query disabledeletenotify NTFS 0”.
In stead of “query”, don’t you mean “set”?
Yep, sure it must be set!
Sorry for this typo, fixing.
Works! Thank you.
@Jim
If you get the “Please use…” output, you may have issued the command wrong. Please check your command.
To check if TRIM is enabled, open cmd/powershell and write
(IF “NTFS” or “ReFS” is NOT specified, BOTH values are shown.)
(I’ve used PowerShell. PS. You should just write the command after >)
PS C:\WINDOWS\system32> fsutil behavior query DisableDeleteNotify
ANSWER;
NTFS DisableDeleteNotify = 0
ReFS DisableDeleteNotify is not currently set
0 is OK, but ReFS has to be fixed
To enable TRIM for the ReFS-storage, write;
PS C:\WINDOWS\system32> fsutil behavior set disabledeletenotify ReFS 0
ANSWER:
ReFS DisableDeleteNotify = 0
NEW CHECK:
PS C:\WINDOWS\system32> fsutil behavior query DisableDeleteNotify
ANSWER:
NTFS DisableDeleteNotify = 0
ReFS DisableDeleteNotify = 0
Fixed!
you don’t need enable ReFS because I believe you don’t even have SSD converted in that filesystem, anyway Windows 10 would automatically enable when someone really converted SSD to such filesystem
I’ve found this tutorial on several sites, but non addresses the (potential) issue with multi-drive setups.
All displays a single drive. I currently have 3 regular SATA SSDs, and one NVMe.
These are connected a bit differently.
The OS drive is on the on-board Intel chipset (whatever, not important, working)
Two others, cheap crapola-drives, KingSpec Q-180 (Never buy these, under any circumstances! Maybe if your life depended on it, like under threat of eating a bullet, perhaps…) that are on a separate controller, a crappy Marvell 92xx that usually requires a specific driver for T.R.I.M to work. Special about this P.O.S is that it doesn’t allow T.R.I.M. to work when using a port multiplier (Which I’m not using A.T.M!), but up until a few days ago, I would guess, it stopped supporting T.R.I.M.
I did have that disk disconnect on me, and I figured that it had something to do with high workload since I’ve been hitting it pretty hard last few days. I use this as a cache drive ATM.
These drives have had this symptoms before, way back when I first got them and in my ignorance I tried to use them on the DELL PERC (RAID controller) on which I had the problem with these getting disconnected all the time with corrupted data that followed.
I then learned about T.R.I.M. but at that time I had unfortunately already broken a few sectors because of this.
To my defense, these was my first SSDs.
However, this recent occurrence leads me to believe that since T.R.I.M. is disabled, something made them disconnect, for some & whatever reason.
I am, however, in the midst of re-arranging the disks, since I’m waiting for parts for my new back plane and I’m going to use another SATA controller (ASMedia 1166) which is tons better, so I think (and hope) that this will have support for SSDs on port multipliers. Not been able to test this yet.
Anywhoo, I tried changing the driver to another that I know has worked in the past to rectify this T.R.I.M function, but I was unable to.
I’m a week, maybe two away from getting the stuff I ordered, so I would very much like to remedy this problem.
As the command window is showing, NTFS DisableDeleteNotify = 0 (Disabled)
ReFS DisableDeleteNotify = 0 (Disabled)
So, it’s activated, but my question is if this is in regards to the system drive? I didn’t find any information whether it’s for a single drive (since the OS drive, obviously, is an SSD).
I should also mention that I’m currently using that ASMedia-controller, separately, with all mechanical drives (19 of them, one’s failing and is disabled via device manager. This is due to bad cables, thus the build I’m doing).
The NVMe-drive is on an PCIe adapter, and T.R.I.M is also working fine.
So, any info about the fsutil command would be helpful. Thank you.
Ok, so a small update. My Marvell 92xx is mongoloid, as well as Windows 10.
The other day I swapped out one of two Marvell controllers for the ASMedia 1166, and I’m not sure if I got the dropout of that SSD before or after, but one thing I noticed, but payed no attention to was that the disk ID changed (Saw this in Hard Disk Sentinel), but not surprised since I’ve just put in another controller.
Now, I did swapped to the Standard AHCI driver, and now the T.R.I.M is working again.
For some reason, the disk ID changed too, and back to the original order.
Well, soon this will but a pale memory with these SATA controllers. I hate these Marvell cards – Nothing but a problem from day 1!
it’s unclear to me why it’s limited to ntfs/refs when it is a block-level operation and not fs-level operation. hell, even having a partition or a drive letter should not be required, it should be doable from disk management.
i have some ssd cards that show noticeable write performance decrease after completely filling them once, and needing trim is the only thing that comes to mind as a reason, but they are usually exfat or fat32. do i need to temporarily format them as ntfs? if so, that’s just absurd