The Windows 10 Settings UI and the Network flyout is completely different from Windows 7 and Windows 8.1. The options have been moved around and it is not clear how to change the network type - private or public. I would like to share how you can change the network location type in Windows 10.
Advertisеment
When you are signing in to your account for the very first time, Windows 10 asks you which kind of network you are connecting to: Home or Public.
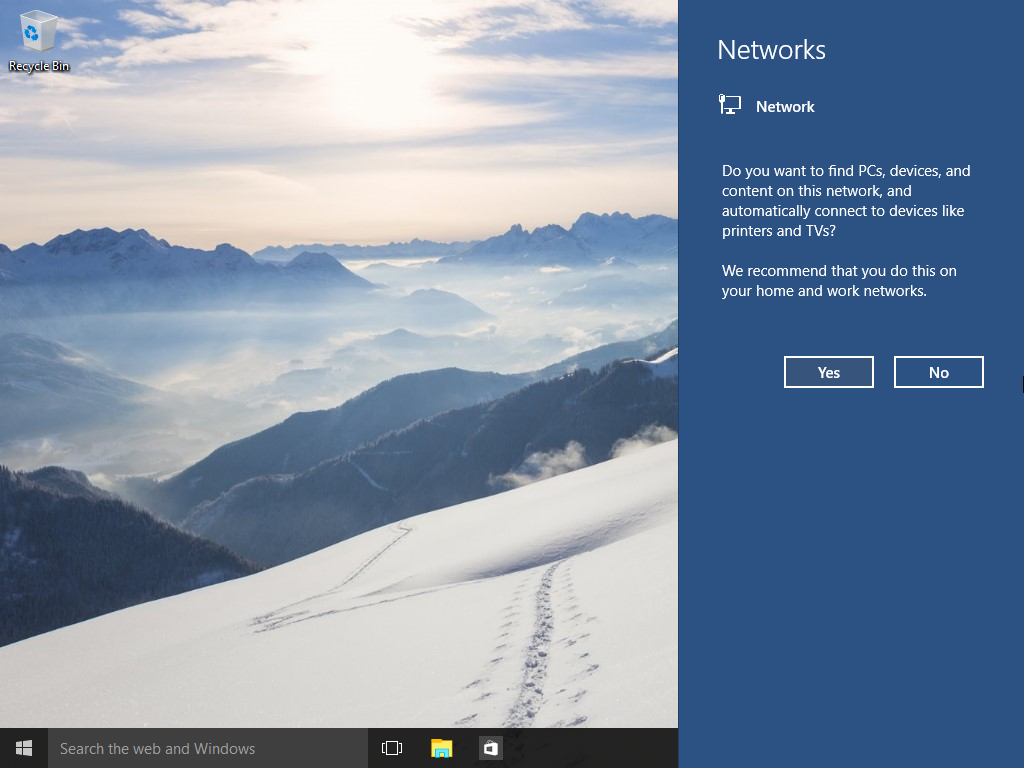
If you pick Yes, the OS will configure it as a private network and turn on network discovery. For a Public network, discovery and access will be limited. If you need to access your computer from a remote PC or browse the PCs and devices on your local network, you need to set it to Home (Private).
If you decide later to change the access type of the network you are connected to, you might even not find which settings to change!
There are two ways to change the network type in Windows 10.
Method one. Change network access type via the Settings app
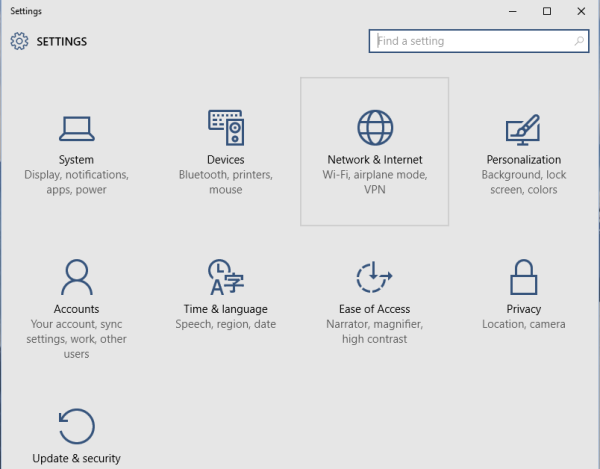
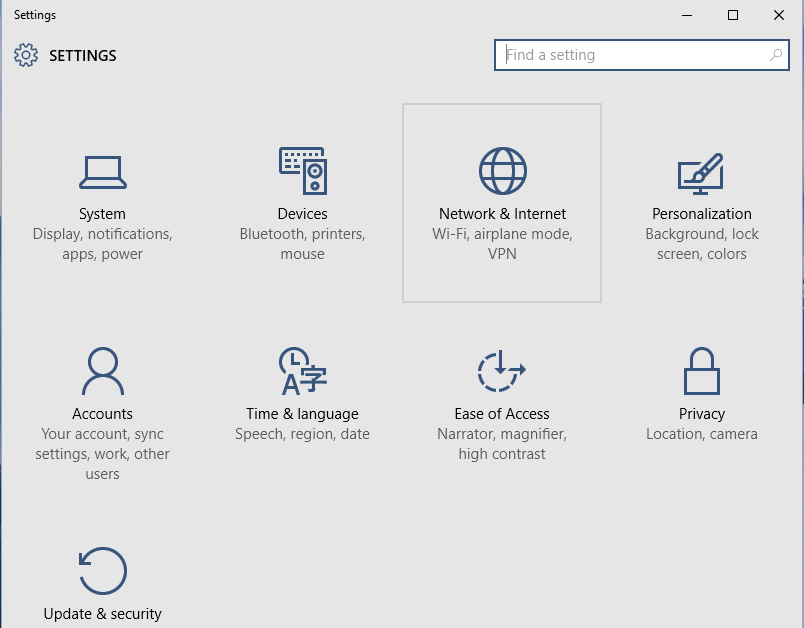
- Open the Settings app.
- Click the Network and Internet icon.
- Depending on the way you are connected to your network, you need to click the appropriate subcategory on the left. If you are using a wired connection, click on Ethernet. If you are using some wireless connection, click on Wi-Fi.
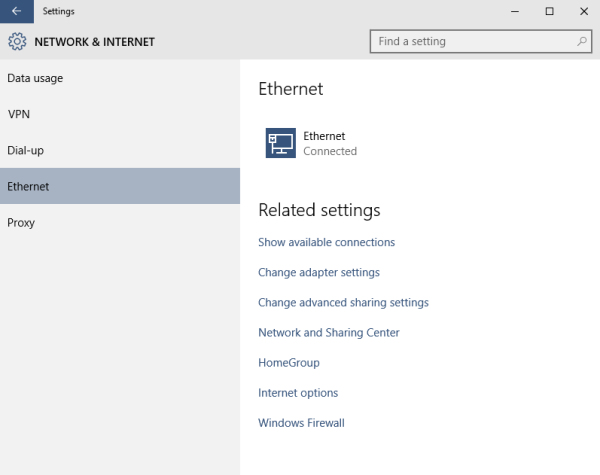
- Click on the connection name on the right. In my case, it is named just "Ethernet":
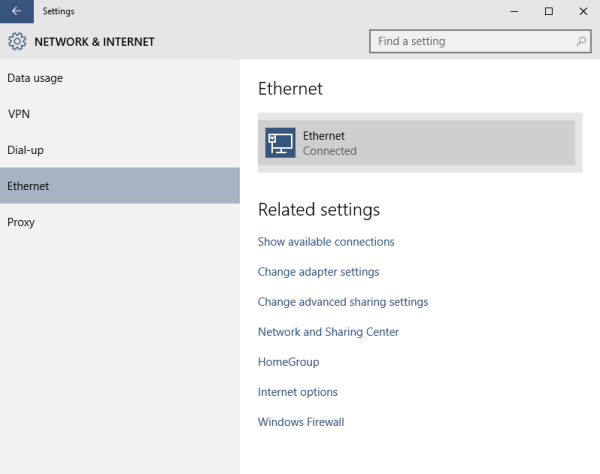
- On the next page, turn on the switch Find devices and content to make this connection Private. If you turn off this switch, this will make your network Public.
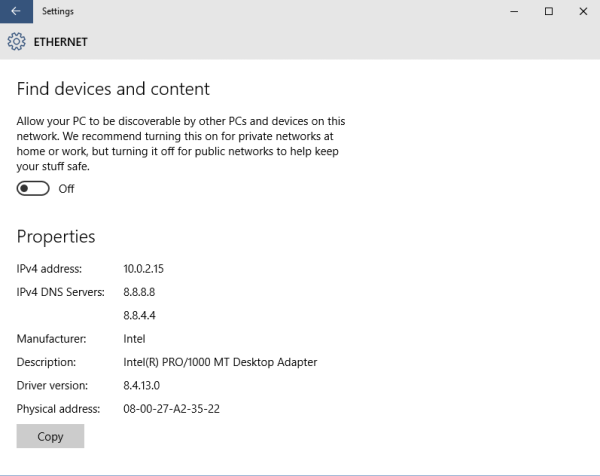


That's it. This is pretty easy, isn't it? This is all you need to know in the Settings app to change the network location type.
Method two. Change network access type by Registry editing
You can change the network profile in Windows 10 using a Registry tweak. After you follow the steps described below, you can easily switch your network location type from Public to Private and vice versa.
- Open Registry Editor.
- Go to the following Registry key:
HKEY_LOCAL_MACHINE\SOFTWARE\Microsoft\Windows NT\CurrentVersion\NetworkList\Profiles
Tip: See how to jump to the desired Registry key with one click.
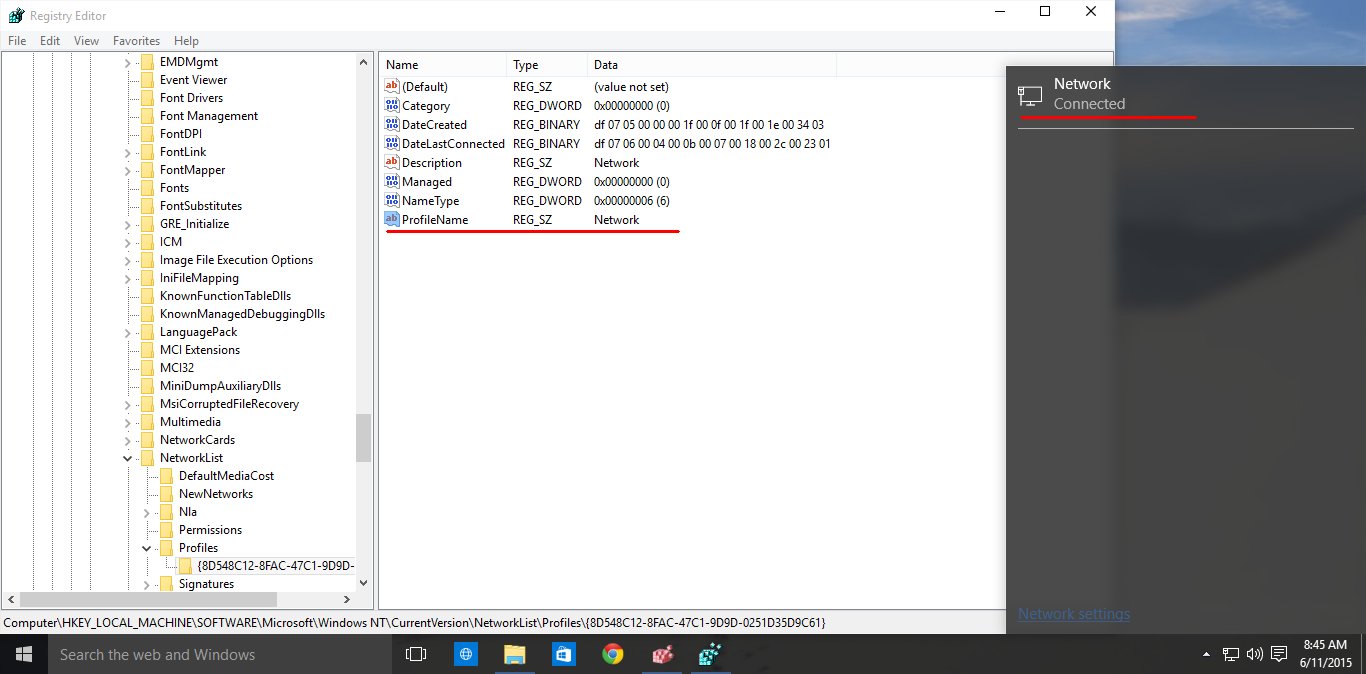
- You will see one or several GUIDs there, each of them represent a network you are connected to. See the following image to understand how it works:
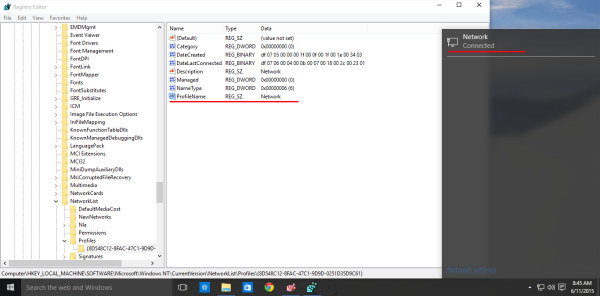
- Go to the GUID subkey which matches your current network connection.
- Create a new DWORD value there, named Category. You might already have such a value, so you will only need to modify it.
- Set the Category parameter to one of the following values:
0 - means your network is public.
1 - means your network is private. - Create a new DWORD value named CategoryType if it does not exist and set its value to 0:

- Restart your PC.
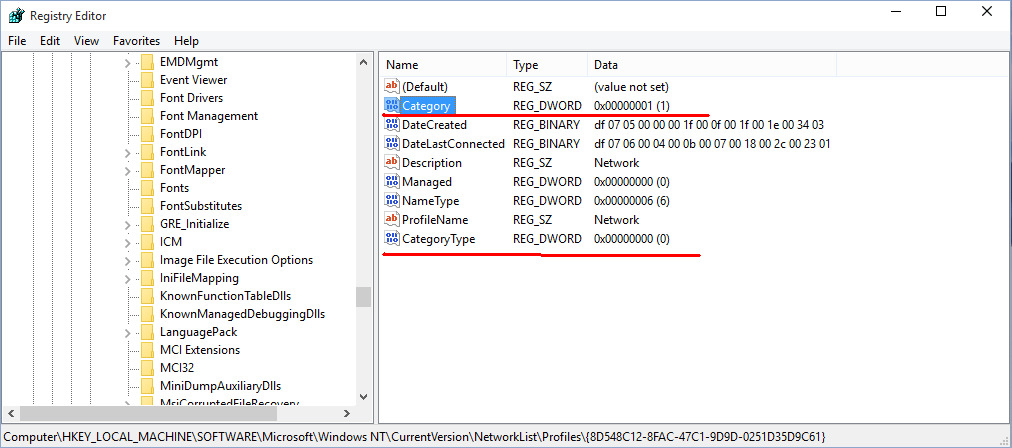
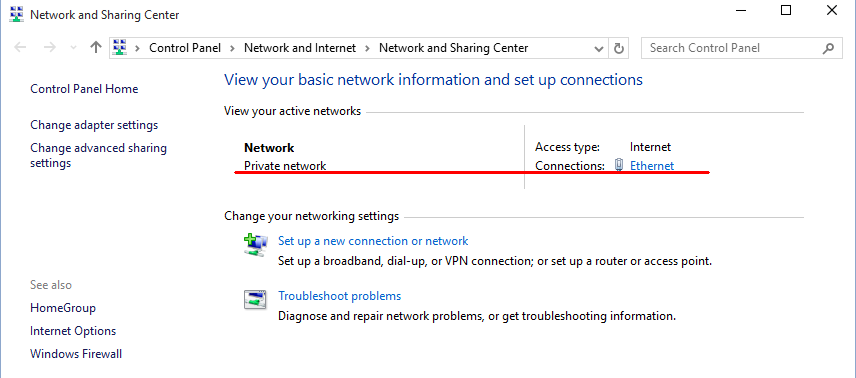
After the reboot, open the Network and Sharing Center and check out the state of your network. It should reflect the changes you made. For example, I set my Network to Private using the following values:
Category = 1
CategoryType = 0.
 Finally, you can use PowerShell to change the Network location type from Private to Public and vice versa. See Change network location type with PowerShell in Windows 10.
That's it. Feel free to post your thoughts, questions and suggestions in the comments.
Support us
Winaero greatly relies on your support. You can help the site keep bringing you interesting and useful content and software by using these options:
If you like this article, please share it using the buttons below. It won't take a lot from you, but it will help us grow. Thanks for your support!
Advertisеment

“This is pretty easy, isn’t it?”
Yeah, well now it is indeed because, once again, Sergey shared his own findings with us …
Thank you ! :-)
You are welcome
My network is shown as unidentified network. I just recently got a new internet provider and I am unable to connect with my laptop. All other devices are fine except for for the laptop. Is there a way to change the network to private, I know it’s possible in all other Windows, I just haven’t been able to figure out how to do it in Windows 10. If you can help me with this it would be greatly appreciated it.
I just found this and thought I’d offer a suggestion in case nothing else is working. As a default you may not be the admin for windows. To enable the Windows 10 administrator account do the following:
Tap on the Windows-key. This should open the start menu or bring you to the Start Screen interface depending on how Windows 10 is configured on the system.
Type cmd
Right-click no the Command Prompt result and select “run as administrator” from the context menu.
Type: net user administrator /active:yes
The administrator account is active now which means that you can sign in to the system using it. It is not password protected by default which means that anyone with access to the system can use it to sign in to it.
to protect it with a password
Type: net user administrator * and hit enter.
You get a password prompt. Type the desired password and again when you are asked to type it a second time for confirmation.
Hope it helps
You can also run Homegroup. If the network is set to Public, that control panel widget will automatically offer to reset it to Private as soon as it opens. You can cancel out after that if you don’t actually want to join the Homegroup. This happens to me regularly, both after Windows Update stuff is processed, and after my Dell Venue 11 Pro goes to sleep.
–Ed–
Thank you! Microsoft should not make this so difficult to find. Most other recommendations say to run the HomeGroup troubleshooter, Microsoft unintentionally hid this so well.
Thanks.
The registry editing did the trick for me.
HKEY_LOCAL_MACHINE\SOFTWARE\Microsoft\Windows NT\CurrentVersion\NetworkList\Profiles
However I had to delete all profiles in the profile list. Restarted the computer and then it connected up just fine by itself and I can now both use Edge and connect to Store in Windows 10.
my problem is different. I am windows 8.1 and could get wifi and Ethernet via my talk talk router which failed.
the replacement router gives me connection on Ethernet on PUBLIC but my wifi is showing as PRIVATE AND A FULL CONNECTION but I cannot open pages . I have tried on internet explorer, chrome and firefox but no result.
I can connect to the internet on wifi on my mobile phone but not my laptop. talk talk(aol) has tested the signal and blames windows 8.1. windows has performed a rollback with no result.
How do I change my settings so that so that both are public?
The registry entry is helpful. But, under the profiles entry there are lot of network connection GUIDs. In my case i need to know the network type (Category-Private or Public) for the current connected network. How can i do this… any idea?
I was having a lot of problems with a ‘virtual’ adapter (used by VirtualBox Host-Only).
On each reboot Windows 10 changes it to PUBLIC instead of maintaining it as PRIVATE.
I had discovered by trial and error testing method (after more than ten hours of testing) that there is a really easy solution (Make IPv4 be Static)… since asking ISP (it does not even exists) is not a solution, it is a PC with VirtualBOX and no Internet at all, no Router anywhere, etc.
What are NOT solutions: Asking for changing anything on a ROUTER (there is no router, it is only one physical PC), asking for changing ISG IP (external IP) when there is no router or you have a Static External IP (not dynamic), etc… and other methods.
What i refuse to try: Touching registry, polices, etc.
My easy (and somehow really stupid) solution that worked was configuring the adapter IPV4 as Static IP (among i am using IPV6, not IPv4), so here goes the steps:
1.- Inside the guest machine go to the adapter
2.- Change Dynamic IP to static IP
3.- Assign an IP that is OUT of the range of the DCHP (VirtualBox default 192.168.56.101 to 192.168.56.254) like 192.168.56.XXX where XXX can be from 2 to 100 (192.168.56.1 is reserved for HOST)
3.- Set the correct MASK (if click Windows 10 will fill it for you 255.255.255.0)
4.- Set the IP gateway as the host IP (deffault for VirtualBox was 192.168.56.1)
5.- Set the DNS just the same IP as the gateway (only first one, the second one let it blank)
As soon as aplied the changes Windows 10 asked if i want to let this computer be seen by other computers on the network… SAY YES, that configure it as PRIVATE instead of PUBLIC.
From now on, after reboots it stays as PRIVATE, not as PUBLIC.
No need to bother with registry tweaks, polices, etc… it is just Windows 10 see the virtual adapter has an Static IPv4.
Not sure (not tested) what would happen if:
a) Return it back to Dynamic (i think on next reboot Windows 10 will change it back to PUBLIC)
b) Do not set GateWay and/or DNS when on Static IP (i never liked to mix things, if IP is Static i allwyas put GateWay and DNS as static)
Hope this can solve other VirtualBox users.
P.D.: Do not forget to do all the rest (configure Private networks with Shared Files and Folders, PC discovery, etc)… doing all that but letting Dynamic IP was working until reboot, because Windows 10 on that reboot changes the adapter from PRIVATE to PUBLIC… setting IPV4 as STATIC makes the trick, Windows will no longer do that change from PRIVATE to PUBLIC on that adapter.
Side Note:
*-This is a Trick to Share a Widows 10 Guest folder, so the Host can see it, but only the host, not the rest of the network; for so, do not use the Bridged network, just add another network (Host-Only) and inside the Windows 10 guest configure such adaptor with a Static IPv4 (no matter if you are using IPV6, configure IPv4 on Static)
*-In other words: Shared folders are good to share a Host folder inside the Guest, but what if you want to share a Windows 10 guest folder with only the host? I was getting mad till i set IPv4 as Static, it was my last test inside the stupid tests list (i was using IPv6, so why IPv4 can have any influence!, BUT IT DOES)
All you have to do is set the DNS Suffix for the Connection.
In Network, open Properties of the connected Adapter. Open Properties of TCP/IPv4
Go to advanced, click the box, near to bottom, DNS Suffix for this Connection.
Use a name you like to, like a.local or kitchen.home, whatever you like in a correct DNS Suffix form =xxx.xxx
Just close all with OK, your done.